
Ever since seeing the name badges from the Open Hardware Summit 2013, I wanted one. I tend to make it to 2-4 transportation conferences a year, plus 3-5 hamfests, so having a cool looking badge is… well, just a want.
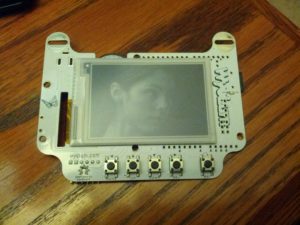
The front. Five buttons and an e-ink screen.
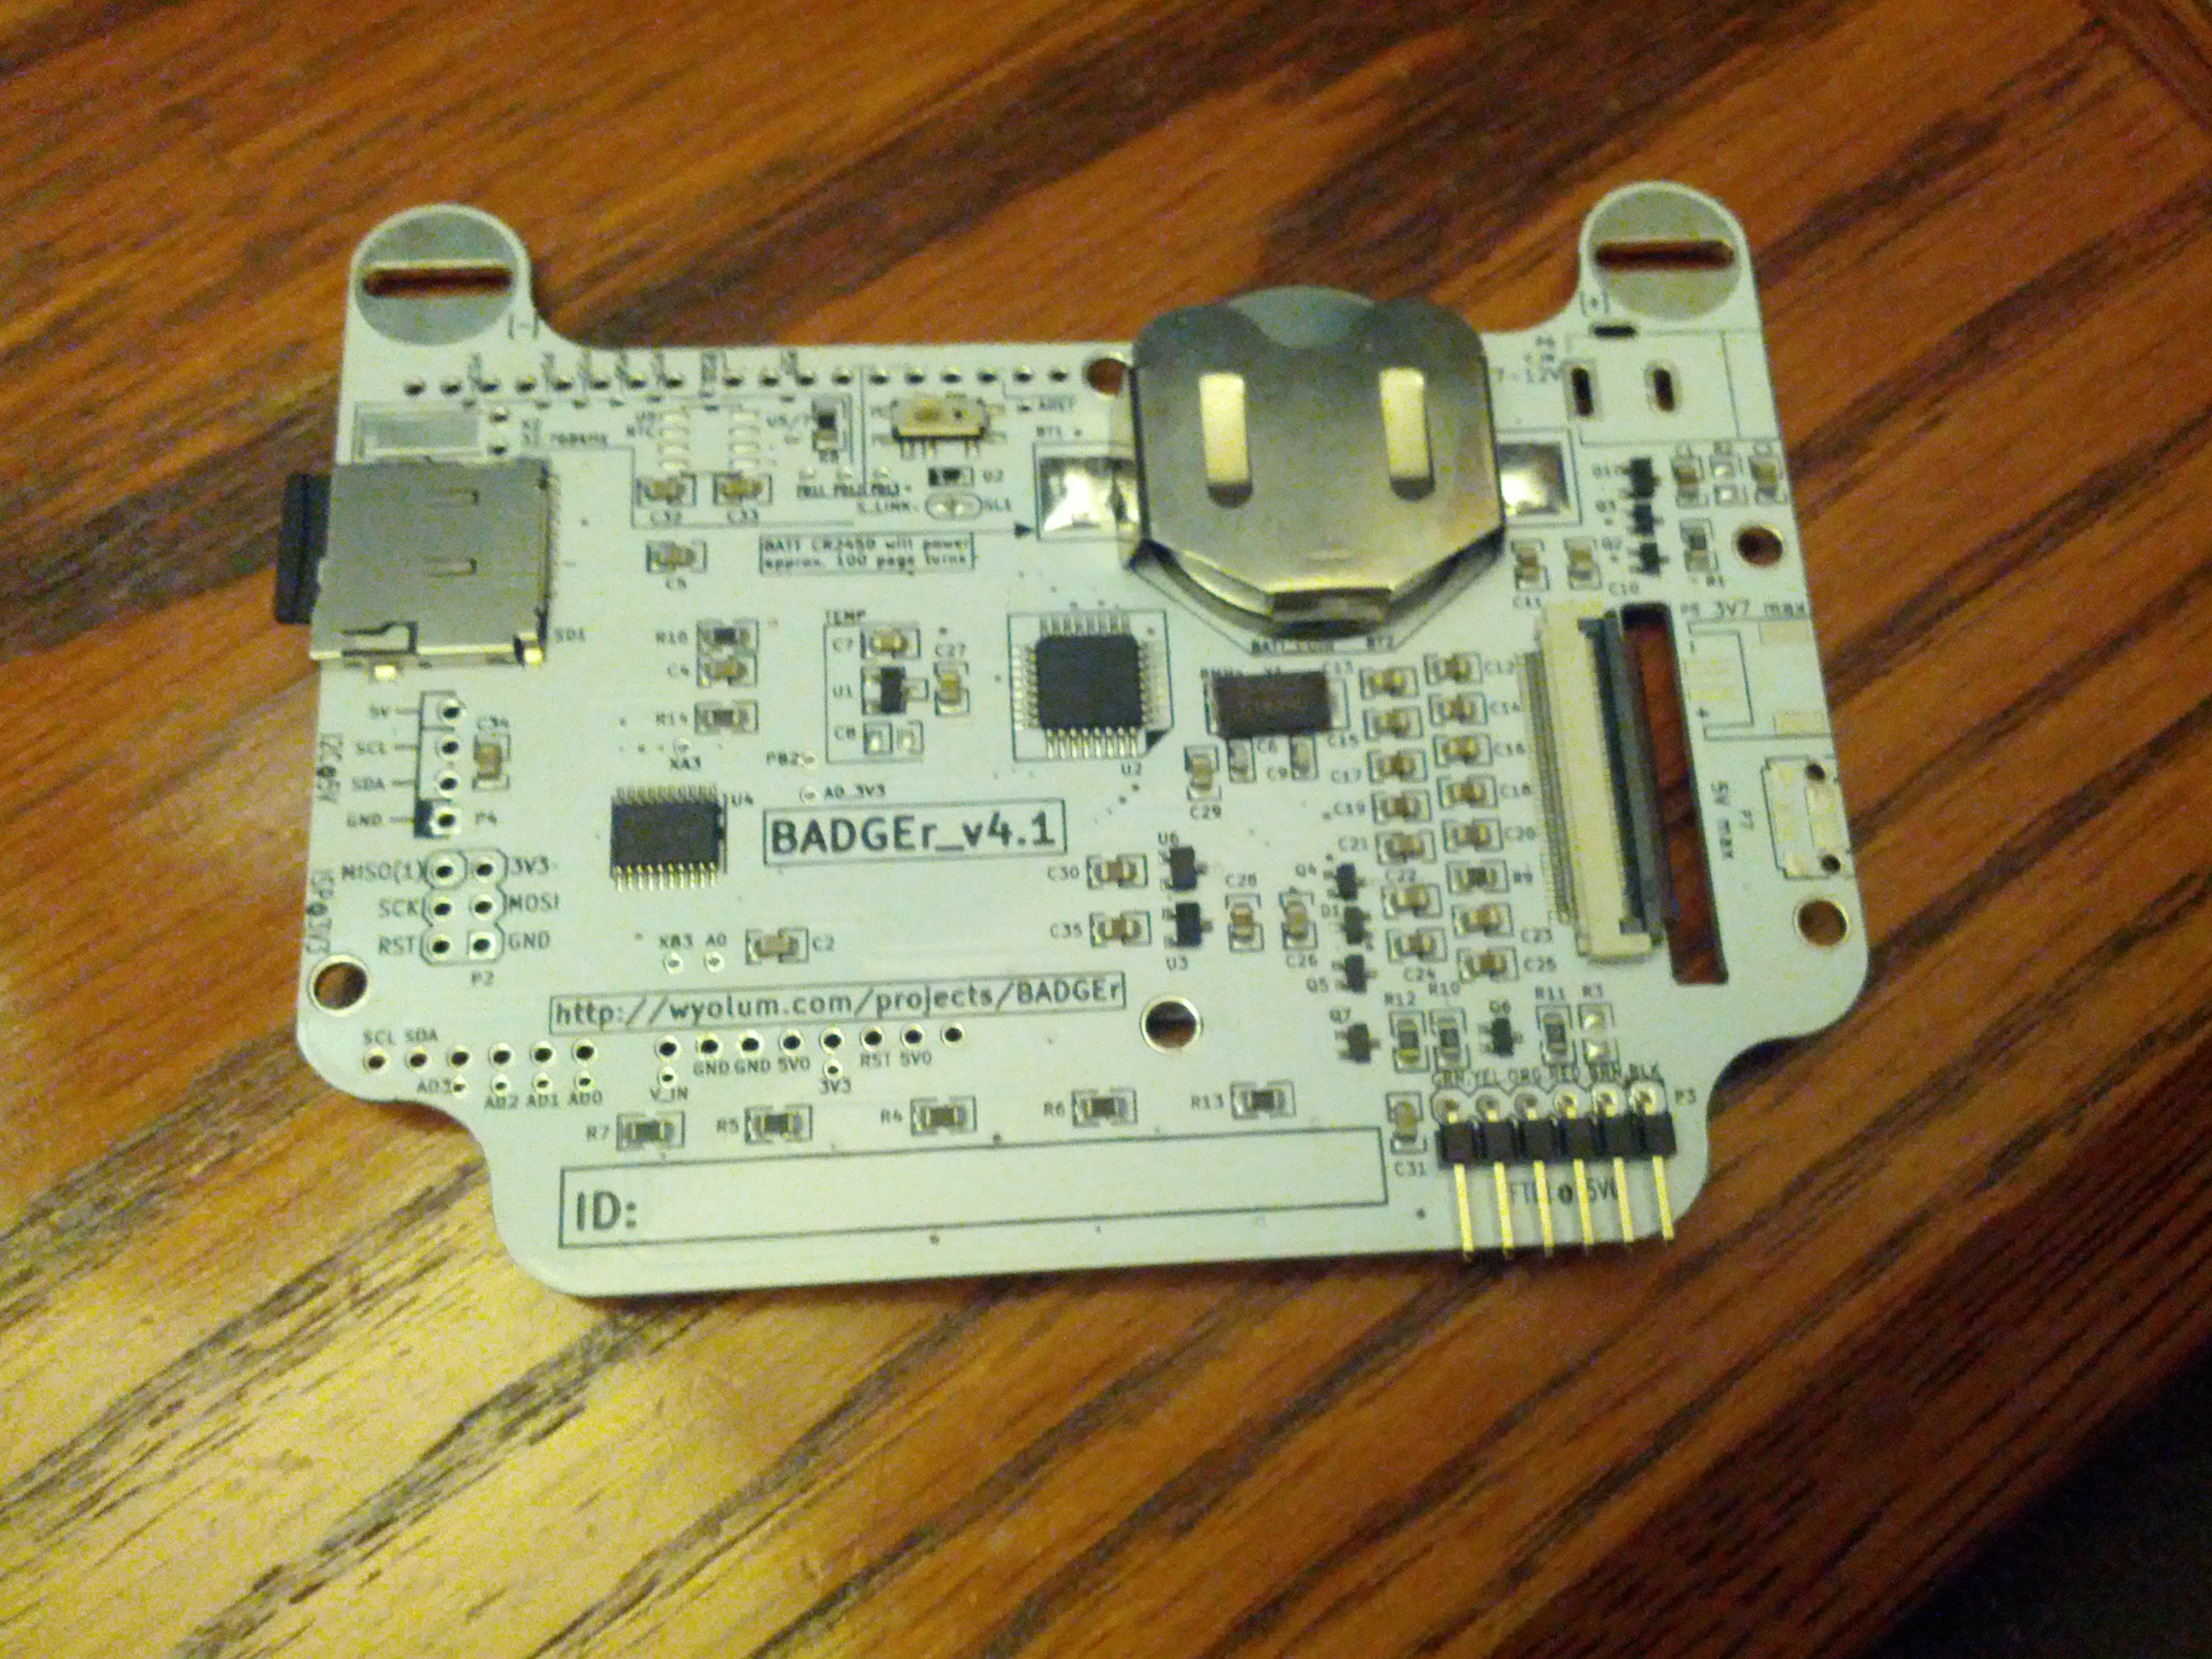
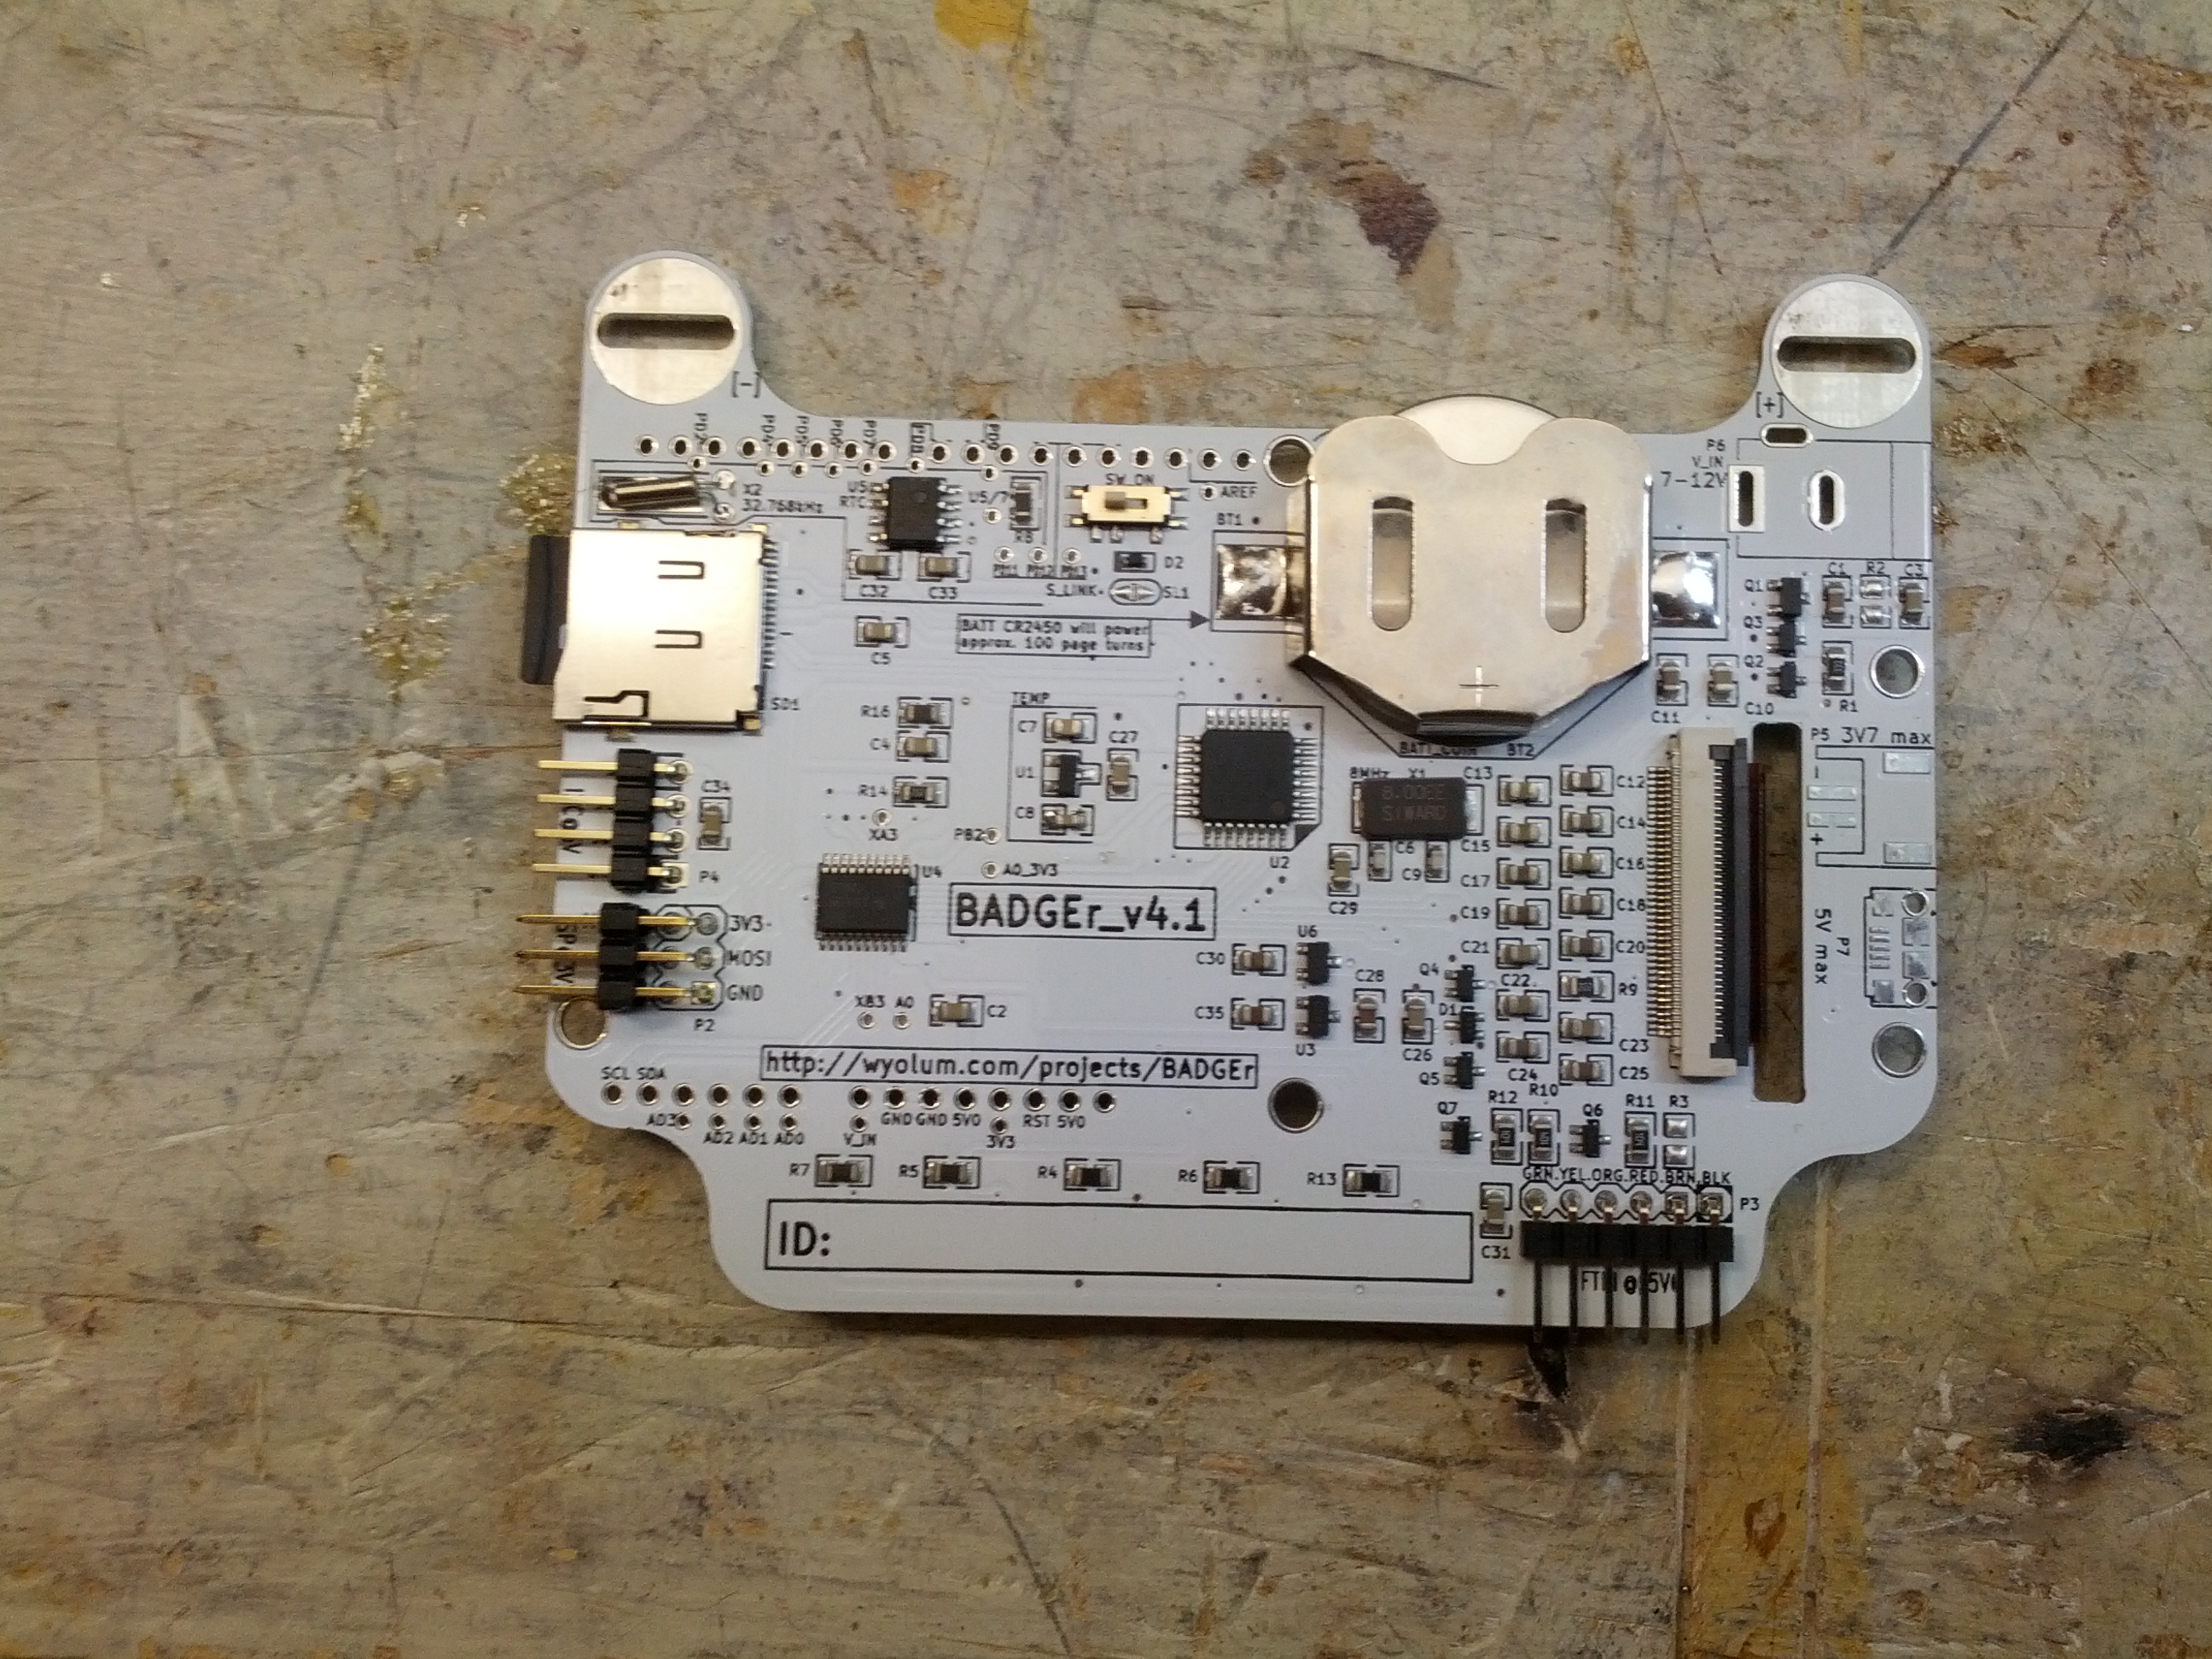
The back. Coin cell, on-off switch, microSD card, serial headers, and components.
First off, the e-ink screen idea is pretty awesome. It maintains an image with the power off, which is a great feature (especially since there are only around 100 page turns on that coin cell).
The powerplant of this is an Atmega 328p. The same Atmel processor used in the Uno, Pro, Nano, Fio, and some Lilypads.
Per the website, there are two unpopulated items – a realtime clock and a temperature sensor. However, looking at the schematic and the board, I see the unpopulated realtime clock area in the upper left area of the board, but in looking just to the left of the 328, there is a temperature sensor – the only unpopulated area is for a 0.1 uF capacitor!
I didn’t even program the thing before fixing those little omissions. I had to make a little change to the realtime clock I had is an NXP, and the doc calls for a TI chip. The only difference – pin #3 is a backup power input on the TI chip, and on the NXP chip it is an interrupt output. I clipped the pin prior to soldering. I also soldered the ICSP and I2C connections, since I think I may end up using those at some point.
The first thing I did with the BADGEr is get a copy of the firmware that is on it. After trying to use avrdude with an FTDI board, I did what I should have done the first time – used the Bus Pirate. Using the connection instructions on Dangerous Prototypes’ website, I used the following avrdude command:
avrdude -c buspirate -C”..\etc\avrdude.conf” -P COM9 -p m328p -U flash:r:”C:/badgr.bin”:r -b115200
** CASE SENSITIVE **
The -c option tells avrdude what programmer avrdude is using.
The -C option tells avrdude the configuration file. In my case, I’m running this from somewhere down in the Arduino IDE folder, and relatively speaking, backup one and then into the etc folder.
The -P option is the port number (in my case, COM9)
The -p option is the part number, in the case of the BADGEr, it is an ATMega 328p and per this page, that is the correct string to use.
-U is the operation. ‘flash’ is the part of memory to work with, r means to read, the next part is (obviously) the file path, and the final r is for ‘raw binary’.
-b115200 is the connection speed. My Bus Pirate is setup for 115200 bps, so I used this. It will not work if incorrect.
Once I ran this (well, twice because I forgot the final r option in the -U portion), I got a raw file with the code on the device.
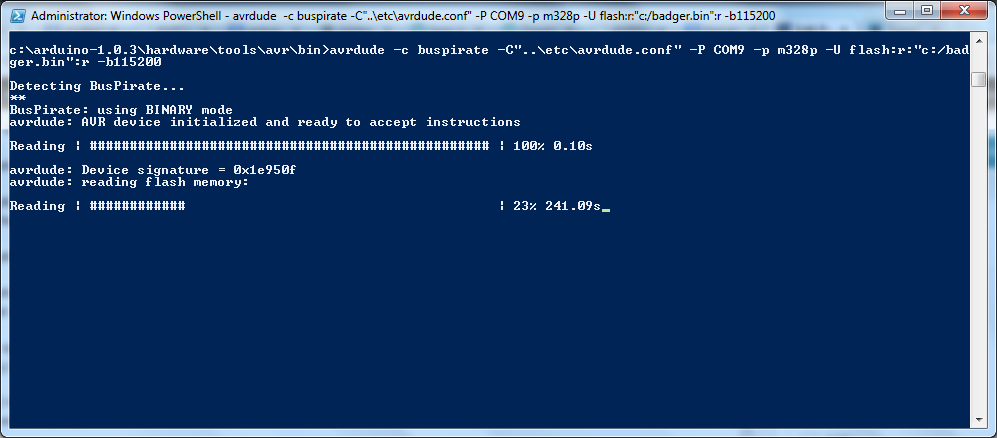
It takes a while…
It took 1,048 seconds, or about 17.5 minutes. For a 32 KB file. There’s some fixes for that HERE. Use them well.
Initial Programming Experience
After screwing around for several days trying to load the BADGEr from SPI, I fixed one of my FTDI boards and got it to work. My advice here: don’t even mess with trying to load sketches via the SPI interface. It won’t work (and I’m not sure that was ever intended).
Initial Program
Thoughts
The battery included died very quickly. I think my next improvement will be a better battery! This DOES need a good power source when programming. I initially used my Bus Pirate to power it while programming it from the FTDI cable.
-73-
Thanks for trying out BADGEr! Anool has included several power options including a LiPO header footprint.