
Blog Archives
-
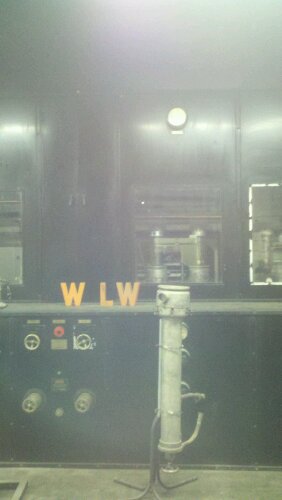
- 500,000 Watt Transmitter
-
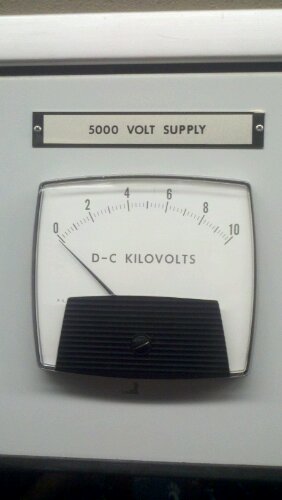
- 5000 Volt Supply
-
- Studio
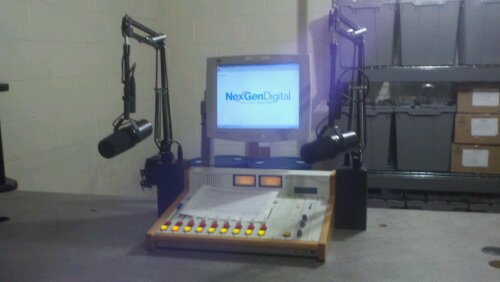
These are cell phone pics from a tour of the WLW Transmitter site in Mason, OH. More and better pics: http://www.flickr.com/photos/andrew_rohne/sets/72157627513548945/
It seems to me the way things are, the ways to run digital soundcard-based modes involves either a new rig and a new (enough) computer with a USB port. Or, you need an old computer with a serial port to trigger the push-to-talk (PTT).
My problem is that I have a MacBook Pro (no serial port) and an HTX-100 (no computer connectivity whatsoever and no VOX). While I can easily connect the mic and speaker to the computer, switching the PTT requires something to get a signal via USB (that something can read) and activate the PTT.
I did this via an Arduino Uno and a transistor and a rig.xml file. It was actually pretty simple, although I did have a little bit of trial-and-error with the rig.xml file.
In fldigi
The first thing to do is setup fldigi to communicate with the rig. This is done by putting the rig.xml file (Arduino.xml) in a good location, such as ~/.fldigi. The XML should look like below:
<!--
	Rig definition file for use with fldigi
-->

<RIGDEF>

<RIG>Arduino</RIG>

<PROGRAMMER>
	Andrew Rohne	AC8JO
	Tested by:		AC8JO
</PROGRAMMER>

<STATUS>
	Tested
	Version:	1.00
	Date:		1 Sept 2011
</STATUS>

<TITLE>RigCAT - Arduino</TITLE>

<!--
default settings for initial setup
-->

<TIMEOUT>0</TIMEOUT>
<RETRIES>2</RETRIES>
<WRITE_DELAY>0</WRITE_DELAY>
<BAUDRATE>19200</BAUDRATE>
<STOPBITS>1</STOPBITS>
<DTRPLUS>false</DTRPLUS>
<RTSPLUS>false</RTSPLUS>
<DTRPTT>false</DTRPTT>
<RTSPTT>false</RTSPTT>
<RTSCTS>false</RTSCTS>
<ECHO>false</ECHO>
<CMDPTT>true</CMDPTT>

<COMMAND>
	<SYMBOL>PTTON</SYMBOL>
	<SIZE>8</SIZE>
	<BYTES>FE</BYTES>
</COMMAND>

<COMMAND>
	<SYMBOL>PTTOFF</SYMBOL>
	<SIZE>8</SIZE>
	<BYTES>FD</BYTES>
</COMMAND>

</RIGDEF>
In fldigi, the setup in Configure – Rig control should be like below, but make sure the device is the correct address for the Arduino Uno. It will be the same address you use to upload the program to the Arduino.

Then, program the Arduino. The sketch is really simple as all it does is respond to the correct string from the serial input and turn on the LED and send some voltage to the transistor base. That allows current to go through the transistor and complete the circuit for the PTT switch. Basically, the transistor acts as a solid-state relay.
The Arduino sketch:
/*
Arduino PTT Rig Interface
Andrew Rohne, AC8JO
1Sep2011
*/

int LedPort=2;
int pttPort=3;

void setup(){
  Serial.begin(19200);
  pinMode(LedPort,OUTPUT);
  pinMode(pttPort,OUTPUT);
  digitalWrite(LedPort,HIGH);
  delay(100);
  digitalWrite(LedPort,LOW);
  delay(100);
  digitalWrite(LedPort,HIGH);
  delay(100);
  digitalWrite(LedPort,LOW);
  delay(500);
  digitalWrite(LedPort,HIGH);
  delay(100);
  digitalWrite(LedPort,LOW);
  delay(100);
  digitalWrite(LedPort,HIGH);
  delay(100);
  digitalWrite(LedPort,LOW);
  delay(500);
}

void loop(){
  String tmp=Serial.read();
  if(tmp=="254"){
    digitalWrite(LedPort,HIGH);
    digitalWrite(pttPort,HIGH);
  }else if(tmp=="253"){
    digitalWrite(LedPort,LOW);
    digitalWrite(pttPort,LOW);
  }
}
As you can see from the sketch, most of the lines are to blink the LED (and this could be done with much fewer lines with two for loops).
The connection diagram is below. Obviously, I had to make a custom cable to go from the 8-pin round connector on my rig to the computer’s mic and phone jacks and the Arduino breadboard (well, breadboard for now).

The above works for me. I will be using it a lot and improving on it, but of you have any improvements, feel free to drop them in the comments.
UPDATE
The new version of Arduino (1.0) doesn’t wants line 33 of the sketch to be the following:
String tmp=(char*)Serial.read();
-73-
Rainmeter is an open source Windows program used for monitoring anything. By ‘anything’, they mean it.
I’ve built a few meters that are probably of interest to other ham radio operators. So far, I’ve created meters for the Solar Number, Solar Flux Index, A Index, K Index, and to show the X-Ray Solar Image. All of these update from the NOAA Space Weather website.
I would love to hear any comments or suggestions in the comments section below or via email (andrew at siliconcreek.net).
Version 0.9.2 (31 July 2011)
Made some changes to the look of the meters – added borders, changed the text to black. Also added a ‘hot link’ to the solar X-Ray image to send you directly to the large image on the NOAA website.
I added the maximum fluctuations to the K-Index meter. It seems a lot of sites show this, and while it seems that it really isn’t an absolute necessity, N0NBH’s Solar Weather Image shows that, as does the NOAA Space Weather WWV Report, so I went ahead and added it.
Also added two new configs for DX Spots. After little investigation, I decided to set things up to go to the Ham Call DX Spotter. This is because it is the only one I’ve seen that has totals by band. I split the spots for HF and VHF/UHF because I anticipate that most people will be interested in one or the other. This is setup with an update rate of every 5 minutes (it is in the .ini file with the code). If you want to change it, make it higher. I didn’t talk with anyone at HamCall.net prior to doing this, and we certainly do not want to irritate them by overdoing things.

Version 0.9.1 (29 July 2011)
Added K index and solar image. See the image below (shot on my Windows 7 computer).

Version 0.9.0 (26 July 2011 – First Release)

The screenshot above shows the A-Index, Solar Flux Index, and Solar Number. So far, that’s all the meters I’ve done so far. These are updated periodically from the NOAA Space Weather Prediction Center website.
I’m making this available to anyone interested. I will be update this periodically with additional meters (K index and maybe something related to DX Spots). If you have any ideas, feel free to leave them in the comments)
To install, start by installing Rainmeter from the website. Then, unzip the contents of this in Documents\Rainmeter (so the files in the zipfile are under AC8JO and there are folders for the A Index, SFI, and SN). Right-click on one of the Rainmeter skins and go to refresh. Then, you should be able to right-click on a skin and add any or all of the solar measure skins.
I remember when I passed my novice test. It took 6 weeks to get my ticket.
I took and passed Extra last night. I just checked the FCC ULS. I am now AC8JO. Less than 24 hours later. That’s pretty darn impressive.
So with that thought in mind, I’m moving my website a little – from kc8unn.siliconcreek.net to ac8jo.siliconcreek.net. Both links will work, though.

I chronicled my adventure of installing my mobile rig in my pickup truck in a previous post, and the one thing I didn’t talk about in that post was where I located the microphone clip. This was for good reason – I didn’t want to drill into any of the dashboard panels in the truck to mount the clip that was sent with the radio. I could have tried to mount it to the radio or radio mount, but it would have been difficult and dangerous to reach while driving.
So, for the while my microphone holder was my cupholder. It works, but it isn’t great. Even worse, my addiction to Starbucks has resulted in my mic getting sticky (probably from one of those venti non-fat no-whip mochas).
Inspiration comes in many forms, and this one came from a diy smartphone cardock on LifeHacker.
I basically bent one of the “handles” to a large binder clip down and wider to accomodate the mic holder disk. Then, I clipped it to the vent on my truck. See the pics below.


And no, I don’t mind that it blocks a few buttons on the radio. There aren’t enough good FM stations in Cincinnati that I need more than 4 presets (fewer on AM), and the little knob is for sound controls the bass, treble, balance, fader, and Radio Data System (RDS). RDS is a really cool idea that doesn’t seem to work for what that knob actually does (select things like news or traffic that it would scan for).
I use Twitter to do a lot of listening and a little bit of talking… well, tweeting.
Every so often, I get followers via Twitter. Sometimes they are interesting people (look at the people I follow – they’re interesting people). Sometimes they’re not so much. I generally try to follow back on my ham radio account (KC8UNN – I have two others that I don’t necessarily follow-back on).
I generally employ the following guidelines:
- If it is my @KC8UNN account, it has to be ham radio related. I’m lenient on this a little if it is a local or prominent ham.
- No spam. Ever. I’ve had people follow me that appear to be specifically to bash someone else. I won’t follow crap like that.
- The timeline has to be reasonable. I don’t care what you tweet, but if I follow you, your tweets are in MY timeline. I don’t want to see very much about politics, and I don’t want to see a gazillion tweets coming in unless they are very interesting (and at 140 characters, it is hard to be interesting enough to justify more than 10 tweets a day). Less is more!
So, in short, if you want me to follow you on Twitter, follow me and don’t make me think I’ll regret following you.
I’ve had a few “duuuh!” moments recently:
- I tried to test SWR with the mic on SSB without whistling or saying “heelllllllooooo” (I realized I shoulda known better and got a 3.5mm plug to use as a redneck key)
- I saw something on the Internet about using a butane torch to solder PL-259 plugs. One of those plugs just popped off the wire it was supposed to be soldered to. Another had the center insulator shorted to ground. Each time I’ve done this, I’ve burned insulation and other stuff.
- I got my work computer banned from http://www.hamqsl.com/solar.html trying to make a Rainmeter skin for it. Fortunately, I did this on Friday and the ban was lifted by Monday.
I’ve had a few smarter moments, too:
- Since I bought a pair of the HTX-100s, I joined the Yahoo Group and just started watching messages. A recent message by another group member indicated that the display would be back if you let a certain capacitor charge. The supposedly-broken rig is now working again.
- I joined the Milford Amateur Radio Club.
- I started playing with MPM Morse Factory on my Android phone to practice sending in CW. Unfortunately, it appears that it has disappeared off the Play Store.
- I wanted to see Ham Nation on a big screen, so I used my Blu-Ray player to pull it up on YouTube.
- I dropped by a truck stop on my way home from a meeting in Frankfort, KY to grab lunch. While I was there, I browsed through the CB aisle and picked up some RG-8. Probably not the greatest stuff, but it’ll work in the pinch I’m in.
I had a problem in the truck recently. The air conditioning went out. Right as the sultry steamy 90º Cincinnati summer started.
As I started looking into things, the lone (obvious) symptom was that the fuse had blown. The air conditioner would run if I replaced the fuse, but would go out quickly.
It didn’t help when I let my XYL drive my truck one evening, and she didn’t use the ham radio and had A/C the entire trip (roughly 20 miles). This was after I read something about a wire being stuck under the intake on a forum. However, it went out on me the next day.
So I took apart the truck. It didn’t take long to realize that the intake was smashing the air conditioner compressor clutch wire (in the first pic – with the blue plug going to that thing with a belt on it). The second pic shows what that smashing really did – it wore the wire insulation down to the point where it could complete a circuit to ground via the air conditioning line (thus causing the fuse to blow).

A/C Compressor Clutch Wire with Intake Removed

Wire Break - Leak to Ground
So now the truck is fixed and I can operate! 73.
Rather than drone on about crap (literally), or new products, I figured I’d talk about what I did at the Hamvention.
My impression was just being shocked by the number of people in such a large space. The last hamfest I was at was in 2002, and there were fewer people there than at the Icom booth at Hamvention. That may be a bit of an exaggeration, but the point is made.

I originally wanted to hit four forums. I actually hit two: propagation and techniques of the best operators. They were interesting. I got there too late for 10 reasons to QRP (I already had the most important reason, and that was because I can’t afford something better!). I decided not to stay in the room for kitbuilding.
Most of my day was spent looking around the flea market. I really wanted to bring home an HF rig. After an hour or two of looking, I saw a lot of prices outside my price range, and then saw a table with a stack of two Radio Shack 10m rigs. $45 for both, one works one for parts. I couldn’t resist.

Not the ones I bought, but the same model
With the two rigs stuffed in my backpack, I called my wife and asked her to do some research for me. I need a power supply, since I have no intention of operating HF mobile (and I don’t think my truck can power an additional rig). She looked up the power specs and I set out in search of lunch and a power supply.

…well, power supply now, lunch later. Those are some long lunch lines.
So, I made my way around the rest of the flea market, finding a power supply for $30. Into the backpack. Those things are HEAVY.
By this time, I did stop for lunch and got into a conversation with a ham from Syracuse (I think) and originally from Minnesota. He told me about his antenna – a dipole attached to his deck eaves, something I will likely imitate once I build a deck.
Upon more looking around (and some of this, I don’t know when I saw it), I did see a cool quad antenna made with PVC (another design I will likely imitate, since I need a decent antenna for 10m now).

I also walked off with a hamstick for 10m and a handful of connectors and antenna insulators.
When I got home, I began testing things, and even though I was in less than perfect testing conditions (if you saw the wire I was using for power, you’d understand that less than perfect part). One of the rigs worked fine. The other turns on but has no display. I haven’t diagnosed it, but when I get around to it, I plan on checking it against the known mods for the HTX-100, since the speaker lines were desoldered (not cut or ripped).
So now I have the Milford Hamfest to look forward to next month.
I was unable to catch Ham Nation live last night (sorry, I was watching the Reds). An in-depth look on iTunes and even TWiT’s website revealed no subscribe link (but they DO have the audio posted). So, with a little digging, I found the address: http://leoville.tv/podcasts/hn.xml.
To subscribe in iTunes:
1. Open iTunes

2. Go to Advanced and then to Subscribe to Podcast…
3. In the Address window, paste the link (above)

4. Enjoy!

Update: want video?
Large size: http://feeds.twit.tv/hn_video_large
Small size: http://feeds.twit.tv/hn_video_small