
Blog Archives
This is Part 2 of God-Only-Knows How Many. Part 1 is here.
A little progress. My weekend was busy with website design for another site I run, the CQWW contest (I spent only around 45 minutes, only 20 QSOs between interruptions of keeping an eye on my kids and some minor radio difficulties), yard work, and taking a cat to a emergency care center (she’ll be fine, but my finances will not be).
Arduino Code: Minor Fixable Frustrations
The Arduino code is in the repository. I’m not going to copy it here, since it is still not working correctly. Over the past week, I’ve tried three different libraries and I think I’ve settled on using adk.h from http://www.circuitsathome.com/ (you can get it from here). What I DO have is an Arduino that once plugged into my Nexus 7, it will tell the Nexus to open the correct app. That’s pretty darn cool. What I do not have (yet) is the intelligence built into the program to initialize the USB and send data. Possibly related to this, it seems like the Arduino only wants to send data when it has a serial connection open (from the Serial Monitor in the Arduino Dev Kit). I have more work to do.
Android Code: Logging, Logging, and More Logging
I have been writing and rewriting the code trying to get something pop into aLogcat or on the app screen with little luck. I have many lines with Log.d and Log.v to see what is going on. The best I’ve had is a “Data recieved” message*. I have more to do here. And as I indicated above, I ONLY see that message if I open the Serial Monitor.
* = The misspelling was intentional. I can’t seem to spell ‘receive’ correctly to save my life, and there is no spell check in Eclipse.
Stay tuned for next week’s episode.
-73-
The following is a QST…
Third Annual WATwitter QSO Party Is Announced
Three years ago NR4CB invaded her dad’s shack and started the idea of “Worked All Twitter” while trying to work as many of her twitter friends as she can. This has become an annual event held around the US Thanksgiving holiday. The event runs from Wednesday, November 27 through Sunday December 1st. See more details on The Bionic Nerd blog post.
ARRL Upgrades to Logbook of the World Worked
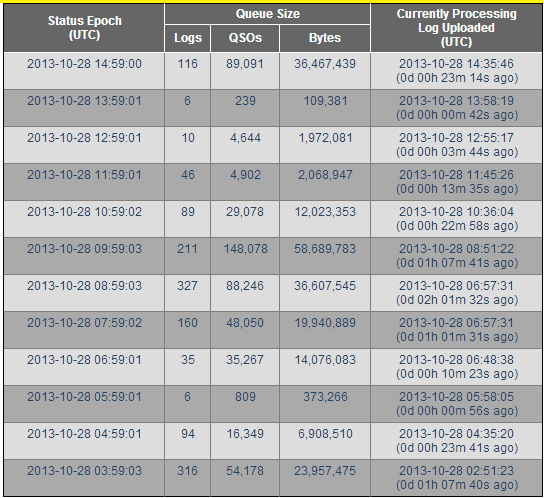
Last year at this time, many hams referred to Logbook of the World (LOTW) as “Logjam of the World” because LOTW got so far behind due to the deluge of logs from several contests in a row, starting with the CQWW contest. After a few weeks of building queues that were continually growing, the league took the servers offline and ultimately did a lot of work on the server systems.
This year, band conditions were excellent for both days of CQWW. In the hours after CQWW, the worst delay I saw was 1 hour 13 minutes, and as shown below, the queues are not building to the point where they are not releasing within a reasonable time, as evidenced by the fact that there was a 42 second delay at 13:59 UTC and the worse queue listed was five hours earlier). Kudos to the league for fixing the problem. In addition, the league also decided back then to be open about how long the queue actually is.
I will be Running Flying Pig Half Marathon
For anyone that’s kept up with my almost-daily Endomondo spam to Twitter, you may have noticed the distances are ever-increasing and the speeds are increasing as well. I had started “shopping” for a half marathon to run. After telling one of my coworkers that she should run the Flying Pig 10k, she decided she wanted to run the half. Another coworker (and marathon veteran) said she’d run the half. We have another coworker committed to either the half or the full (he just ran Columbus two weeks ago – his first – in a damn good time). We’re working on a fifth person as well. Additionally, I’ve been talking with another local ham that may run it depending on his training/school calendar.
My goal time is below 2:18:00. That’s just under an average of 10.5 minutes per mile. I’ve been running two major parts of the actual course, so by the time this rolls around, I’ll be ready. Of course I know at least half the ham radio volunteers on the course, some of them may cheer me on, at least one will tell me I’m a slowpoke.
-73-
This is Part 1 of God-Only-Knows How Many.
I finally got around to working on the easy button – I found a decent (not great, just decent) tutorial on the web that discusses sending the status of a button attached to an Arduino to an Android device. I’ve been making changes and learning about bitmasks and bit shifting (something they never teach traffic engineers!).
The initial (key word!) Arduino and Android code is written and up on Github. Right now, I am writing a test routine that will eventually morph into a functional program. I’ve really only spent time on the Arduino
I took the code from the tutorial link above and made quite a few changes.
Before being able to compile the code, you need the microbridge Arduino headers. Then, you have to fix some of the source files – in usb.cpp, max3421.h, and Adb.h, there is an #include “wiring.h” which needs to be changed to “wiring_private.h”. Once you’ve installed the library (copy the files to the Arduino libraries folder in it’s own folder), the following should (key word!) compile and send a binary output string to the serial monitor based on the buttons that are pressed.
The binary strings on the screen represent the buttons that are pressed in the arrangement of 1abc1 where a is 1 if button 1 (pin 4) is pressed, and 0 if it is not, b is button 2 (pin 5), and c is button 3 (pin 6). So…
10001 = no buttons pressed
11001 = button 1 pressed (pin 4 high)
10101 = button 2 pressed (pin 5 high)
10011 = button 3 pressed (pin 6 high)
11101 = buttons 1 & 2 pressed
11011 = buttons 1 & 3 pressed
10111 = buttons 2 & 3 pressed
11111 = buttons 1, 2, & 3 pressed
IN THEORY, this will all be sent to the Android device and the Android will display what buttons are pressed on the screen. I have that designed, but I haven’t tested it and my Android code won’t compile yet. With luck, that’ll be next week’s blog post.
REVISION: Note the fact that the preceding paragraph says “IN THEORY” in all caps. That means that it really doesn’t work at all so don’t use my code… yet. 🙂
On the todo list for this is using interrupts to listen for the button as opposed to listening for a change every 100 milliseconds.
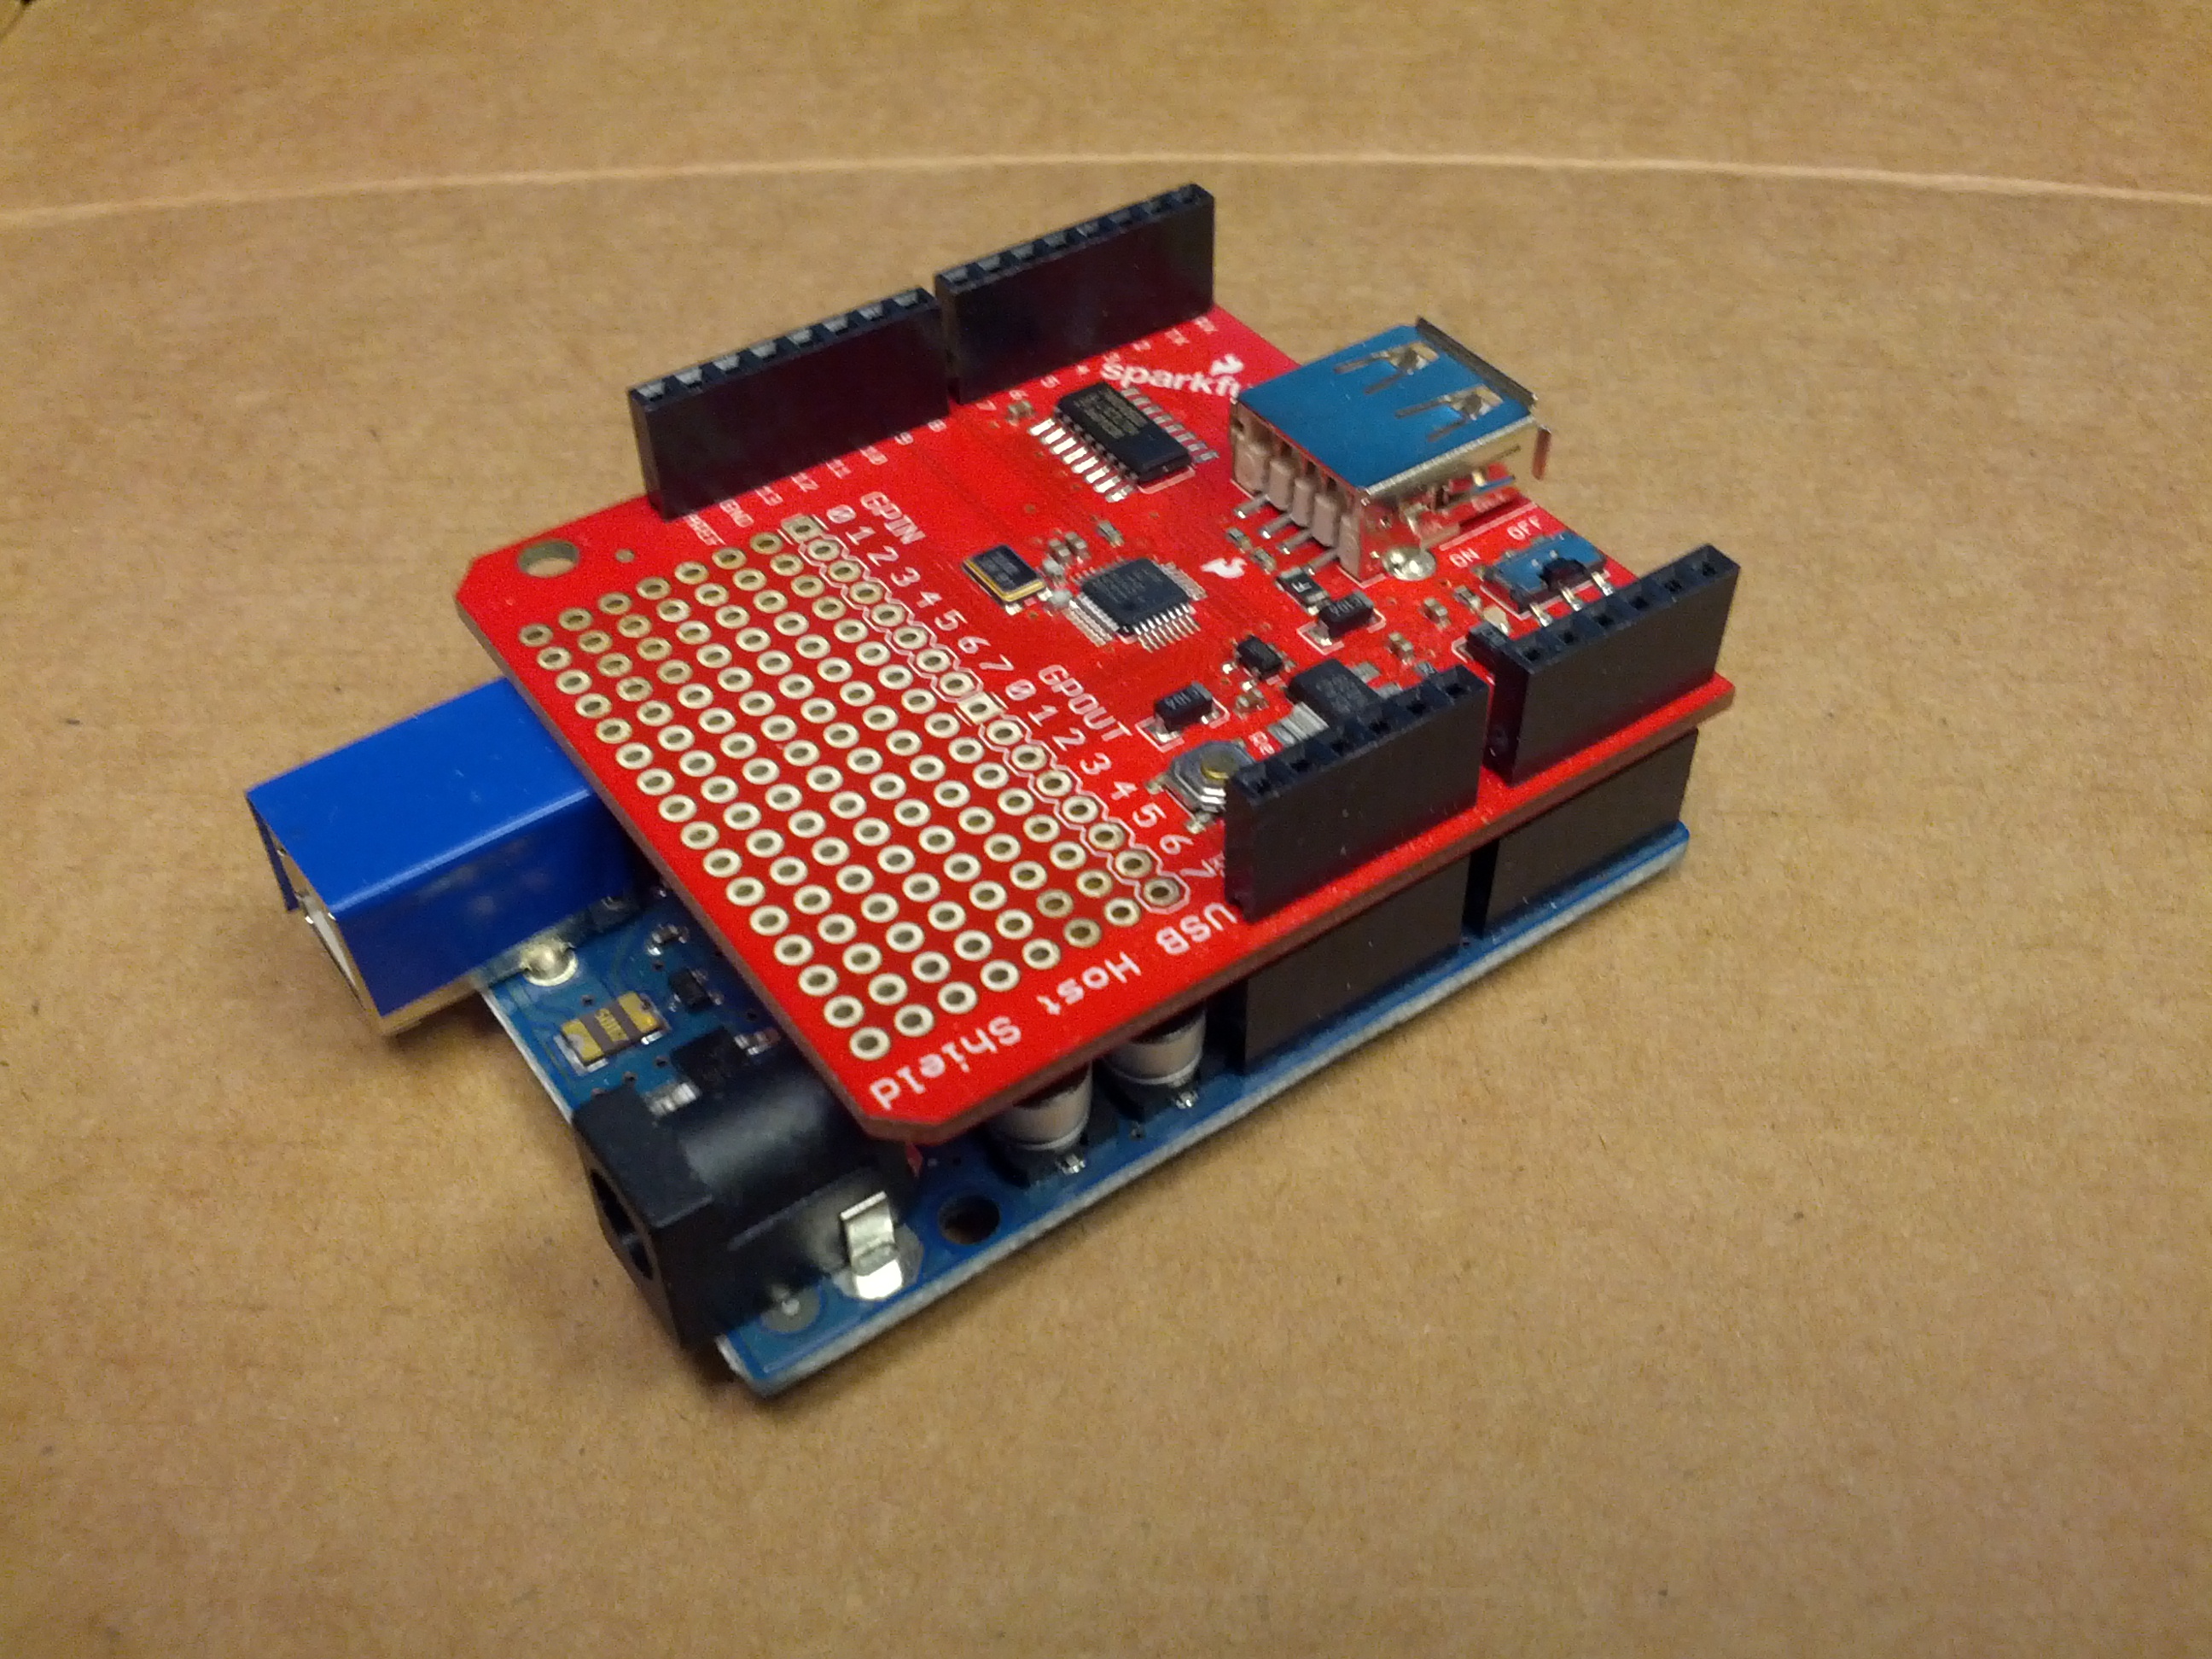
This is – so far – the development device. An Arduino Uno and a USB Host Shield from Sparkfun.
-73-

-
- The nicest looking cannon ever.
-

- Robot that throws frisbees.
-
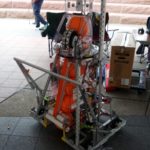
- Robot that throws small basketballs.
-

- Robots that move and lift.

-

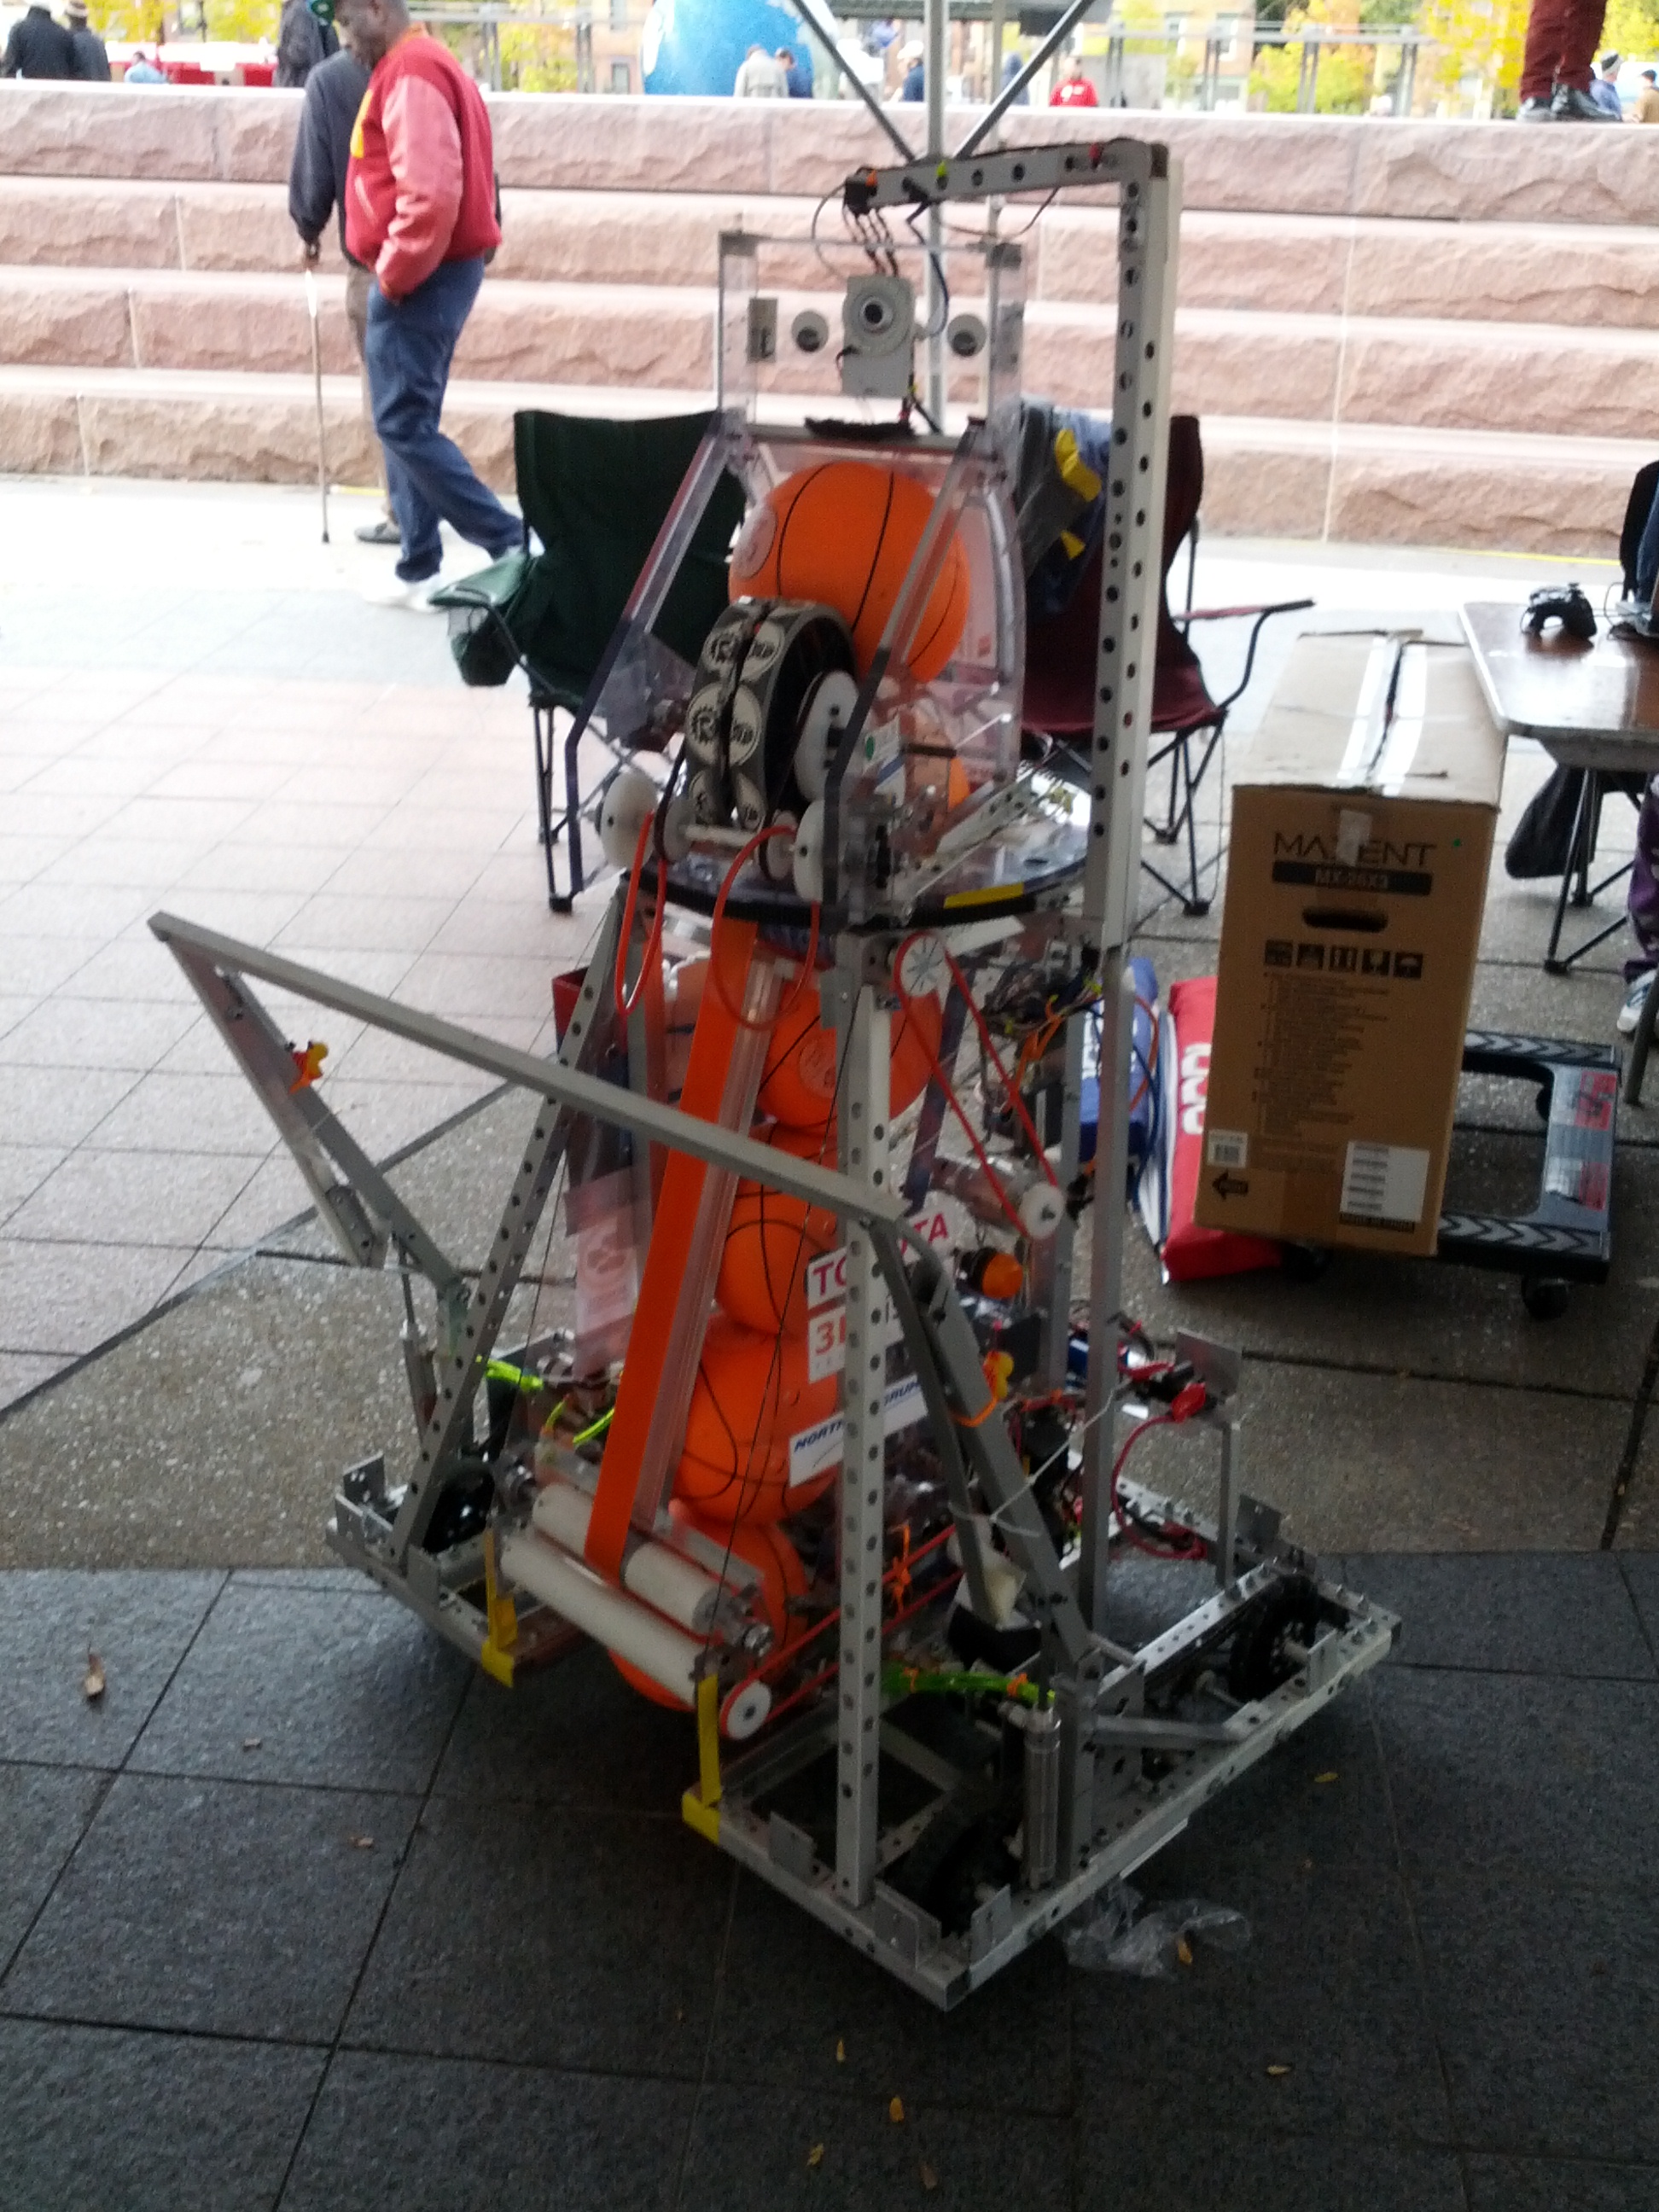
- Ummm… Hi.
-

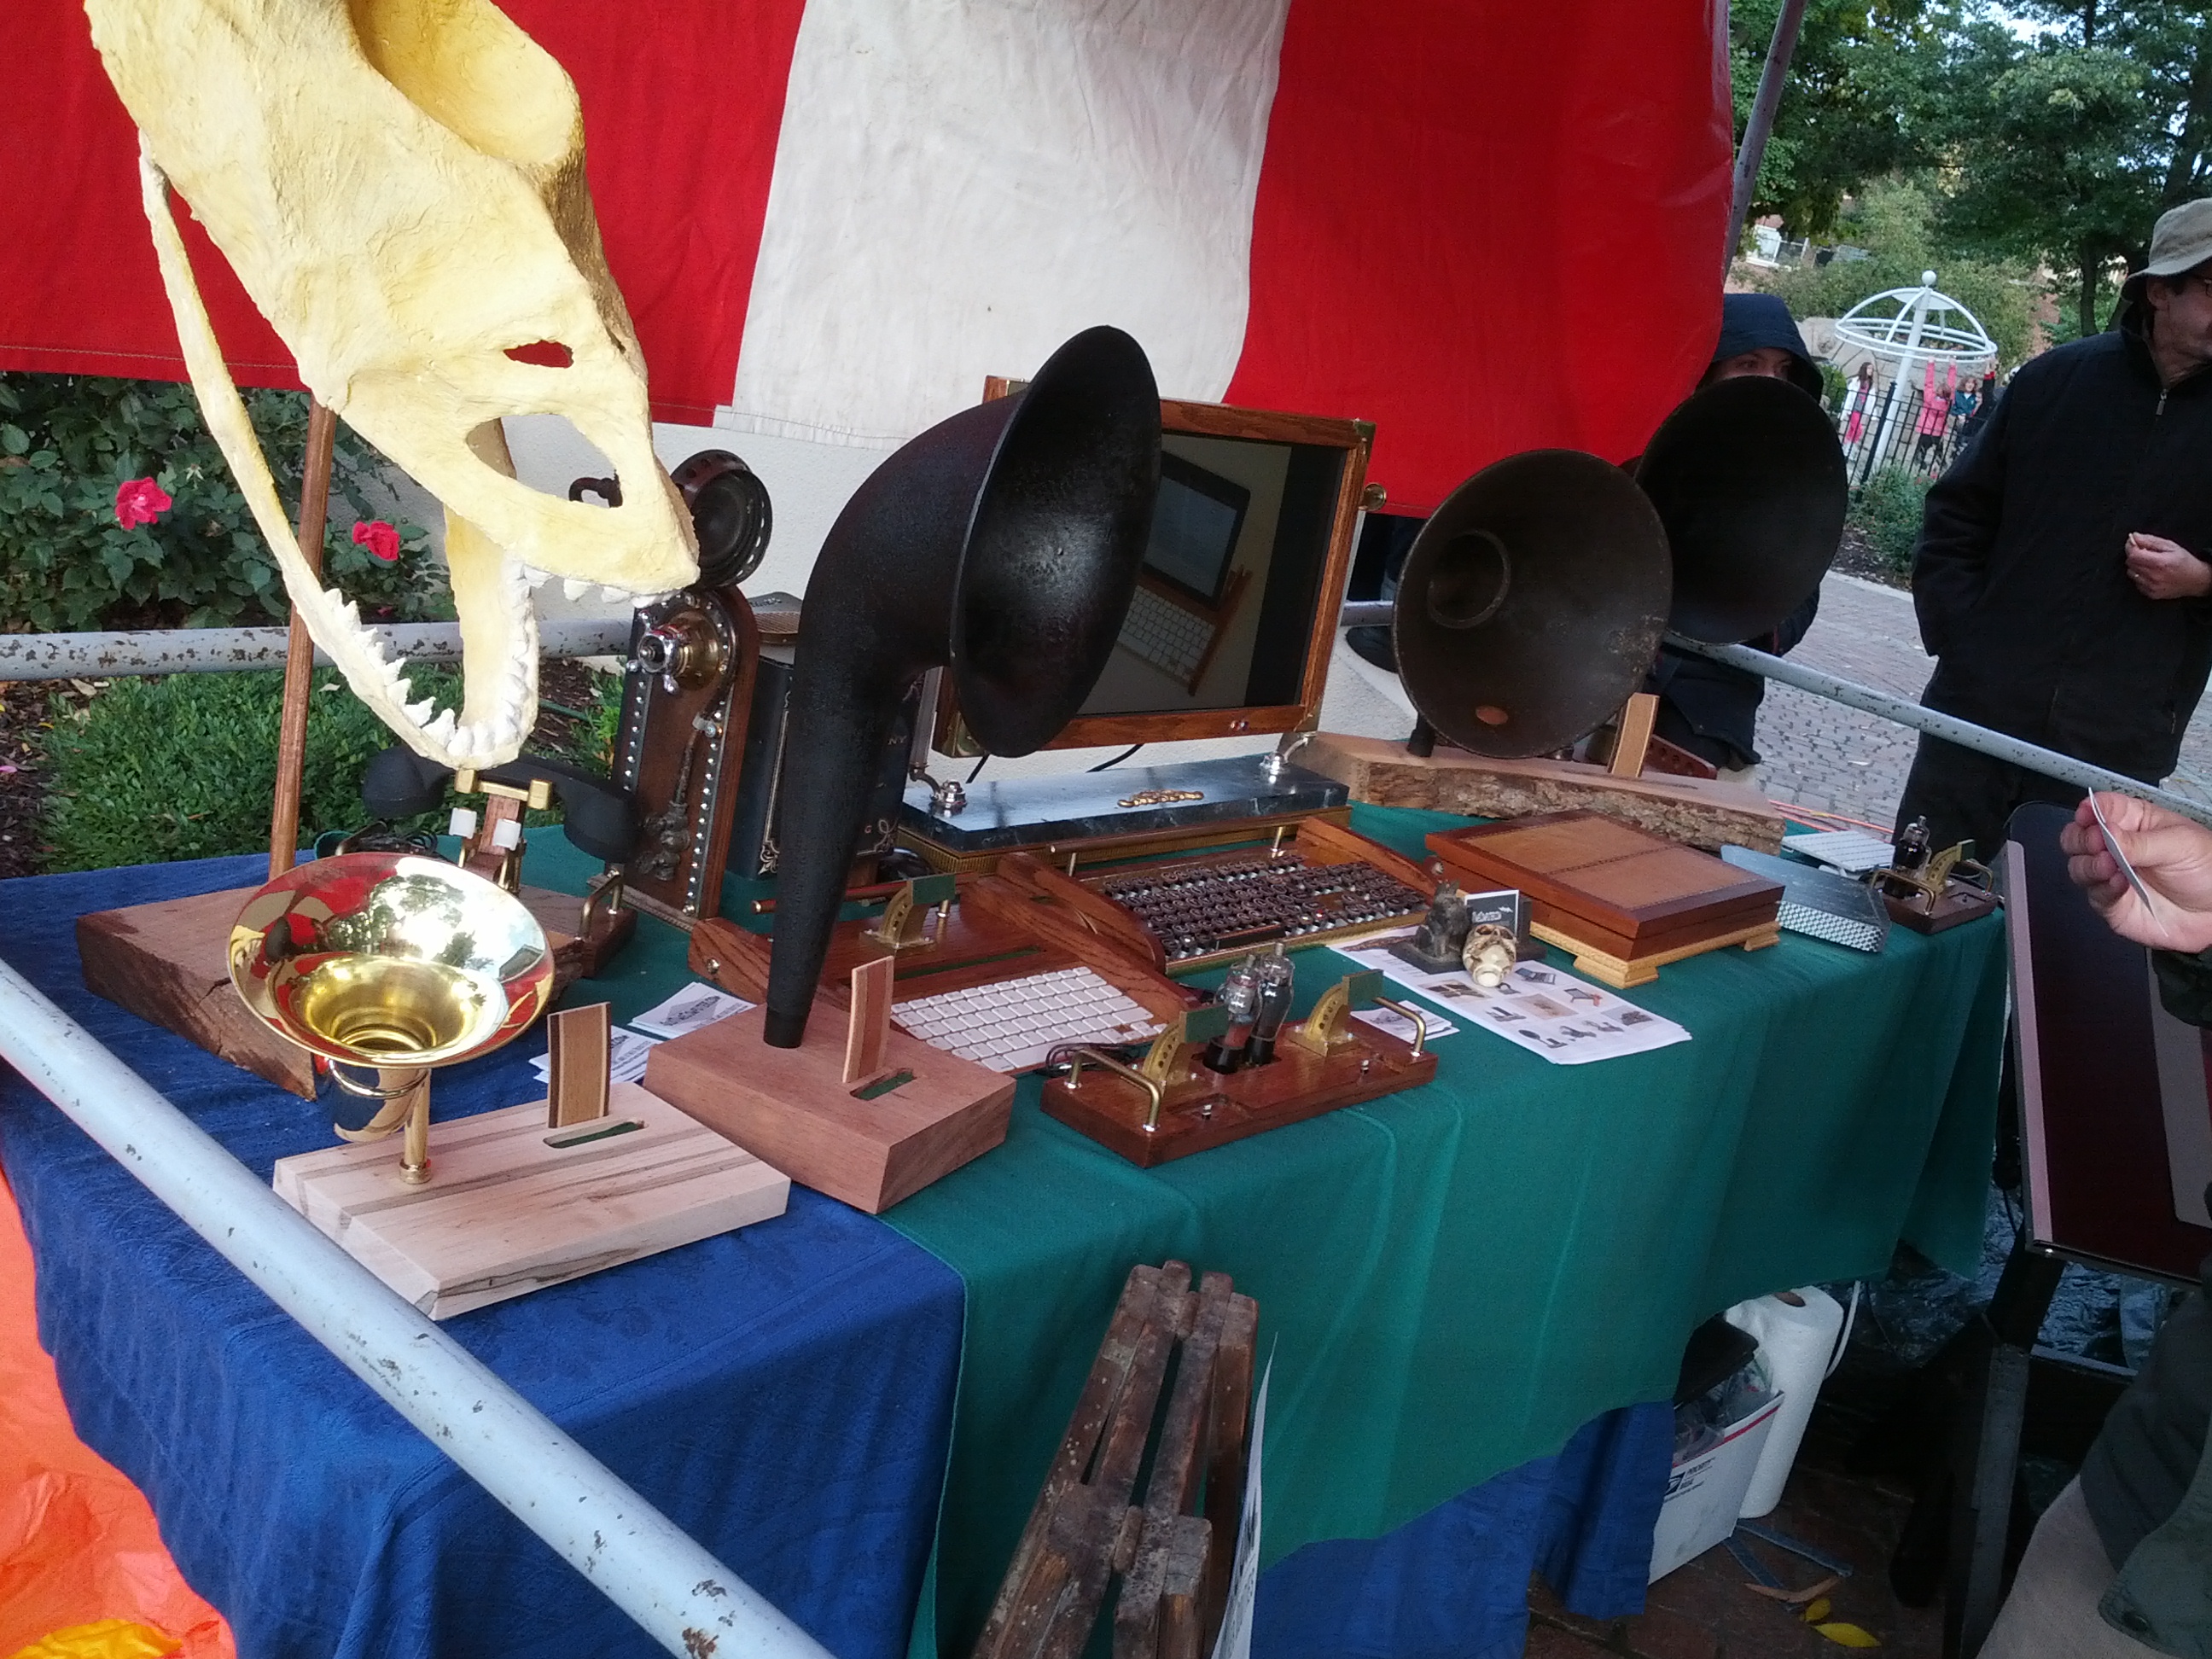
- Vintage stereos meet newer computers.
-

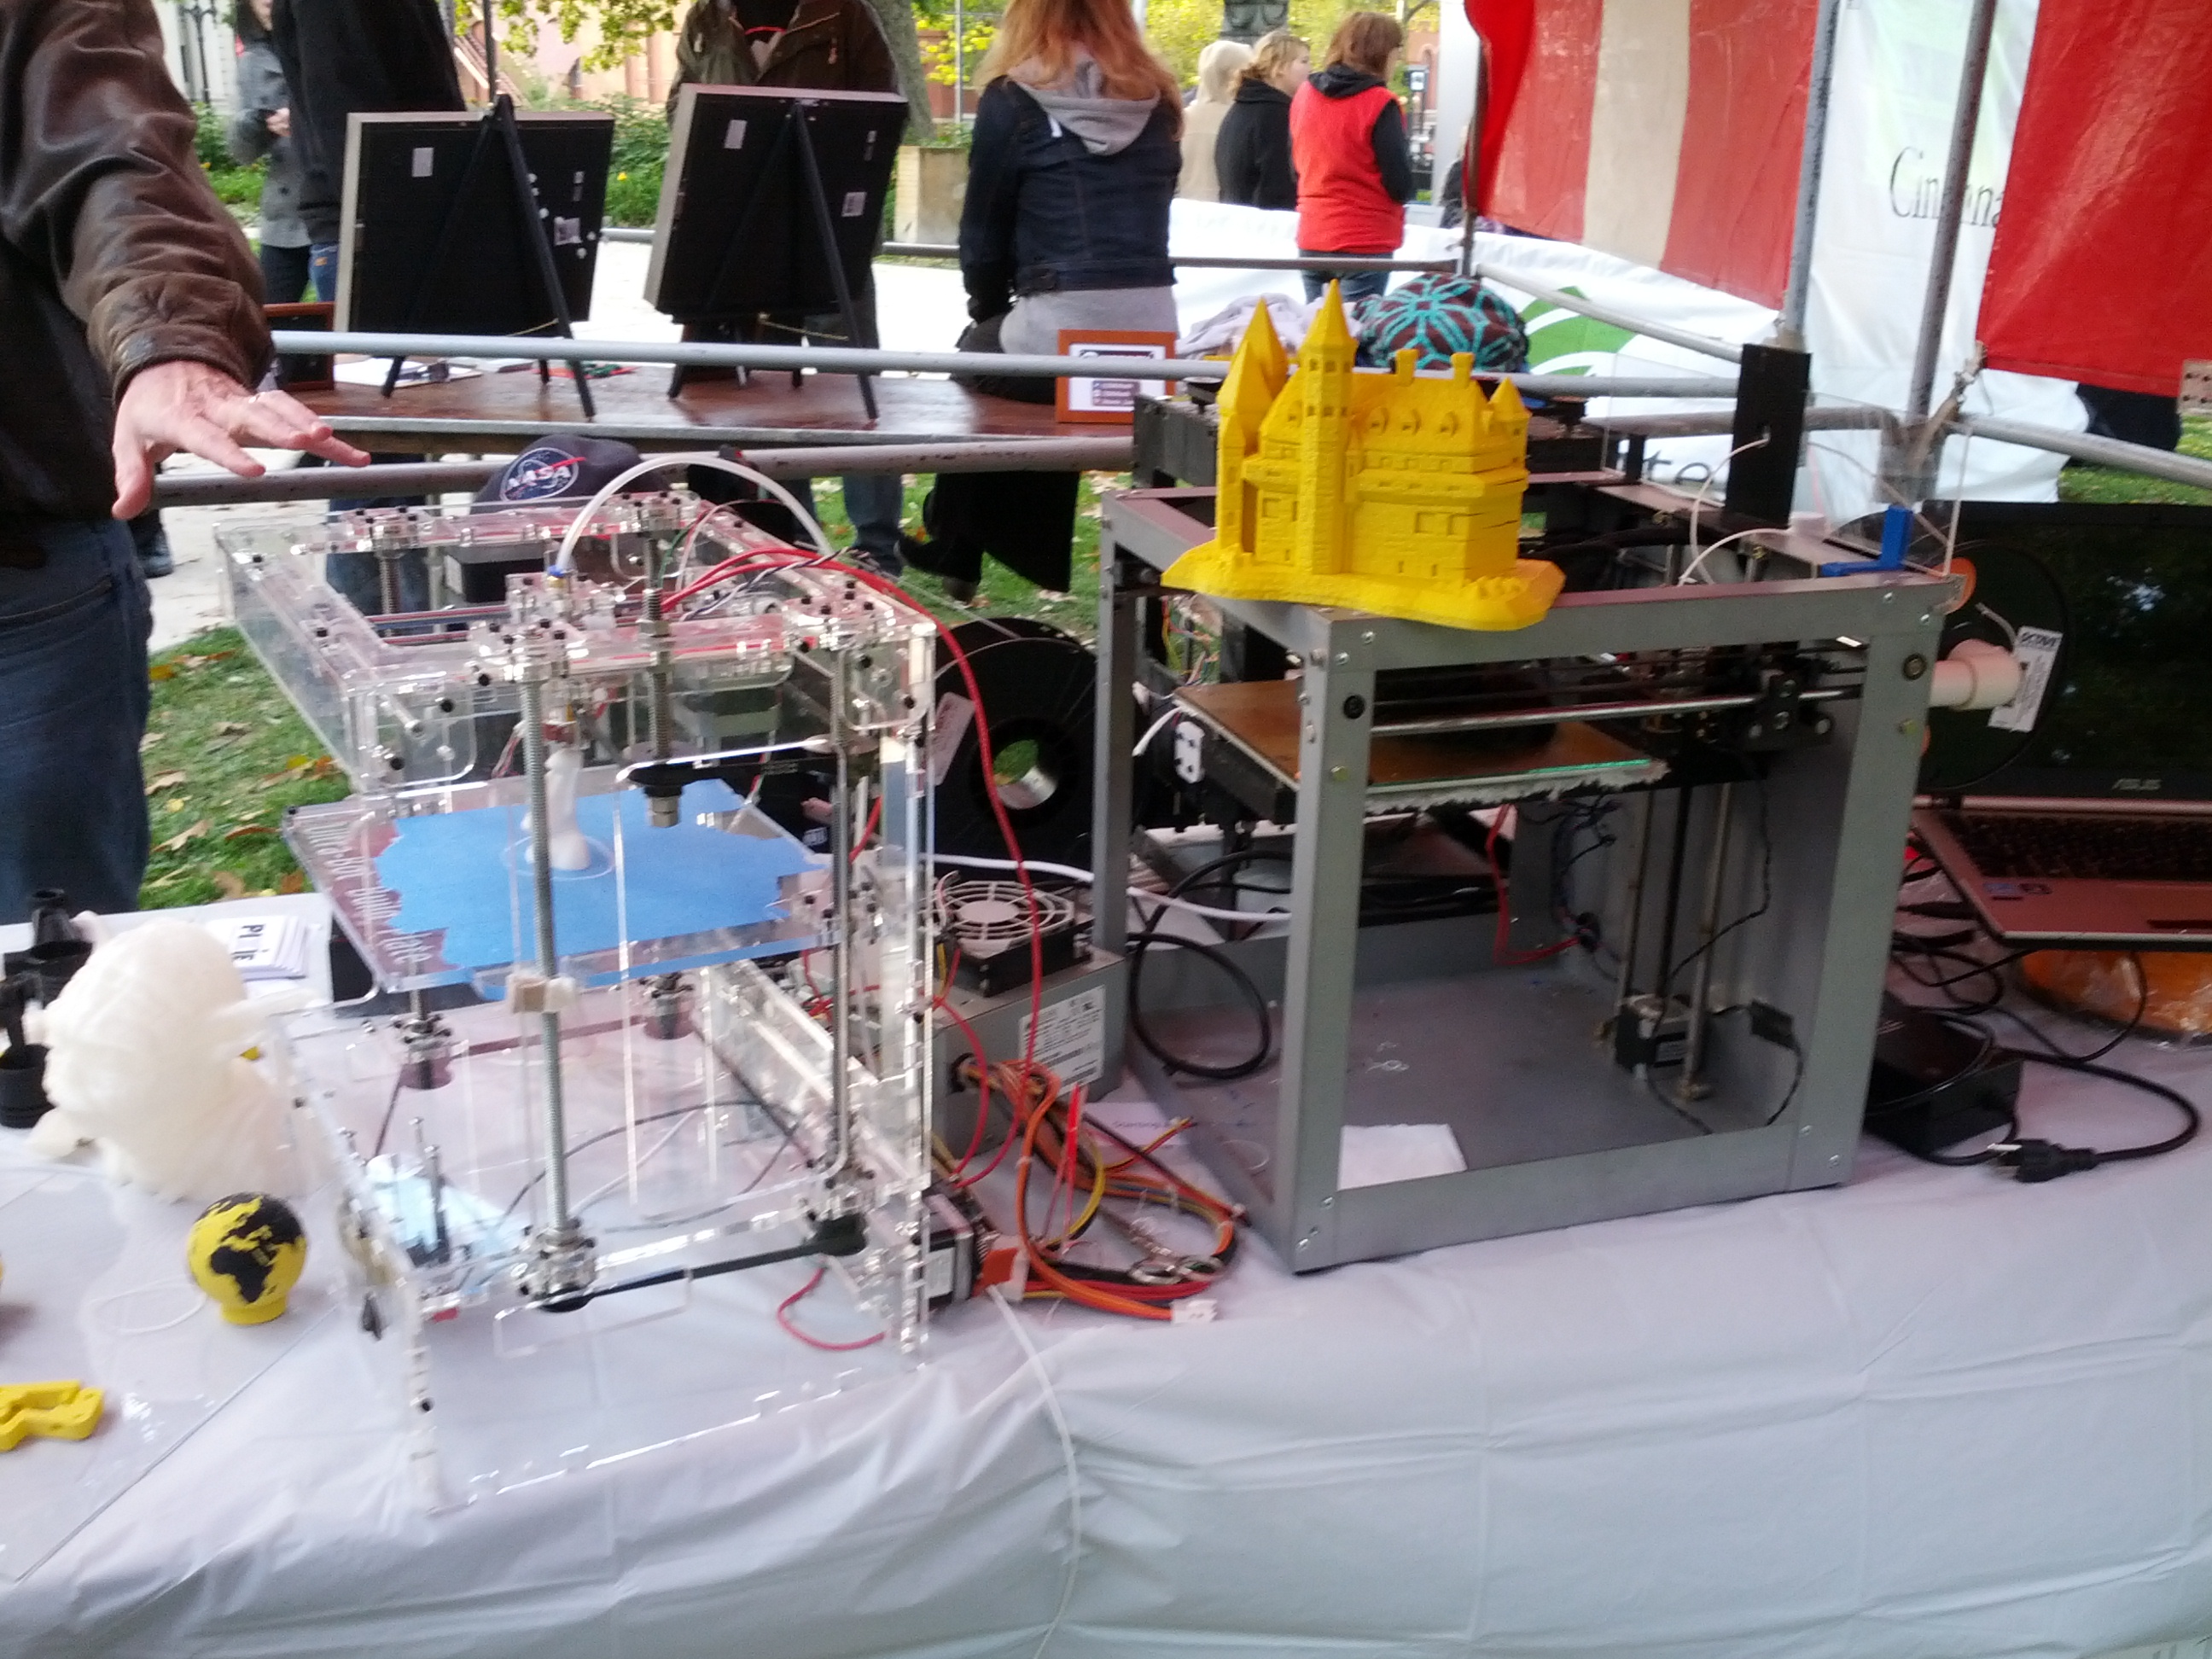
- 3D Printers.
-
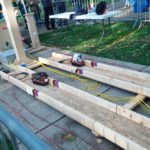
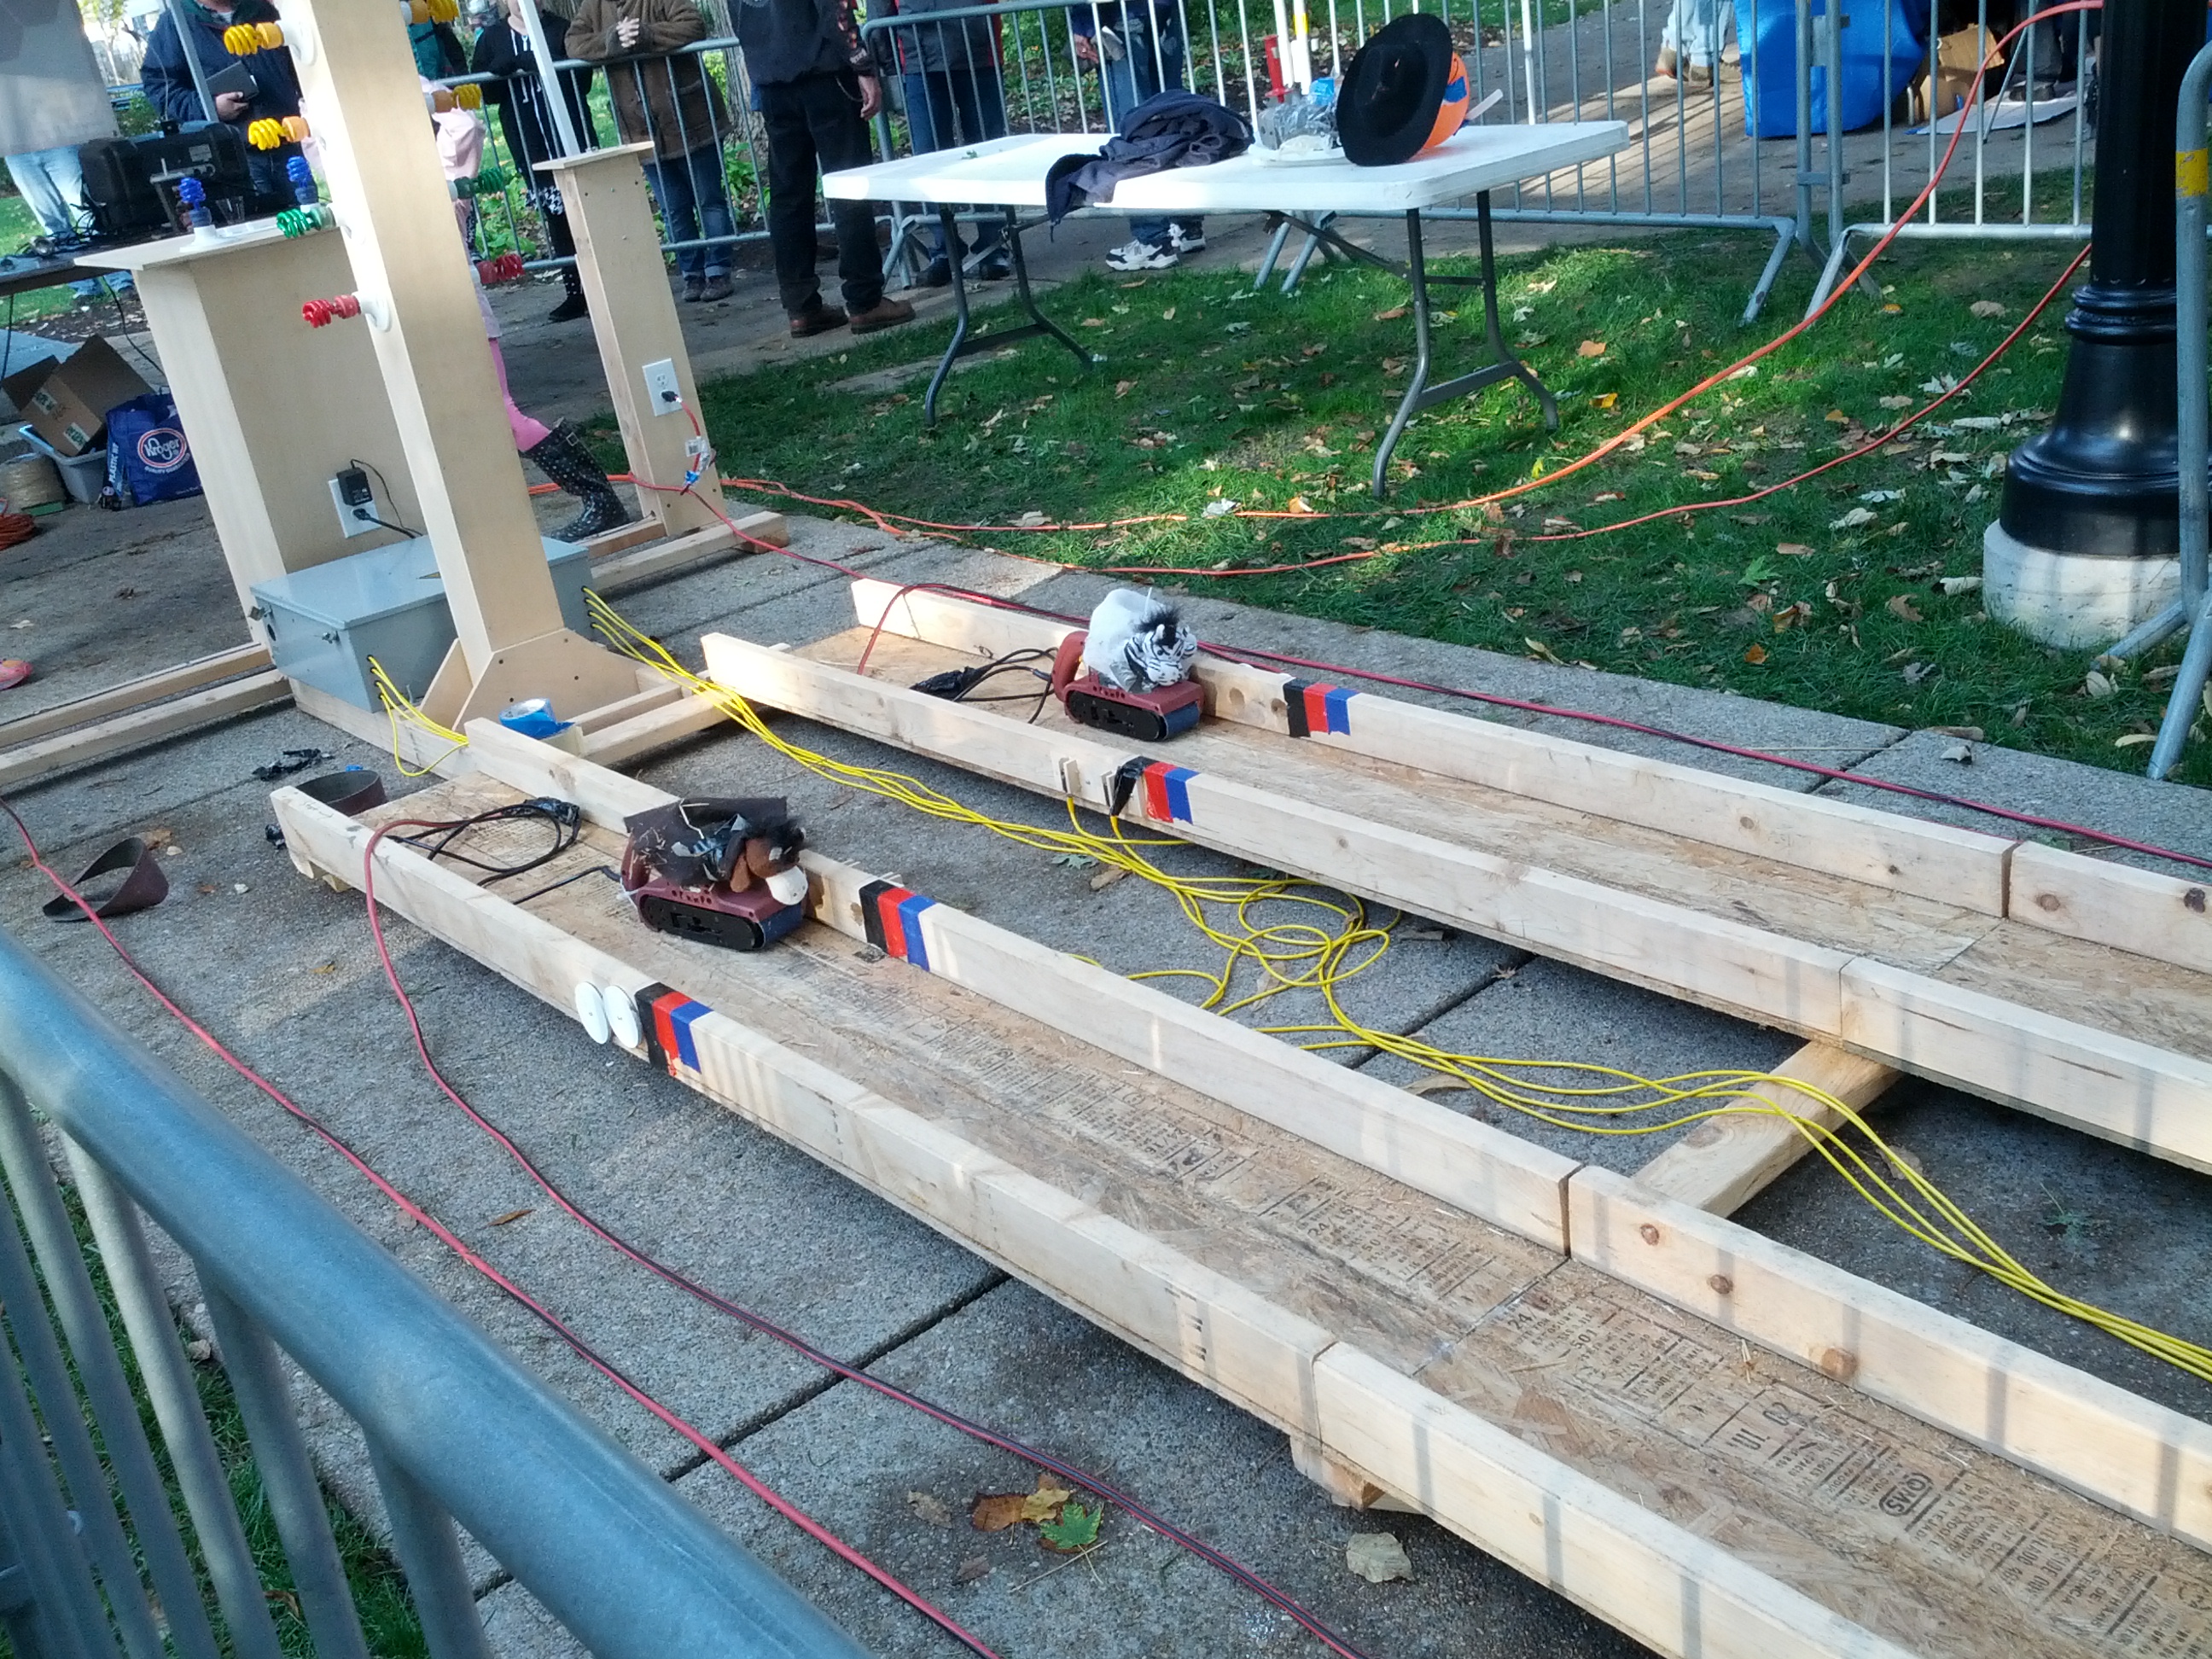
- Power Tool Drag Racing (there’s a video below).
-
- More Power Tool Drag Racing
-
- This was an interesting plotter (for lack of better terms). The two wheels in the upper corners controlled the pen.
-
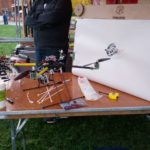
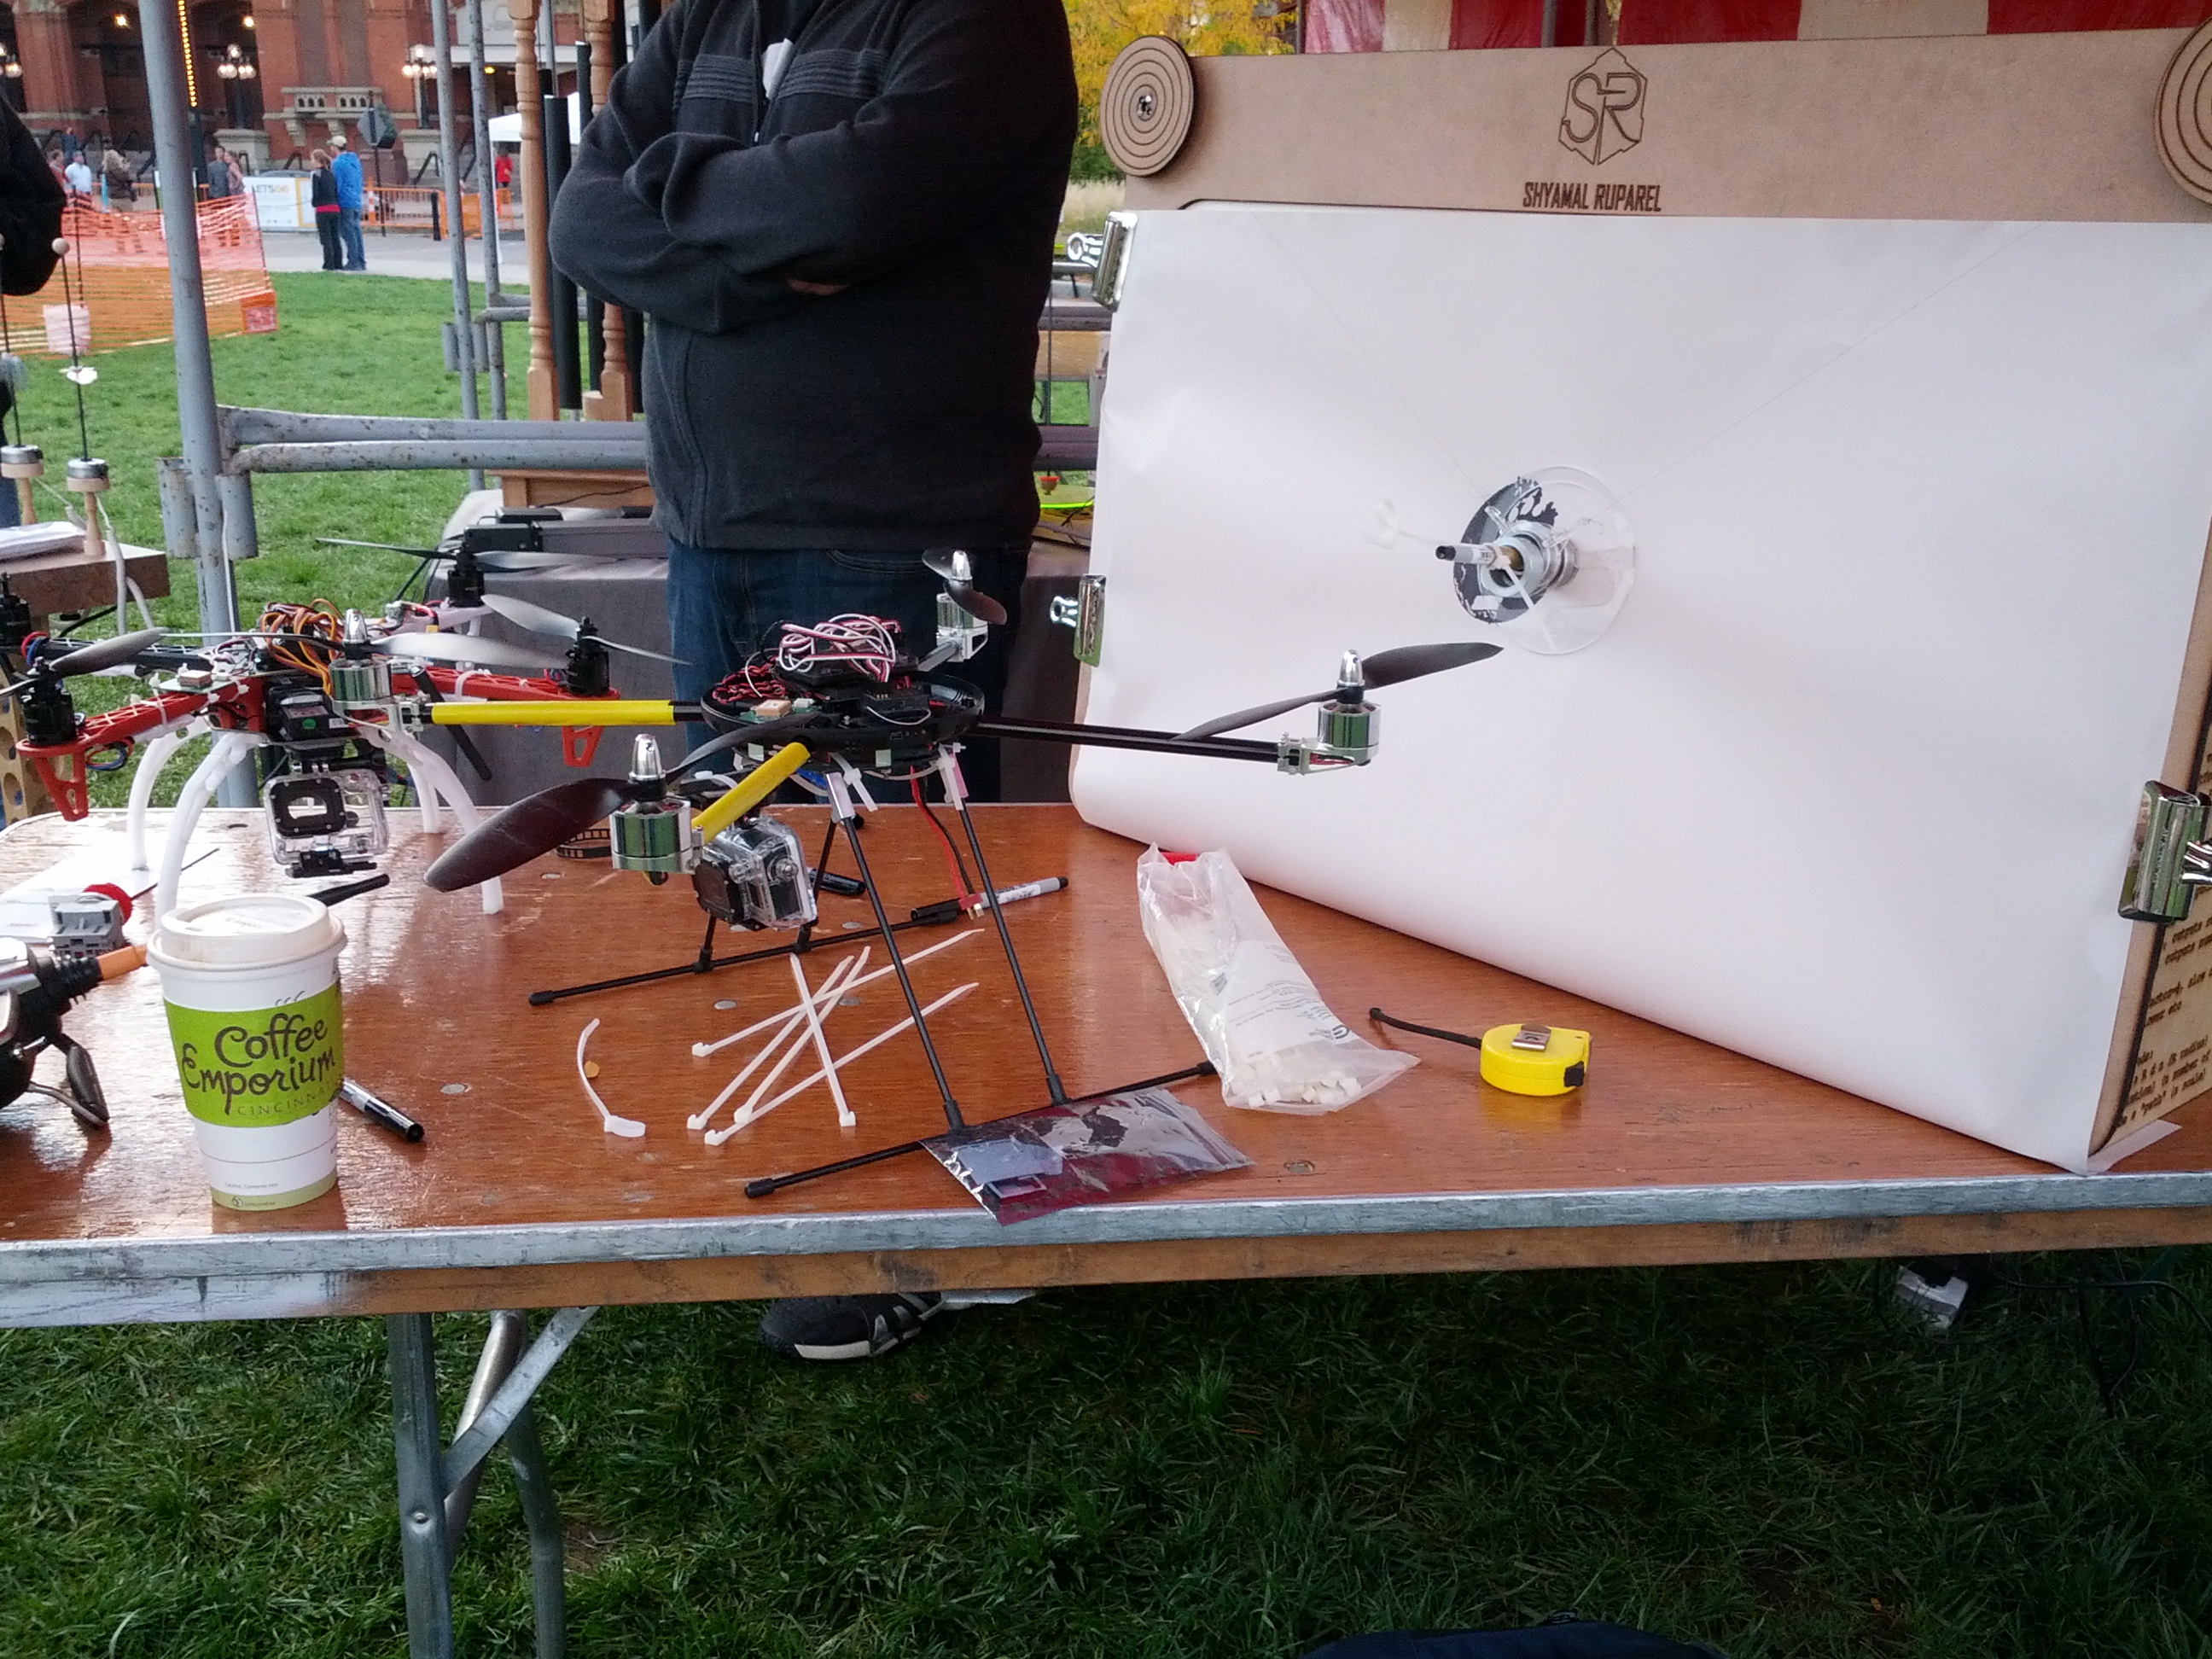
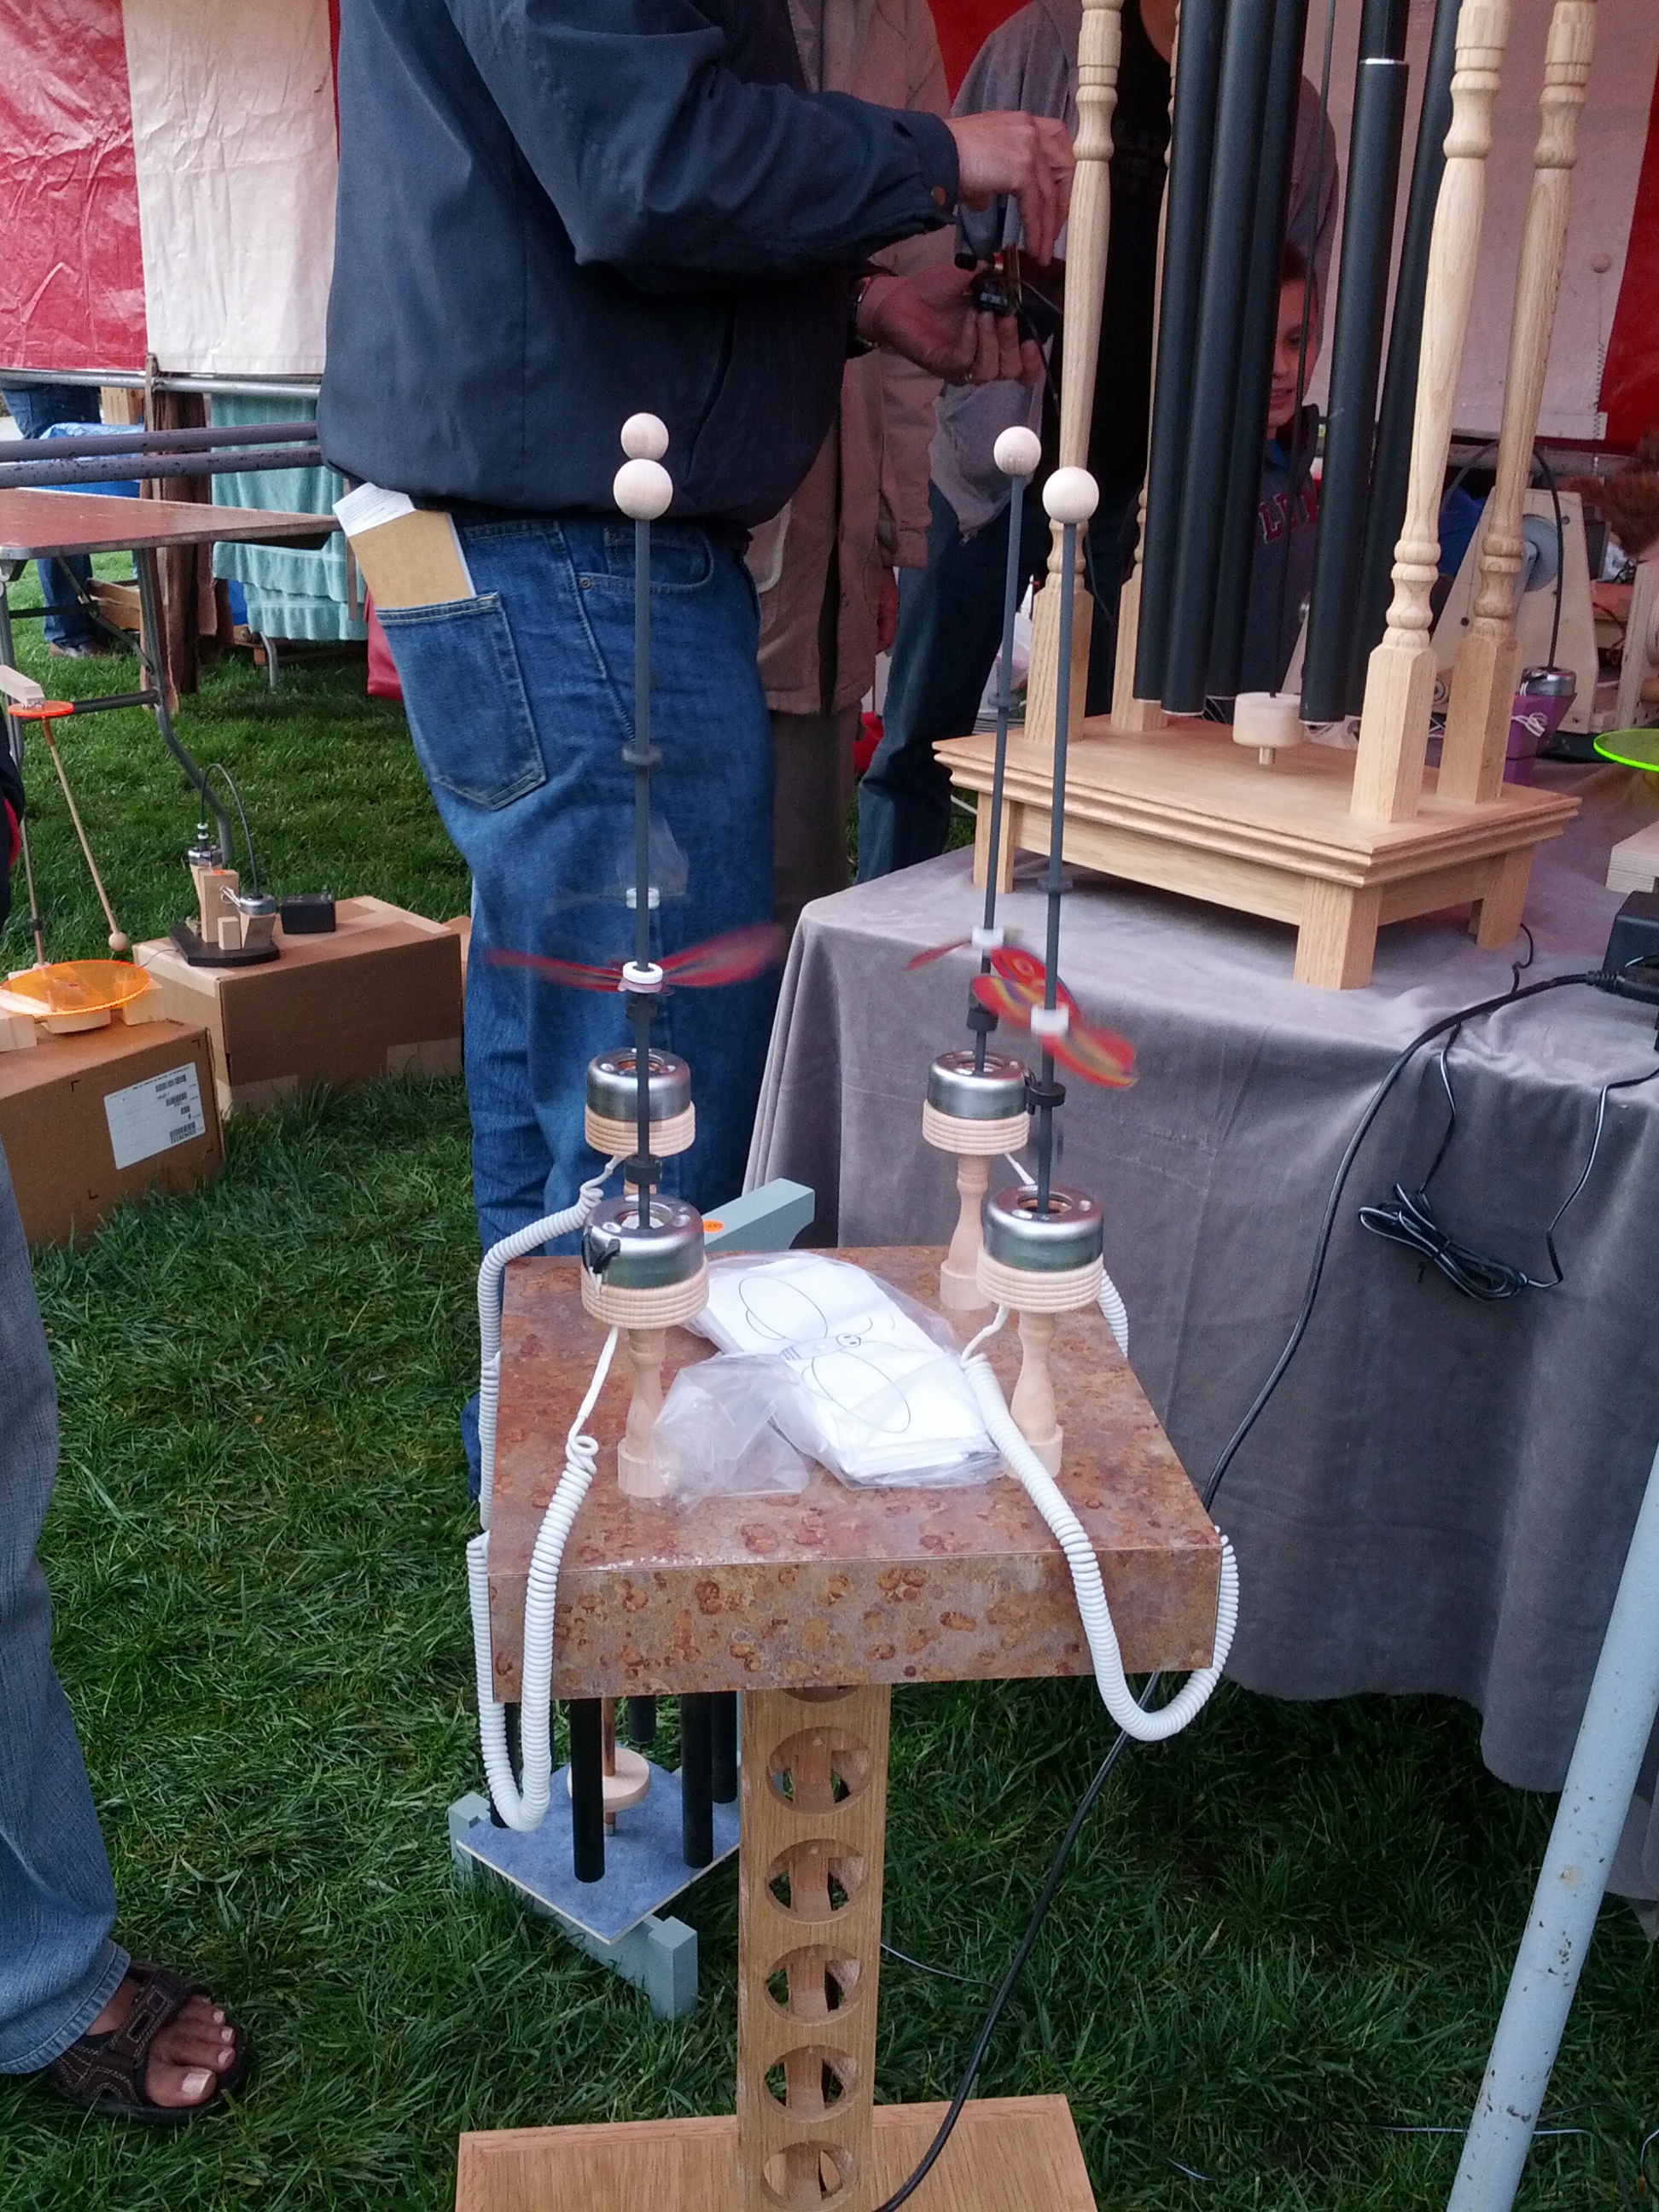
- Quadcopters. I’m not sure you could have a Maker Faire without ’em.
-

- Plush Toys.

-

- This was the drum set that controls the propane percussion.
-
- This is pretty neat. The “bees” on the sticks were moving up and down. Other items at this booth were solar powered windchimes.
-

- R2D2.

I gave a presentation to the Queen City Emergency Net on October 18, 2013. This was an update of the presentation I gave to Oh-Ky-In last August, which is an update of the Cincinnati FM Club presentation in February, which was an update of the presentation I gave to the Milford Amateur Radio Club a while back. This page is a set of links for those that attended or missed the presentation.
Links Mentioned:
QRPTracker (satellite tracker)
Starter Sets:
Sparkfun: New Starter Set (with Arduino Clone, $50), New Inventor’s Kit ($100), Starter kit ($60)
Adafruit: Starter Pack ($65), Starter Kit ($125)
(added 2013-08-22) Seeed Studio: Starter Set ($70), Starter Kit (bigger) ($120)
Add-On Packs:
Have an Arduino board but not enough accessories or don’t know where to get started? Seeed Studio has a “Sidekick Basic Kit” that can get you up and running – it doesn’t have an Arduino, but it has a lot of components (etc) to get you started. And it’s $20. Seeed Sidekick Basic Kit ($20)
NOTE: Look hard at what these packs include! There ARE differences.
Raspberry Pis and Beagleboard Blacks can be bought at Mouser, Digikey, and Newark Electronics/Element 14. Raspberry Pi accessories (like the Pi Plate an Pi Cobbler) can be bought at Adafruit or Newark Electronics/Element 14.
For anyone that’s been following me on Twitter, you’ve undoubtedly seen my tweets about getting some DX on 10m while mobile. For whatever reason, 10m seems to be the sweet spot with my 706 and the hamstick.
The Setup
The current setup is here (old pic)

This is the radio in the lower center console of my truck.
The Issues
One issue with this is that it is difficult to control the radio. Part of it is that I need to use it more. Part of it is that it is just over an arm’s length away. Solution: I have the head separation kit, I need to mount the radio somewhere easier to see and control.
The only other issue is logging. I’ve tried using Google Keep and Evernote, but they haven’t worked very well. Keep tries to transcribe the speech, which it usually does poorly with callsigns and frequencies. It will normally get the ubiquitous “five nine”, though. I’ve decided I need an “easy button”.
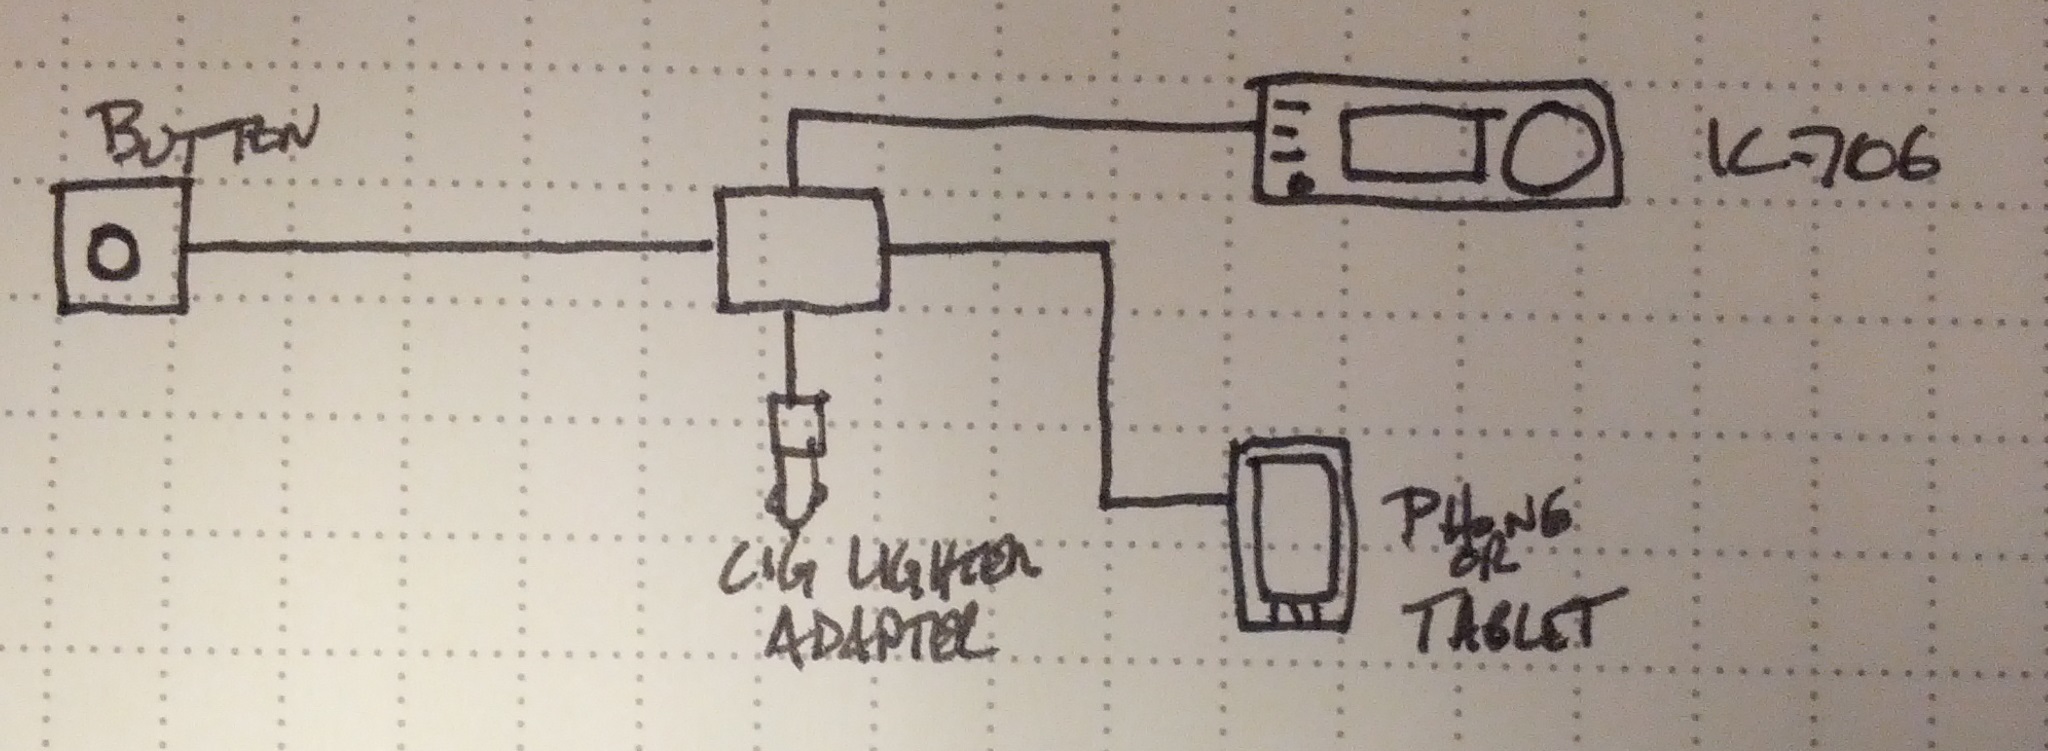
Easy button block diagram
So, an Easy Button. Ultimately, this will become an Android App. It’ll probably be Arduino powered. It’ll likely be open source, too.
I figure when it is plugged in, it should start an app (maybe I’ll have to do this manually). It’ll charge the Android device (hence the cigarette lighter adapter). It may run the GPS to get location when the button is pressed (I can think of a few uses for that); it would definitely get the time and date (UTC, of course!) from the phone, and it would prompt the phone to record the callsign, signal reports, and any other notes. It would also connect to my IC-706 to get the frequency and mode.
Stay tuned!
-73-
I spent the weekend building stuff.
RF Probe
First, I built an RF probe using a schematic from the ARRL Handbook. It’s a pretty simple build, as all I needed was a pair of old test probes, a germanium diode, a capacitor, and a resistor. I packaged the electronics in a small piece of CPVC pipe, which is nice and unobtrusive.
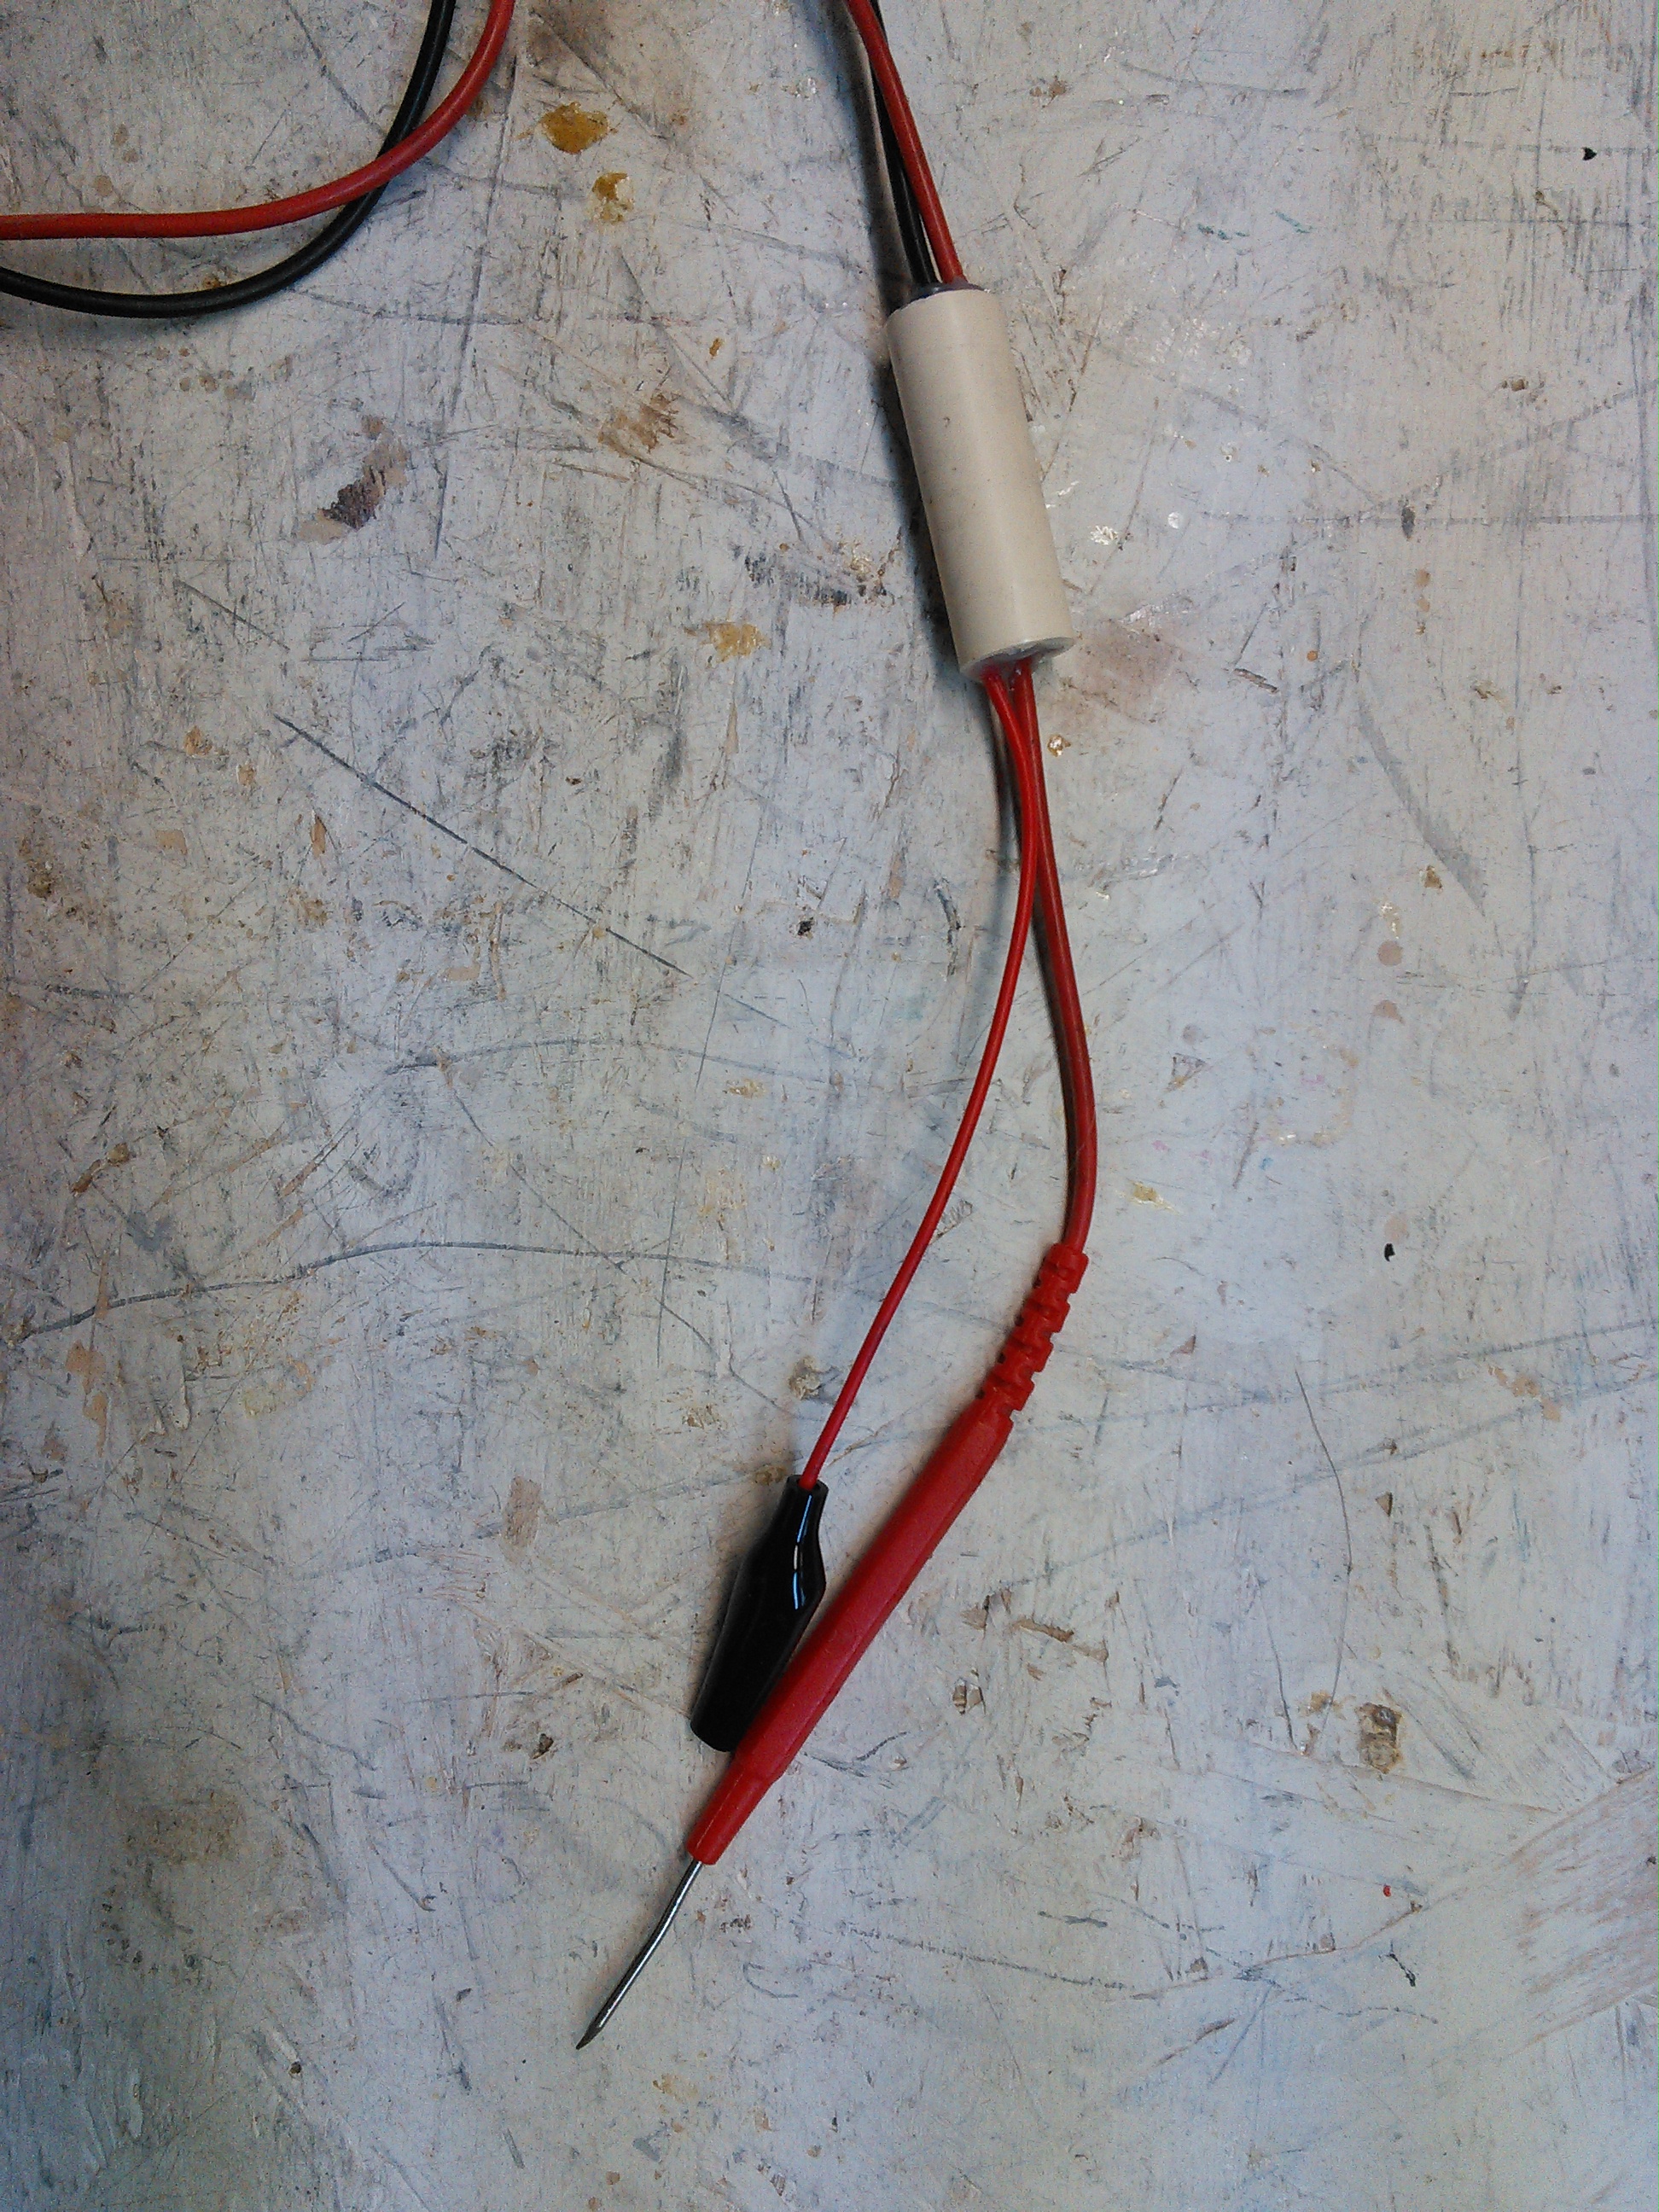
This is the RF Probe. It fits nicely in some 1/2″ CPVC pipe.
End Fed #2
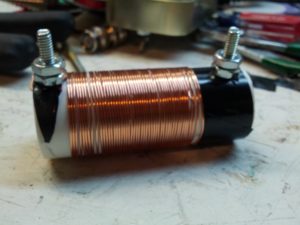
After W0EA told me I used the wrong coil core material, I built one with the correct material (ferrite, not iron). I still have the old, so I’ll do some comparisons, but barring any major issues, I’ll stick with the ferrite one.
End Fed #2.
-73-
I don’t have much to post, and with weekends being nearly as busy as weekdays, I haven’t had much time to get into anything, but I did get some time working in the shack on a Par style end fed antenna. I started thinking about this and worked off the design on W0EA’s blog.
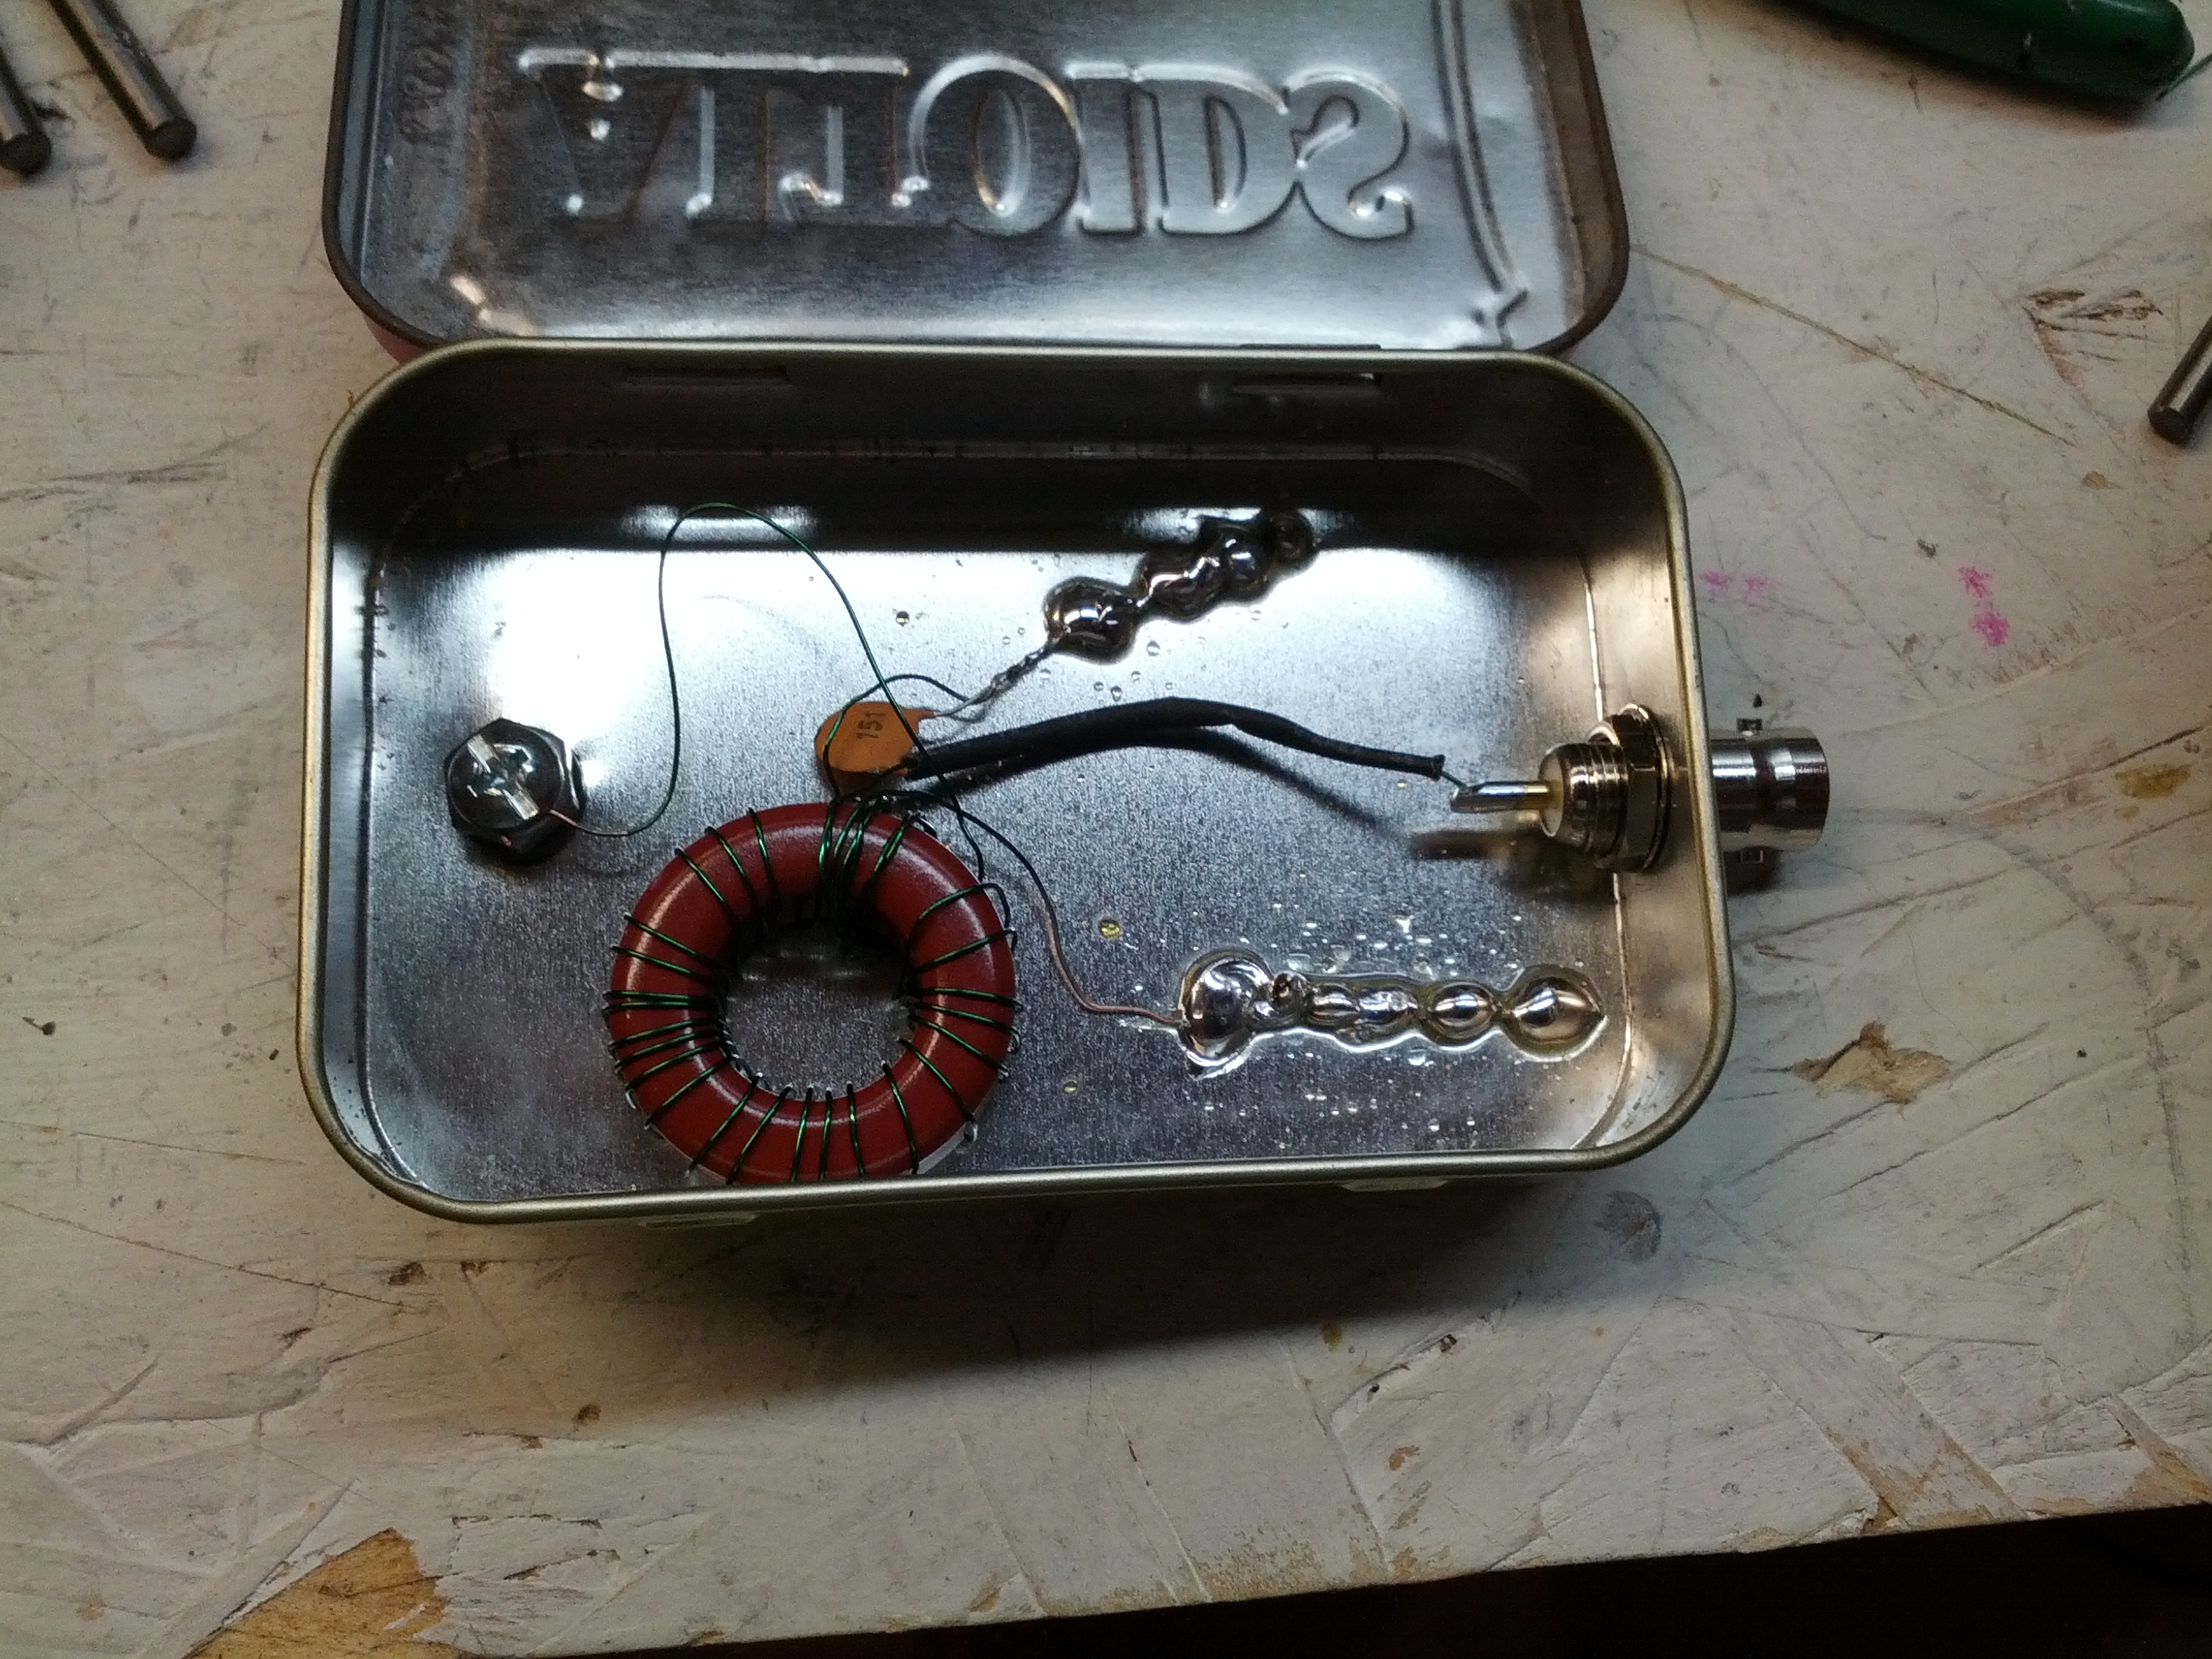
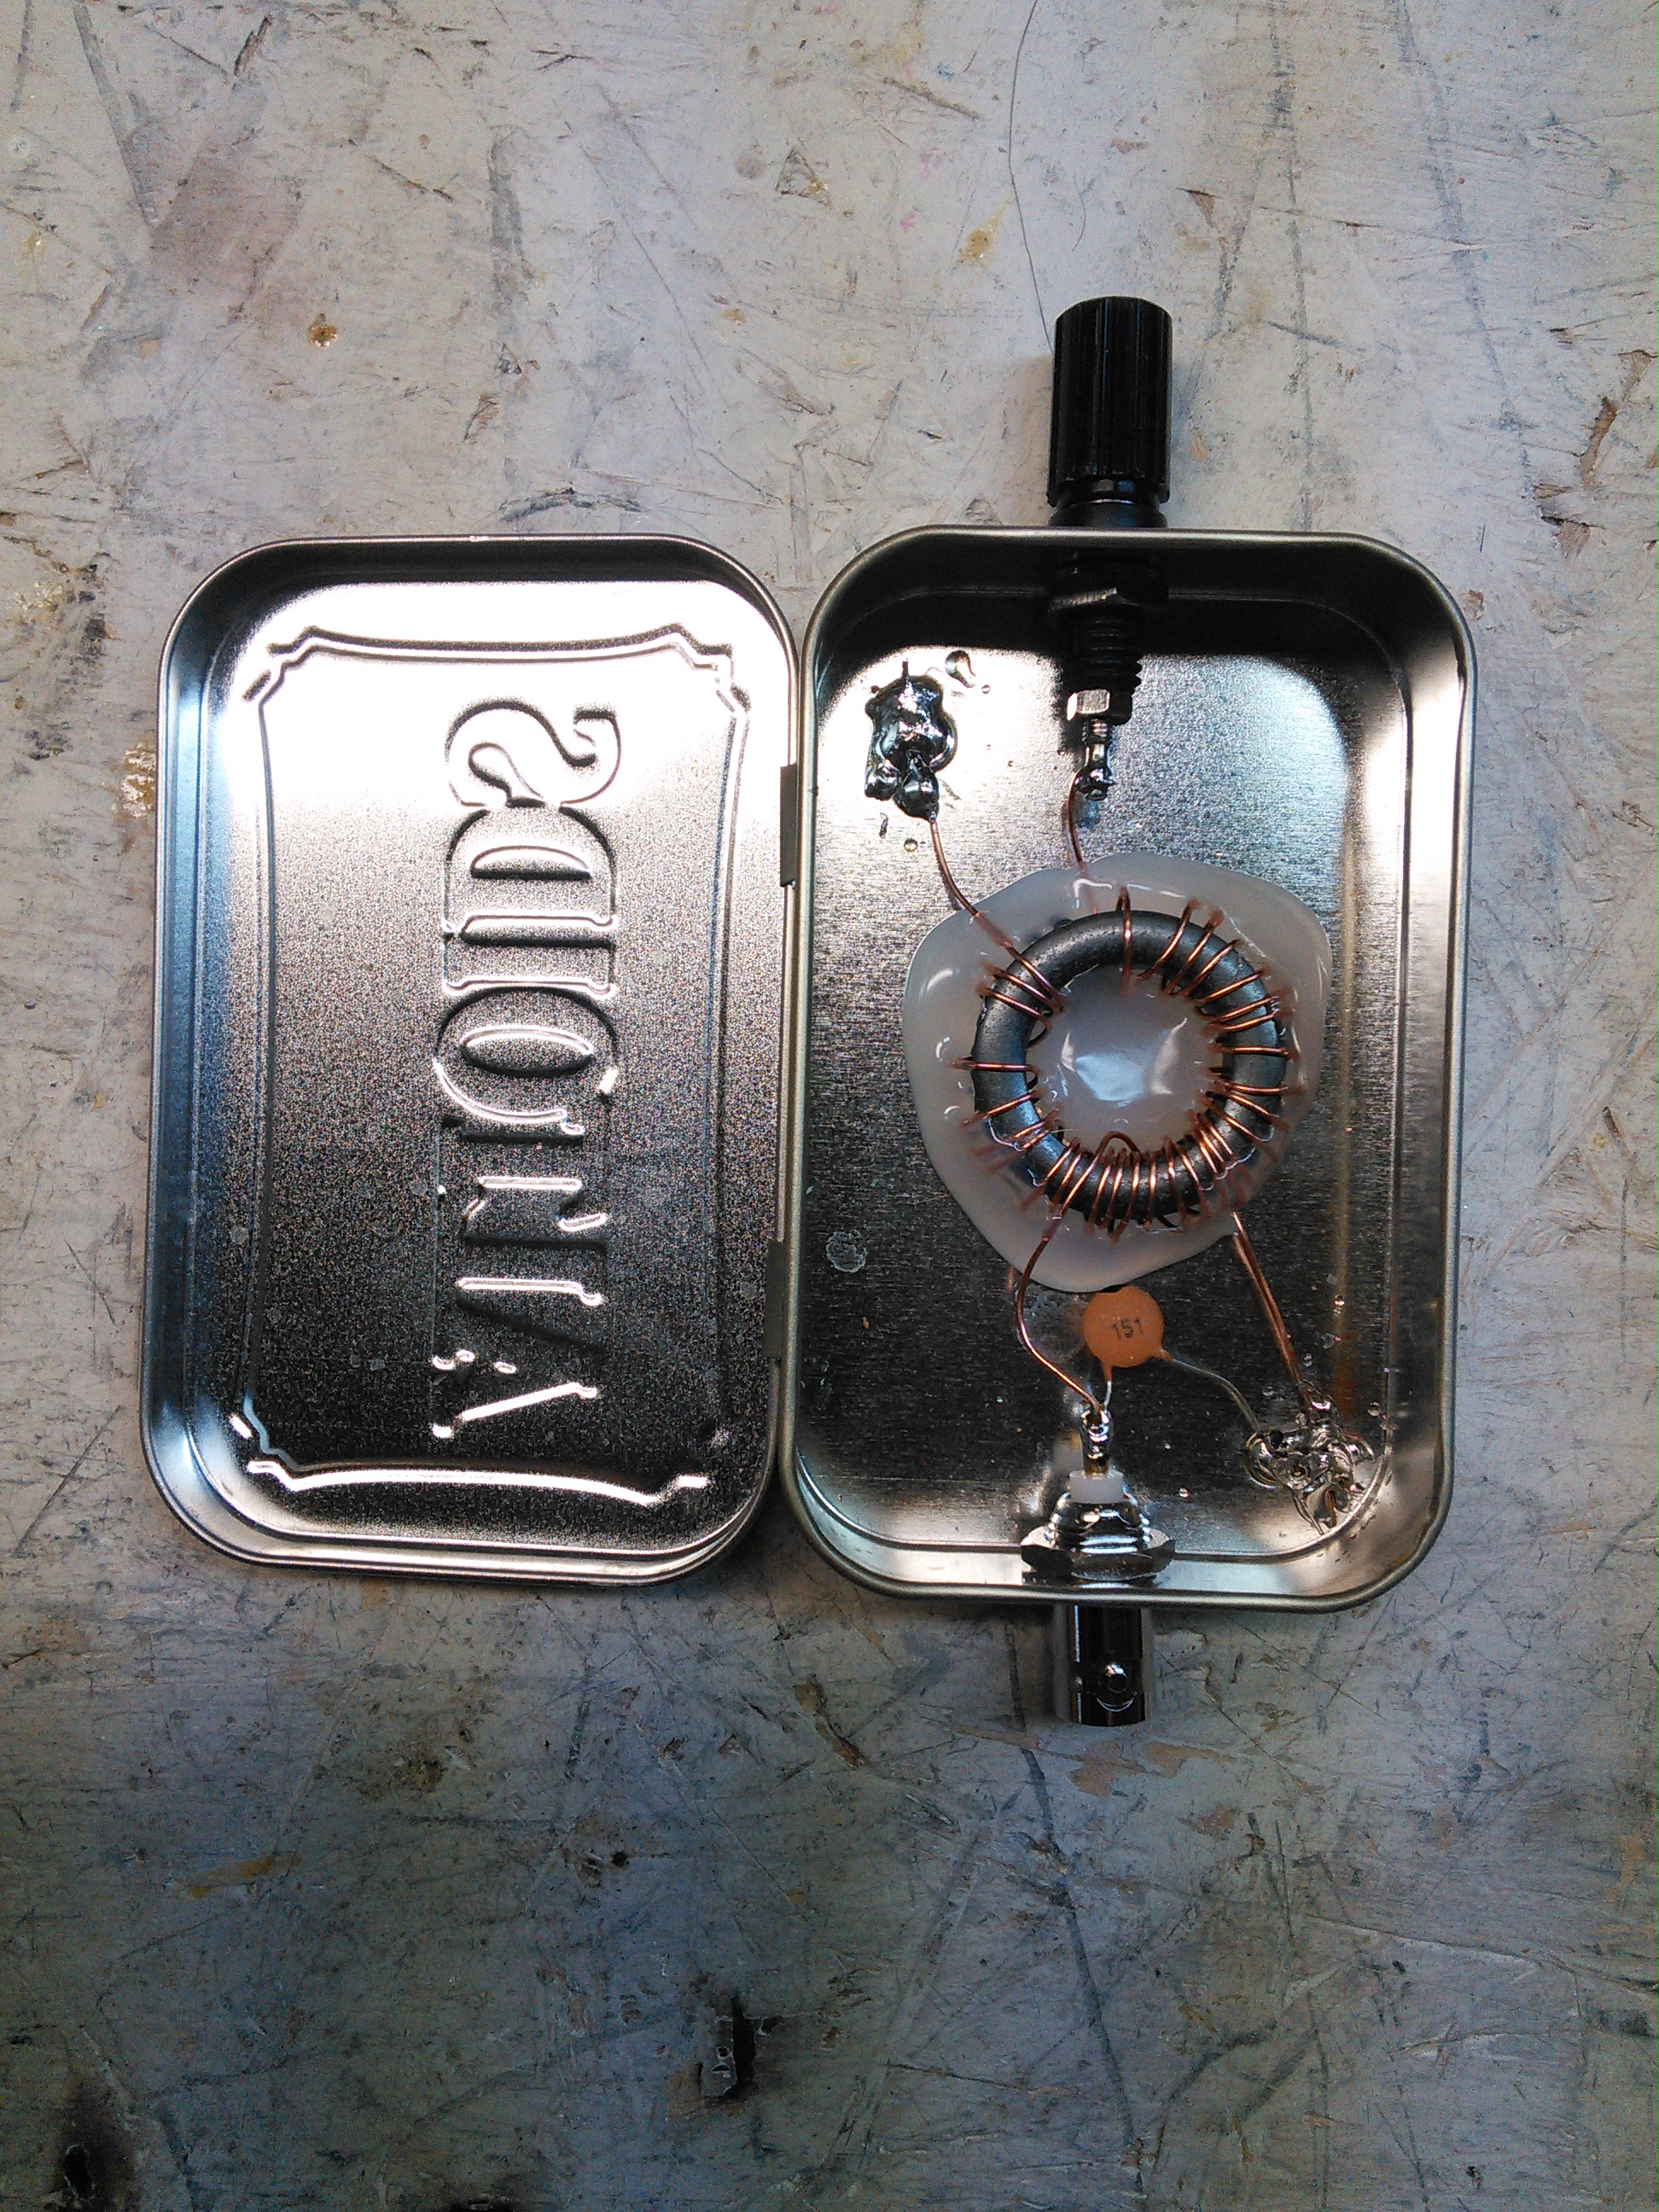
This is the inside of the box. I used an Altoids tin. The coil wire is small enough that I would consider this QRP only.
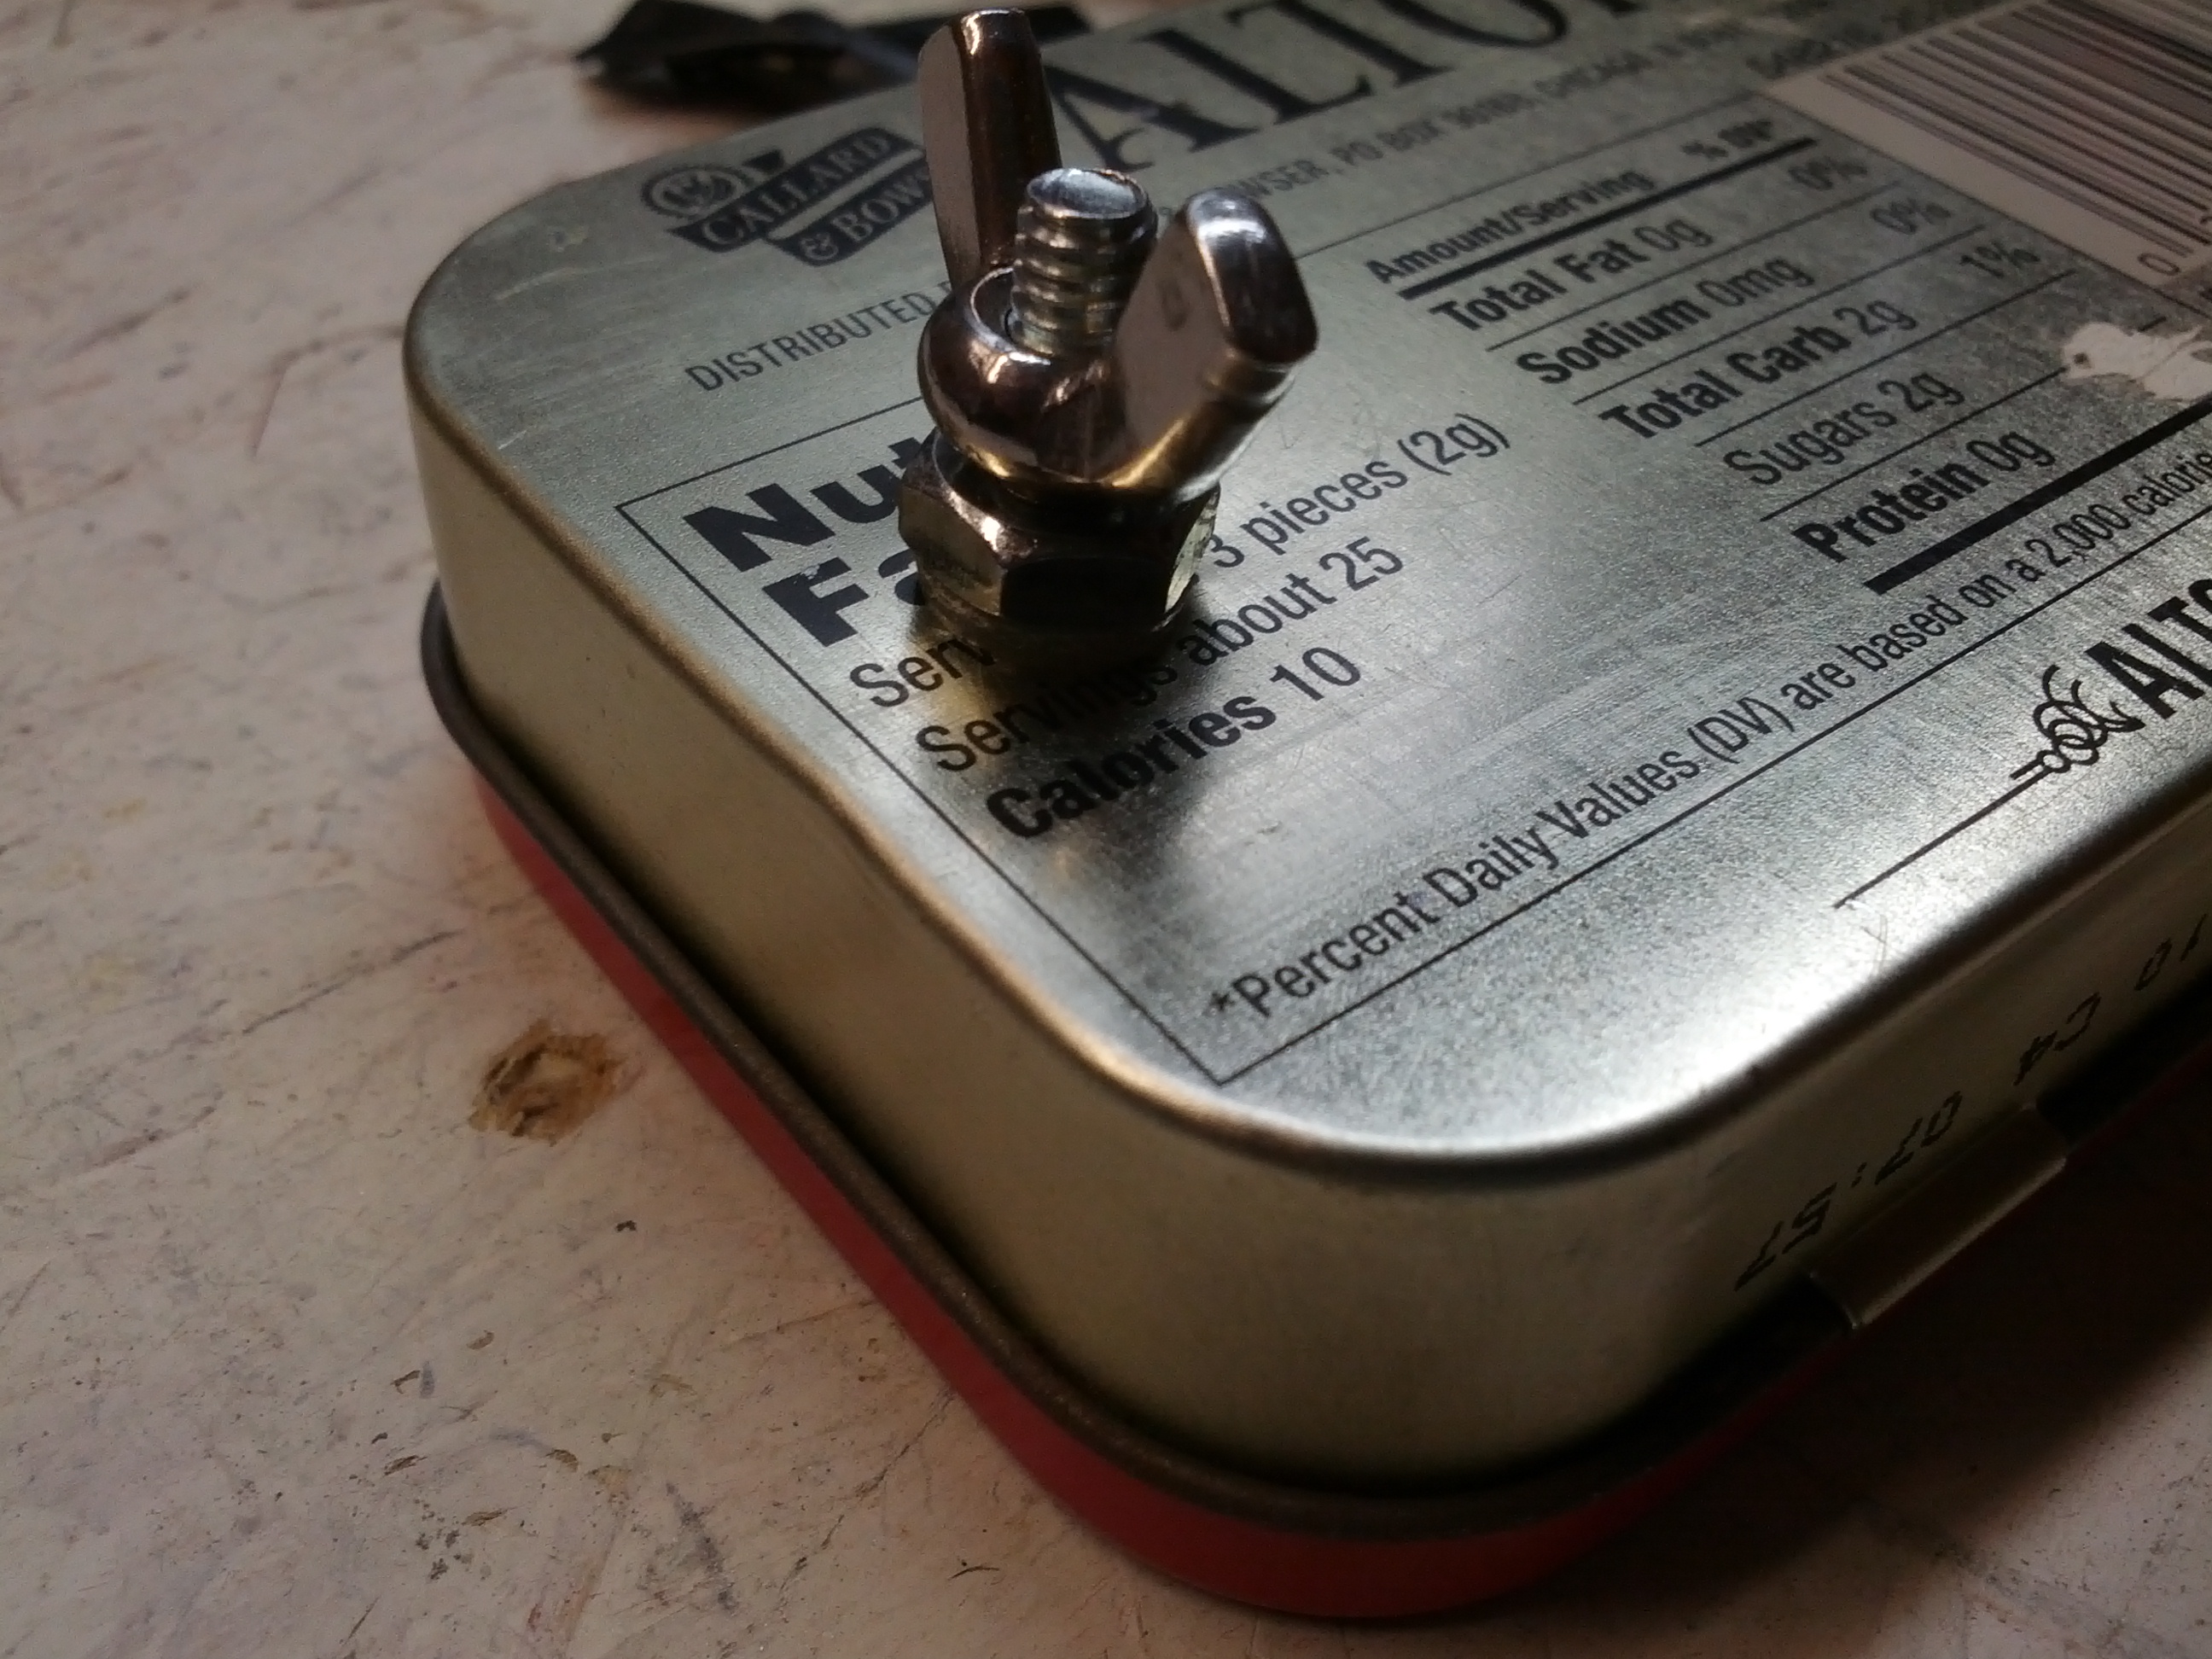
This is the back of the matchbox. It is difficult to tell in this picture, but the bolt is insulated from the case. At some point, I will improve this to have an insulated connector (right now, a good tug may cause the bolt to contact the case).
Soon to be trap. And for the love of all that is holy, DO NOT COUNT THE TURNS. It isn’t done, and I was adding turns when I should have been removing – this coil resonates on 10m, not 20m like I need.
-73-
UPDATE: W0EA connected with me via twitter to tell me I’m doing it wrong. Specifically, I should be using a ferrite core, not an iron core. Looks like I’ll be winding a new coil this weekend.
One of the things I am doing for Halloween involves a pumpkin, a proximity sensor, and a music shield. Unsuspecting suspect comes near pumpkin, and the pumpkin talks to them. This is a very simple item, but one that can be pretty fun and very useful.
The Arduino is below. This is based on an Uno and uses a music shield and a proximity sensor. The music shield is from Seeed Studio and is the most expensive part (save the Arduino itself). The proximity sensor is a Sharp sensor, which can be bought from several sources. One potential addition may be a small op amp as an audio amplifier.
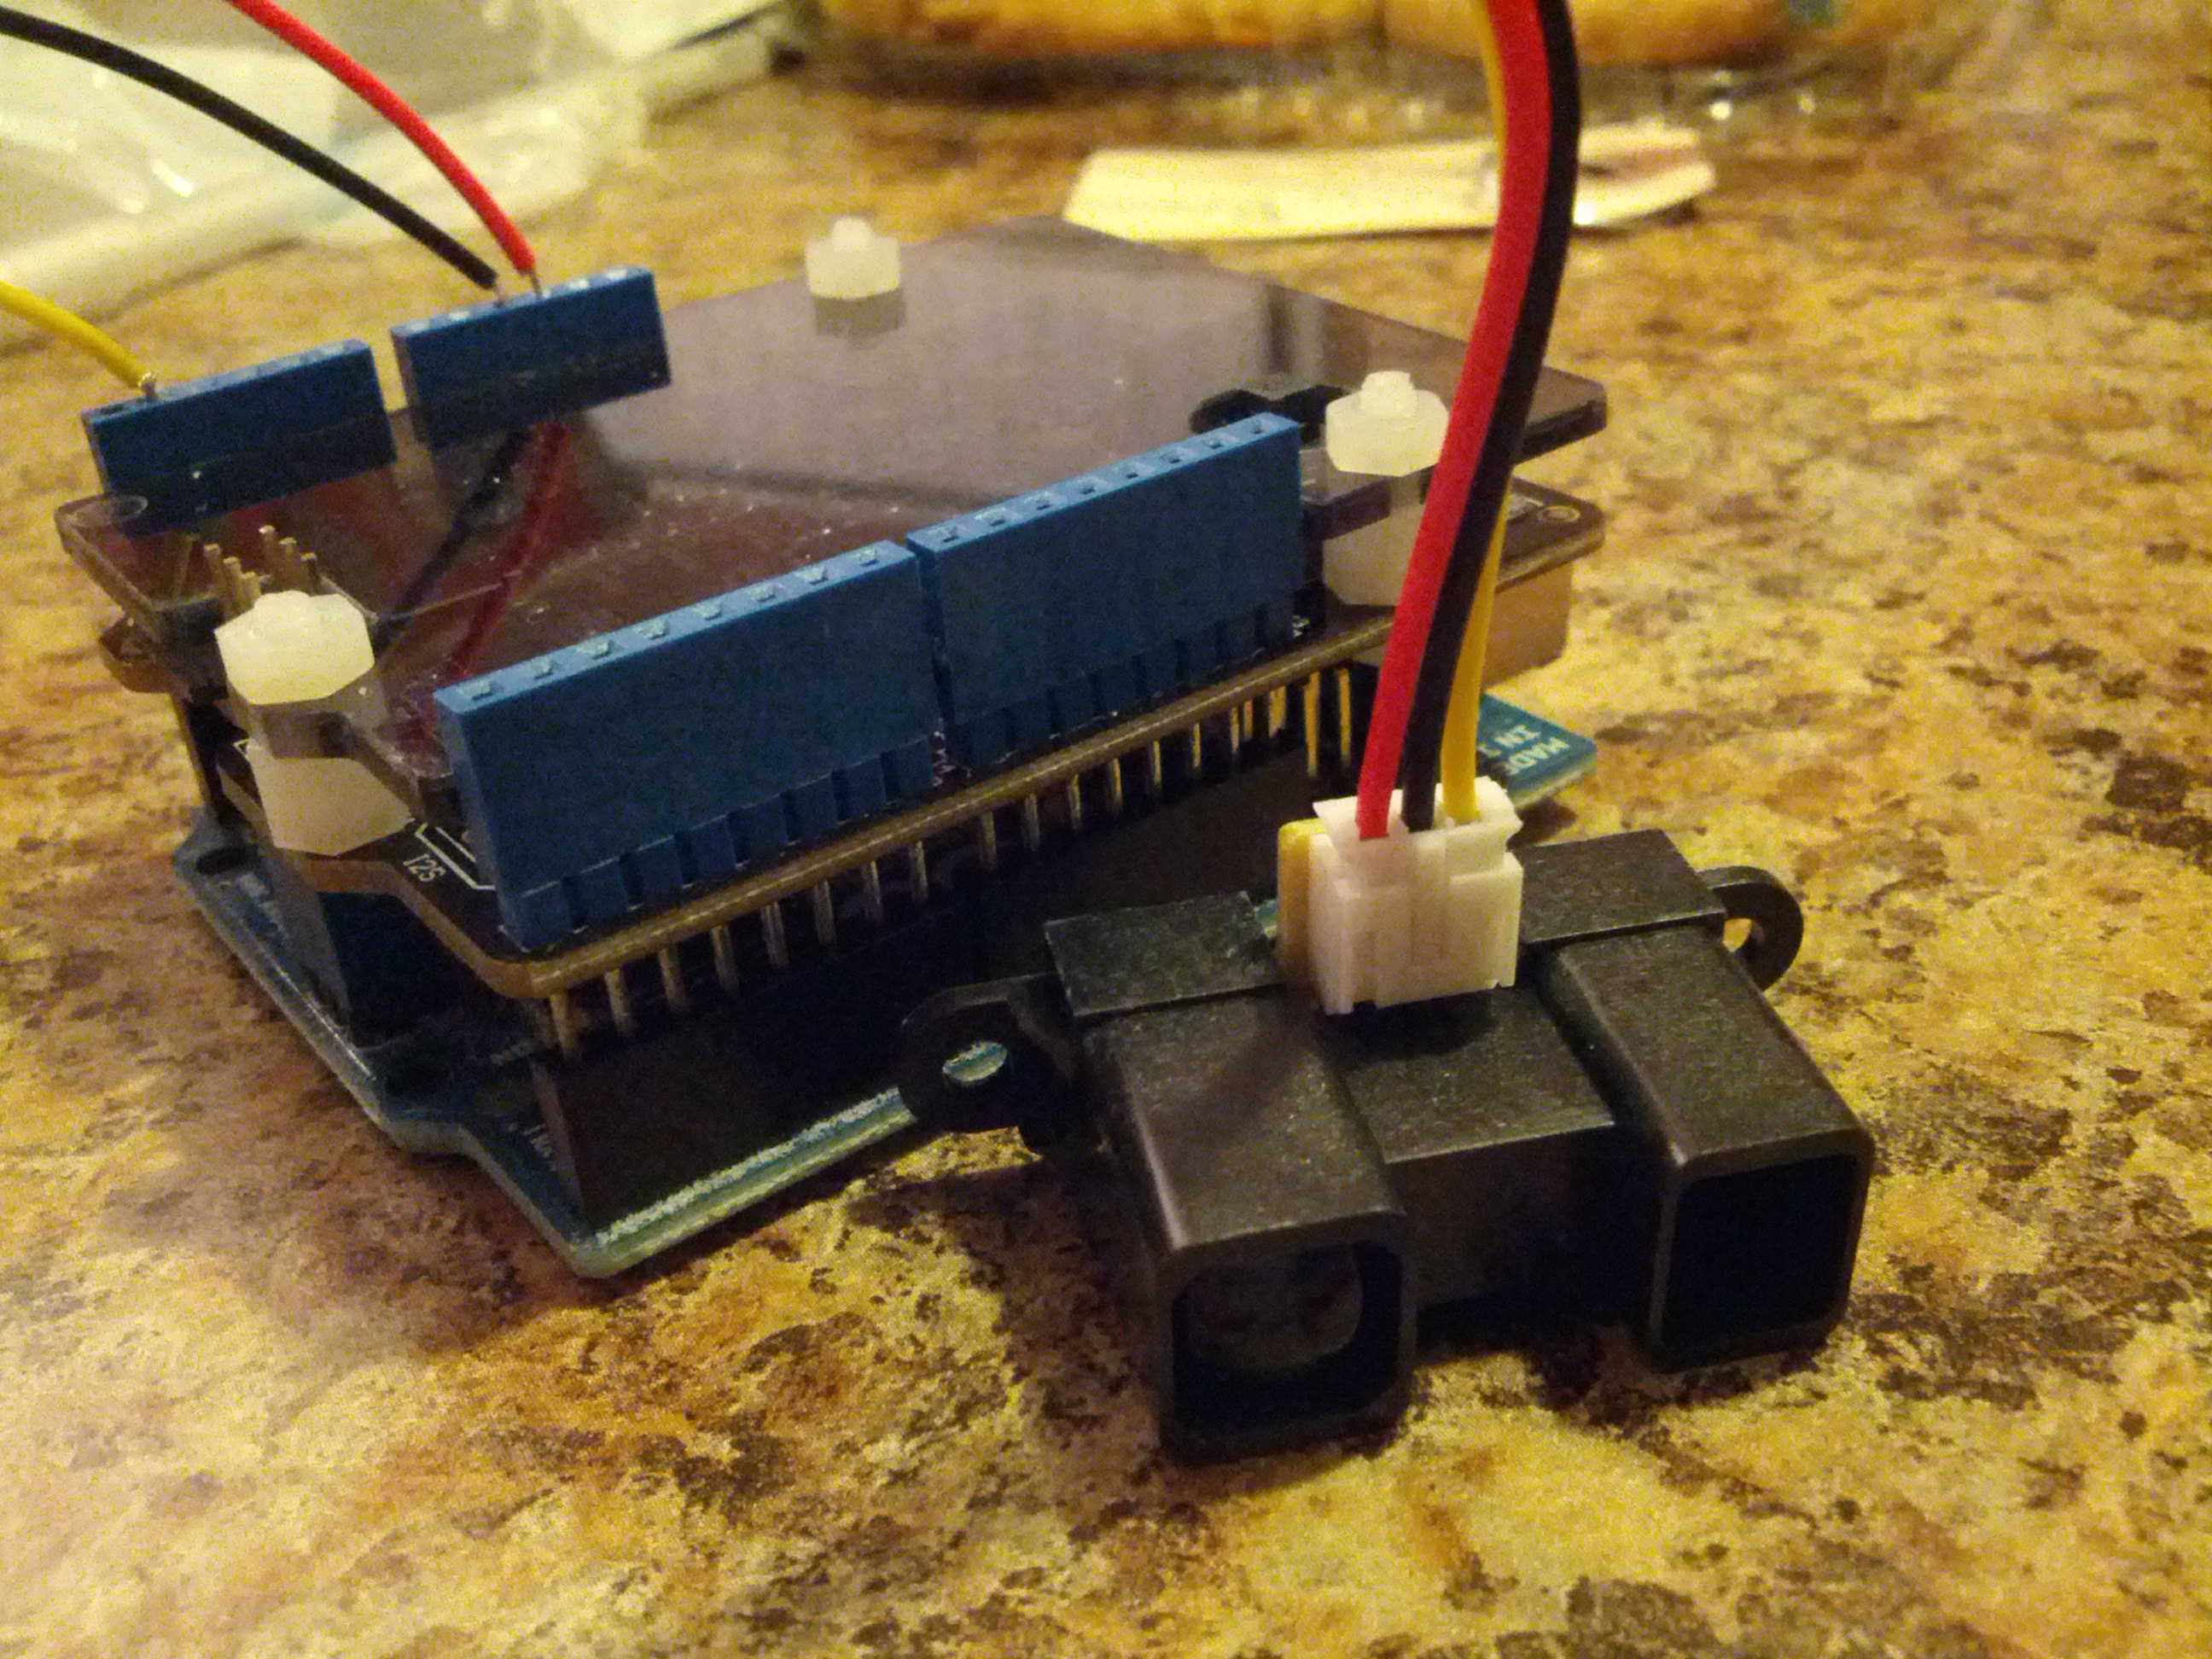
This is an Arduino Uno with a music shield and a proximity sensor.
The code is on Github.
-73-
Over the long weekend, one of the many things I got done was the Ten Tec. I found that there was a wire that was disconnected from the antenna. Once I resoldered it, I was able to hear on 75 meters (it was 1:30 AM, so the other bands were pretty dead).

I did notice that the RIT control is a little off, but since I never seem to use it, I’m not particularly worried about recalibrating it.
I also need to build a tuner. I’ll probably build it, I’m just stuck between a T network or a Pi network. Either would be simple to build.
-73-