
Blog Archives
Recently, a coworker brought a raingauge to me that was collecting dust somewhere in a storage room at the office. After making it work, I thought that I could certainly rebuild it. Better. Faster. With a much cooler interface.
I also thought that this might be a damn good opportunity for my BeagleBoard Black.
Setup
There are a few initial things that need to be done:
 ntpdate time.nist.gov

opkg update

opkg upgrade
These commands set the date and time, update the available package listing, and upgrade all installed packages to the latest version.
The next thing I did was edit /lib/systemd/system/bonescript.socket and change the listening port to 8080. This will break the connection between the board and the website (so you can’t click the buttons on some of the programming example pages and make the LEDs blink… which I admit is a pretty cool feature). Cloud9 will still remain on port #3000. More on that later.
Additionally, I changed /usr/lib/node_modules/bonescript/server.js to port 8080. This was really to try and maintain the connection between the board hardware and the website. It didn’t work, but I wanted things off of port 80 so port 80 could be used for a website.
After all this I rebooted the board.
When it came back up, I lost internet access to the board, so I edited /etc/resolv.conf to add the local DNS server in my office.
After that, I ran several installs:
opkg install mysql5

opkg install lighttpd

opkg install php php-cgi php-cli

opkg install lighttpd-module-fastcgi
Next, I edited the lighttpd config files per this blog post. Once those were edited, I restarted lighttpd and brought up my version of index.php (which included the phpinfo() command to show me that PHP was working).
Ruby & ThingSpeak Installation
I installed Ruby and got the Thingspeak source from GitHub (I created some folders for this, I’m assuming if you’ve made it down here you can figure that part out):
opkg install ruby ruby-dev

git clone git@github.com:iobridge/thingspeak.git

gem install bundle
Then I went to the GitHub project page to follow the instructions to install ThingSpeak. I ran into several problems. One of them related to a file not being able to find assert.h. I fixed this by setting the C_INCLUDE_PATH variable:
export C_INCLUDE_PATH=/usr/include
The next problem wasn’t so easy. The linker was having a problem finding one the libgcc_s library. I ultimately fixed this by linking /usr/lib/libgcc_s.so to /lib/libgcc_s.so.1:
ln -s /lib/libgcc_s.so.1 /usr/lib/libgcc_s.so
Then, I started getting “Command not found” for /usr/bin/mkdir. That was sort of a “WTF?” moment, considering I created a folder for the ThingSpeak source earlier. I figured it must be hard-coded to use /usr/bin and the mkdir command was in /bin. More symbolic links:
ln -s /bin/mkdir /usr/bin/mkdir
Once these symbolic links were in place, I was able to get further in the “bundle install” process, only stopping thrice for the following missing items:
opkg install libmysqlclient-r-dev

opkg install libxml2-dev

opkg install libxslt-dev
After these three items are installed, I could bring up ThingSpeak by running:
rails server -d -p 3001
And bringing up http://localhost:3001
In the next post, I’m going to get into the rest of what I was doing.
-73-
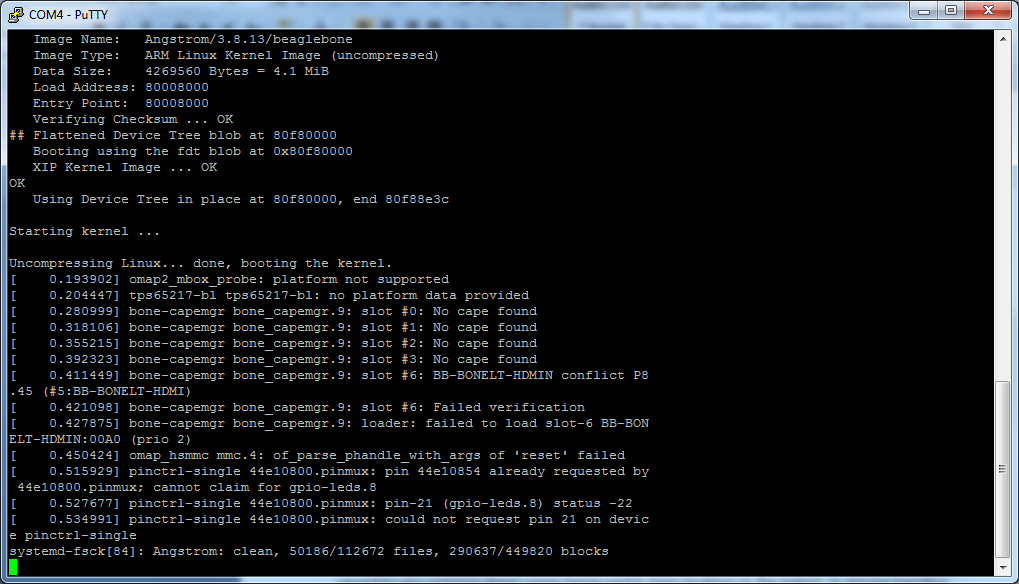
I’ve been playing around with my BeagleBone Black quite a bit recently. It all started with one of my coworkers bringing in a rain gauge that we had collecting dust somewhere in an office storage room. I had been installing software to the BBB and ran out of space on the eMMC (internal memory) chip. So I tried to boot from an SD Card – the one I updated the BBB to the latest software with and still loaded with the image. It appeared to me that it maybe had been reloading the eMMC, but I couldn’t tell for sure. After around a half hour, I power-cycled the BBB. Bad news, it wouldn’t boot. I don’t have the correct HDMI cable, and I’m at work, so my resources are pretty limited.
Enter the FTDI port on the BBB. Enter the fact that I don’t have an FTDI cable at the office. D’oh!
But I have a few Arduino Unos.
I wondered, and then quickly looked on the Internet to find a page on Instructables that describes how to use an Arduino as an FTDI programmer. I then looked at a reference for the pinouts. A page at Circuitco has the pinouts that seemed like they’d work – ground, RX, and TX. I hooked them up and…
It gets a little bit more MacGyver-ish. I have only a small box of jumper wires at the office, a few shield headers, and a breadboard…
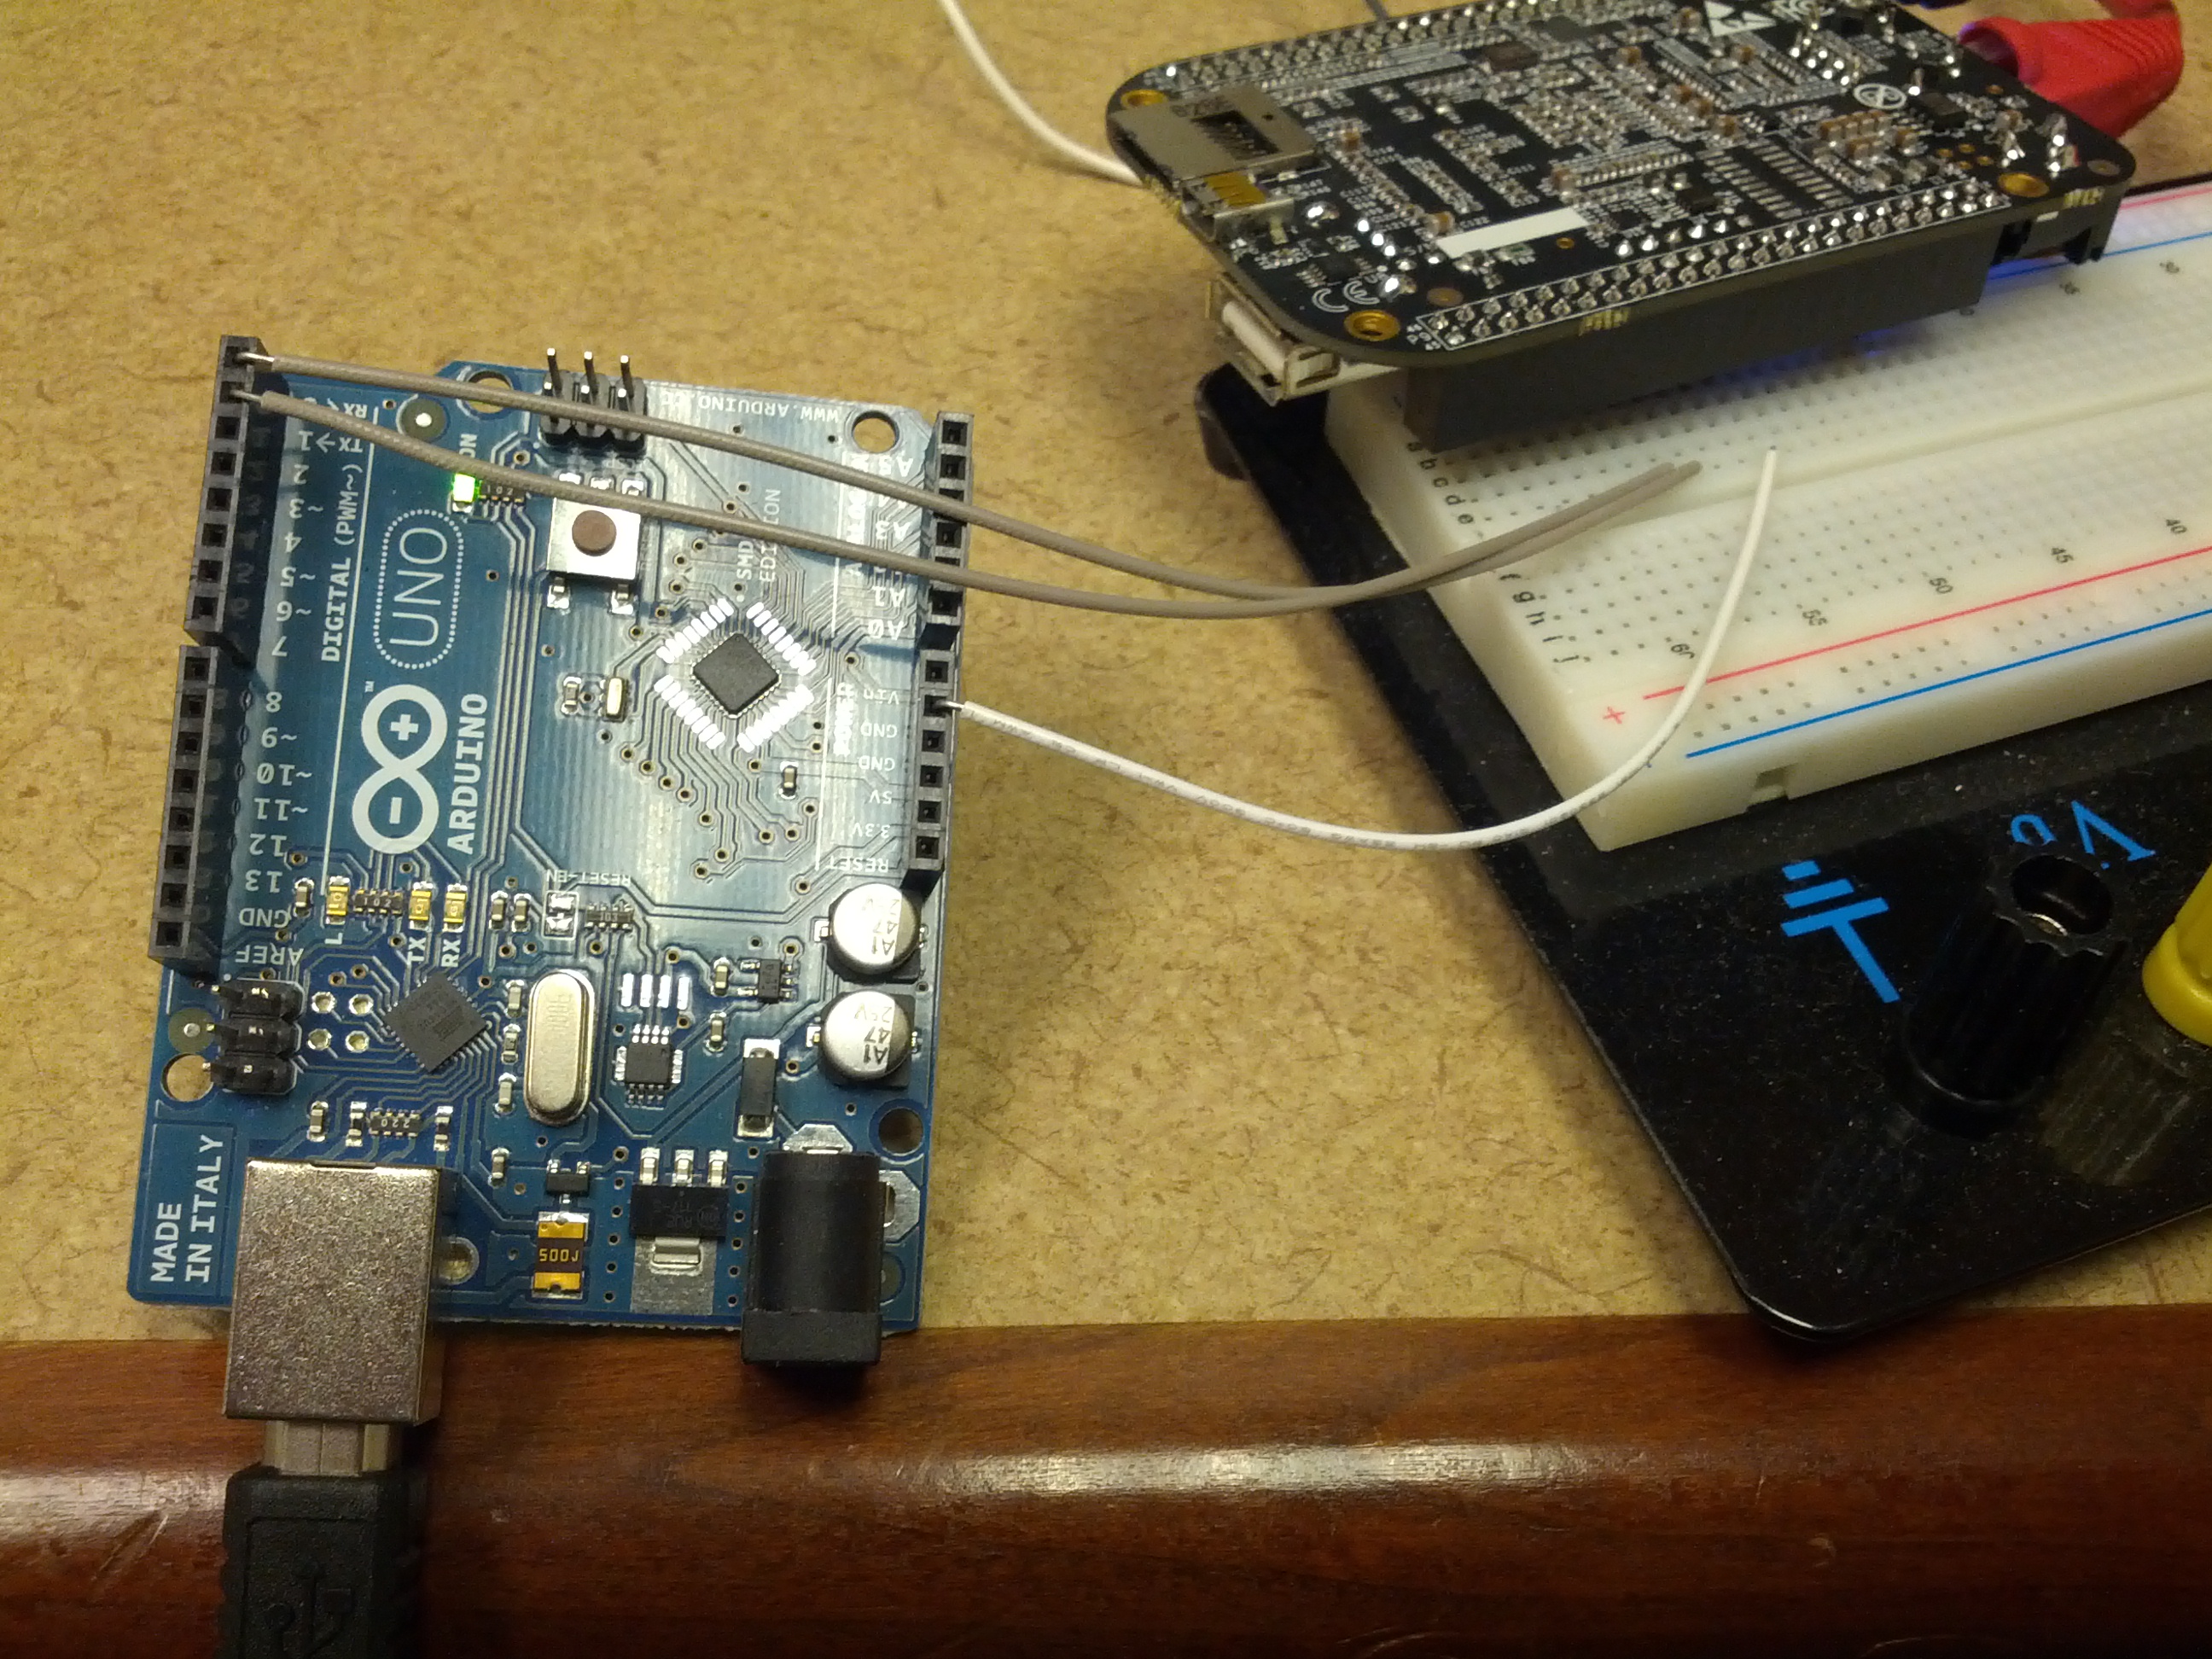
This is an overview of the setup. The Arduino RX, TX, and Ground are connected to a breadboard that has a shield header that connects to the BBB’s FTDI port.
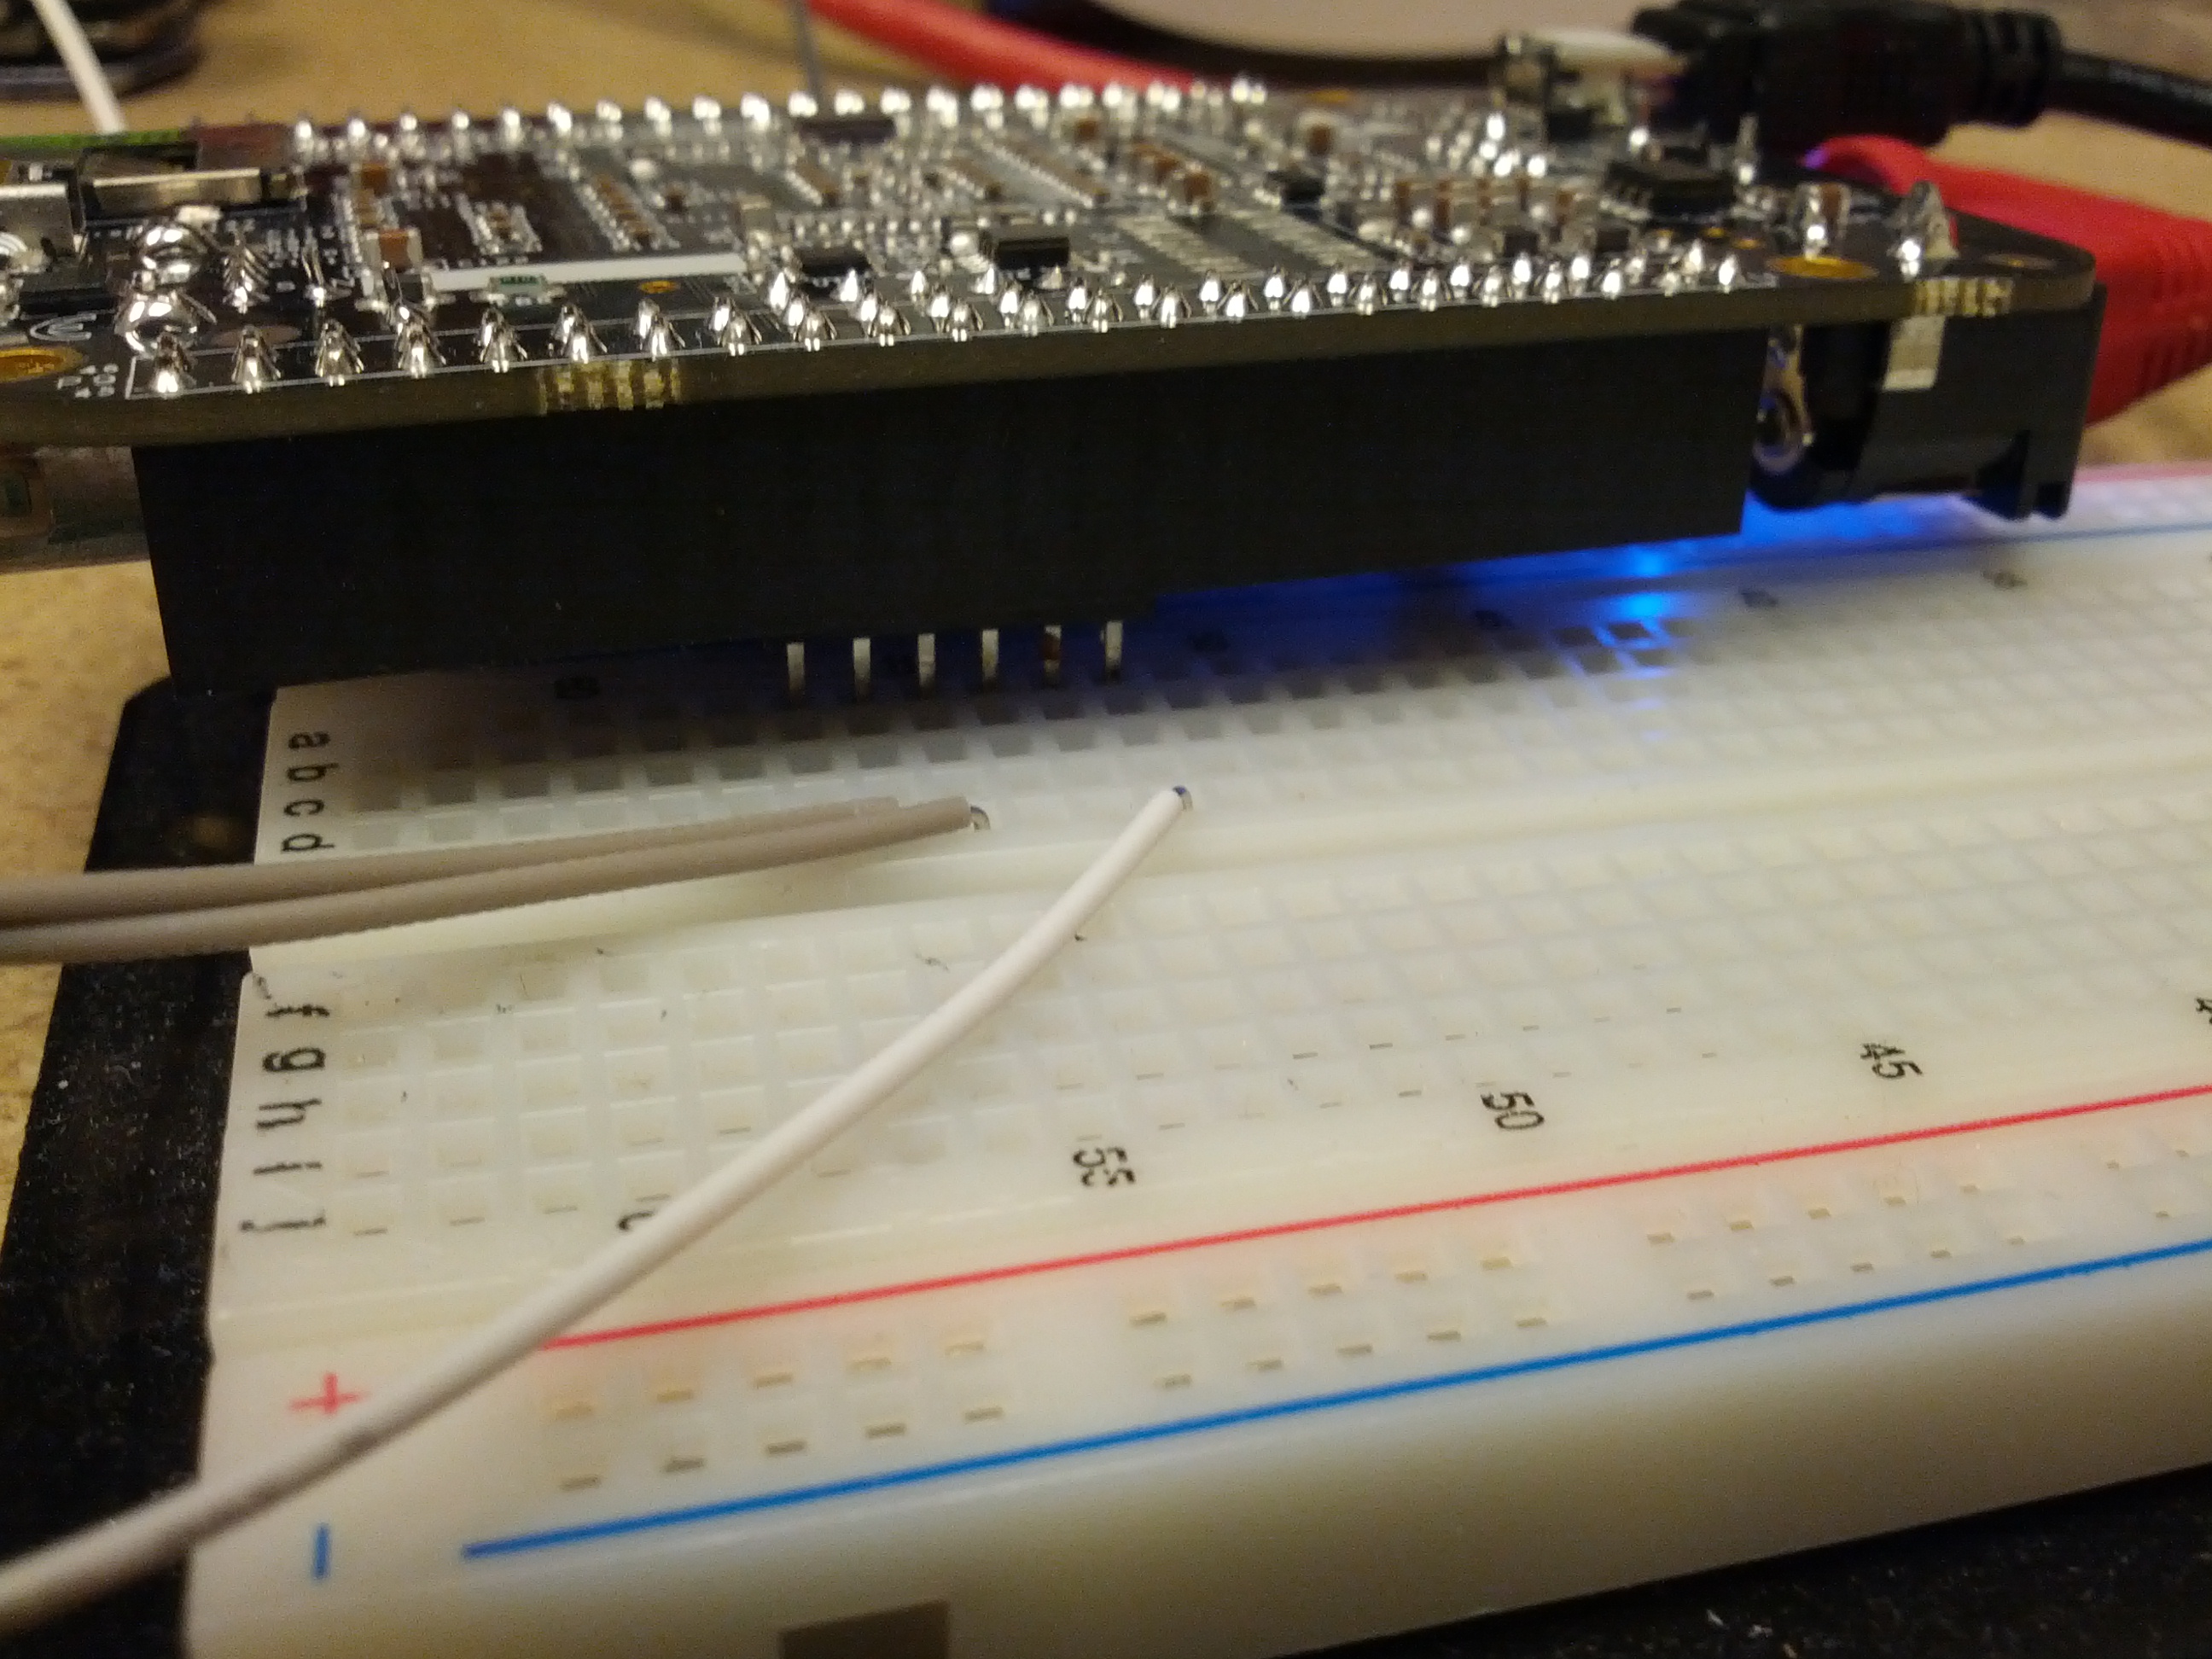
This is the connection between the breadboard and the BBB.
I decided to move all my radio stuff from my desktop to my laptop for now. My desktop has never been a reliable computer – there’s something wrong with it that causes it to stall (and whatever it is, it’s hardware and not OS, as it has done the same with XP or Mint). It also goes SLOOOOOOOOOOOW. In fact, it goes so slow, I tend to boot it at least 10 minutes before I need it, and it was degrading to the point where it wasn’t even ready then.
So, one thing I ~need~ want to be able to do is digital modes like RTTY (I know many hate it, but I do enjoy RTTY contests). The problem I ran into is not a new one: there’s no serial port on my laptop, meaning my old way of triggering my radio’s PTT is now a useless group of components.
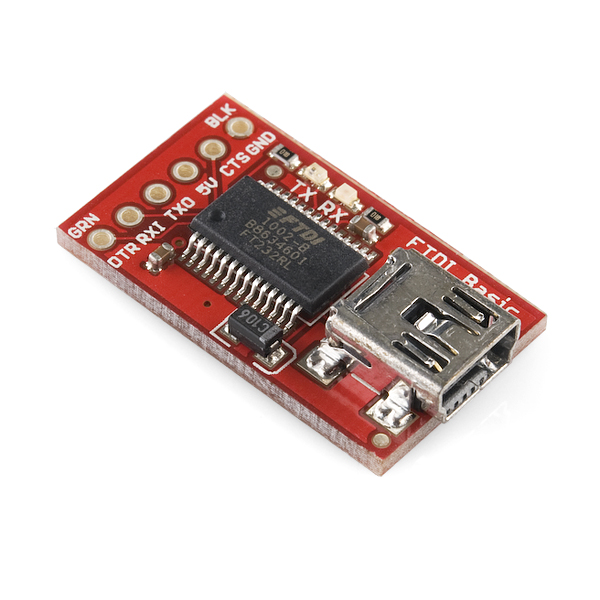
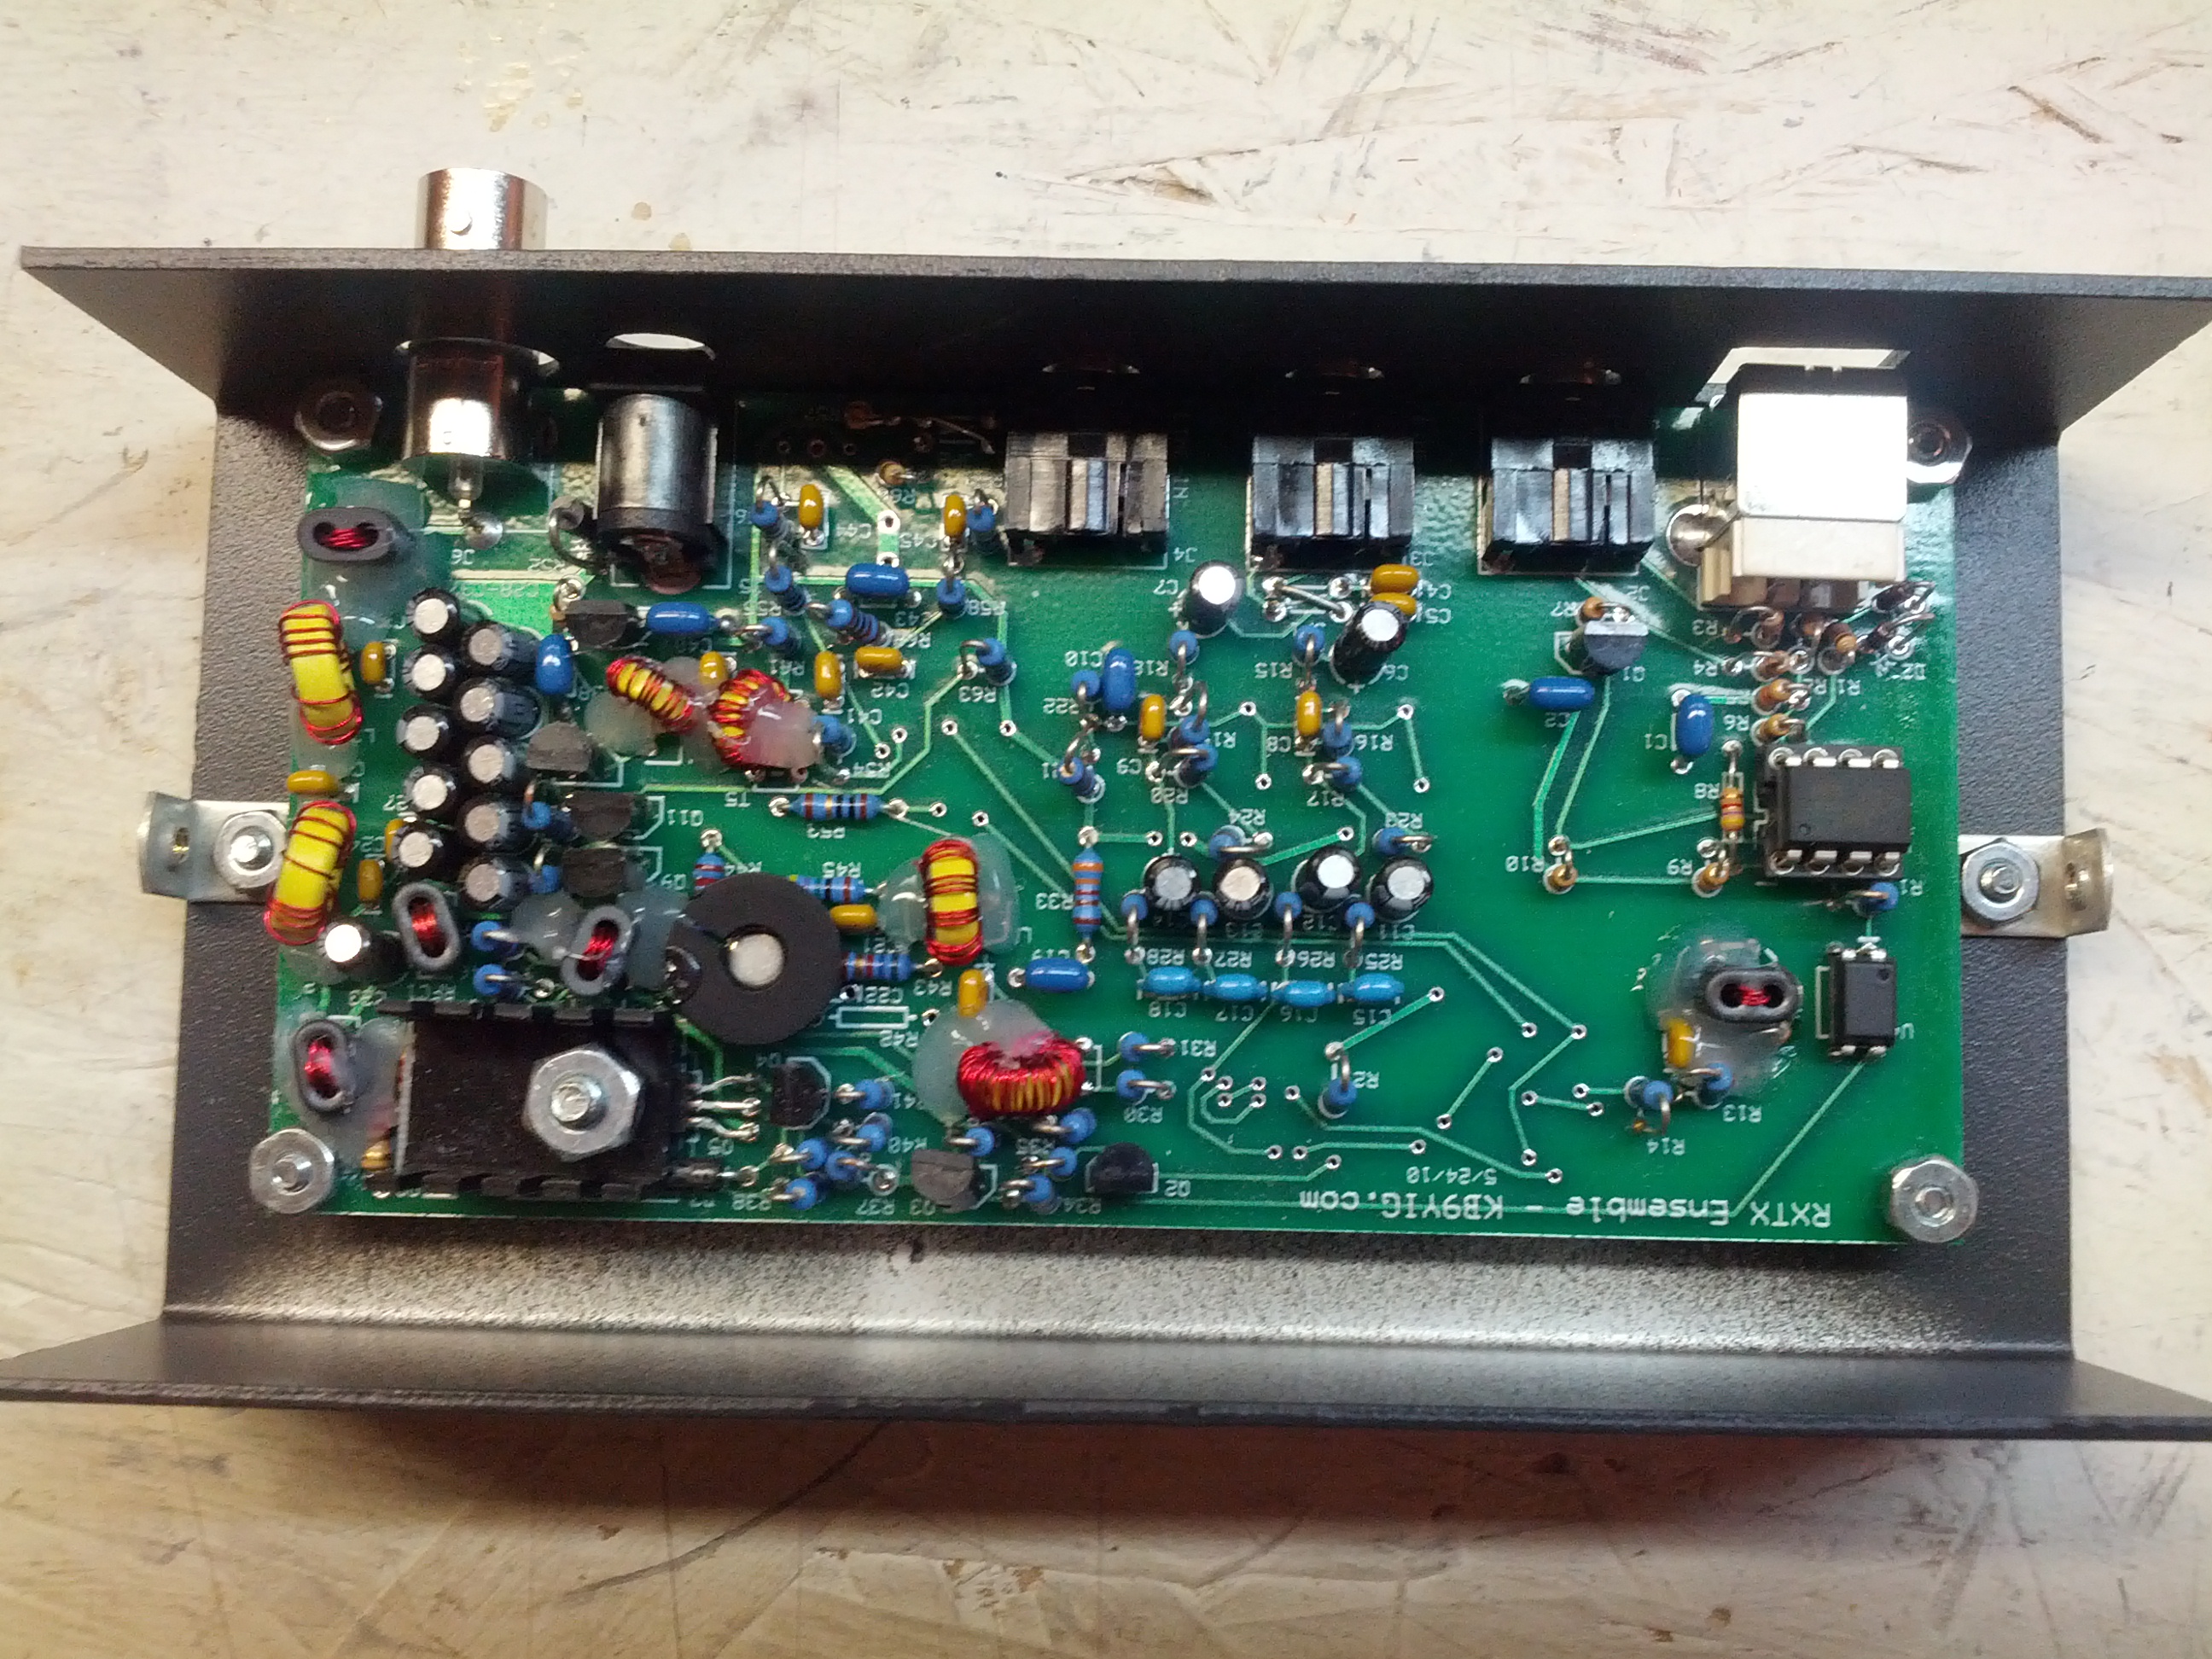
I happen to have a Sparkfun FTDI Breakout board sitting nearby. It has a damaged trace to the 5V output caused by the fact that my soldering iron is an old Radio Shack 45W pencil (which puts out far too much heat for many boards). I had set it aside with the intent to use a wire jumper to fix the problem, but after getting it back off the electronic triage shelf I realized that everything worked except the 5V output. The module looks like this (picture credit from Sparkfun):
I first wired it in with my transistor switch to look something like this:
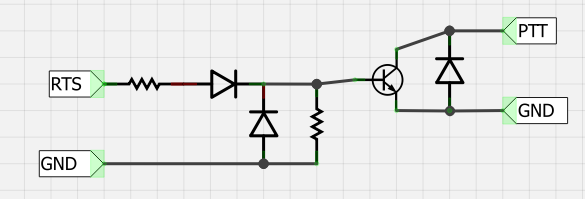
It didn’t work.
I started to investigate. I noticed that DTR, RX1, TXO, and CTS were all 5V, but DTR would drop to 0V when the DTR was activated via software.
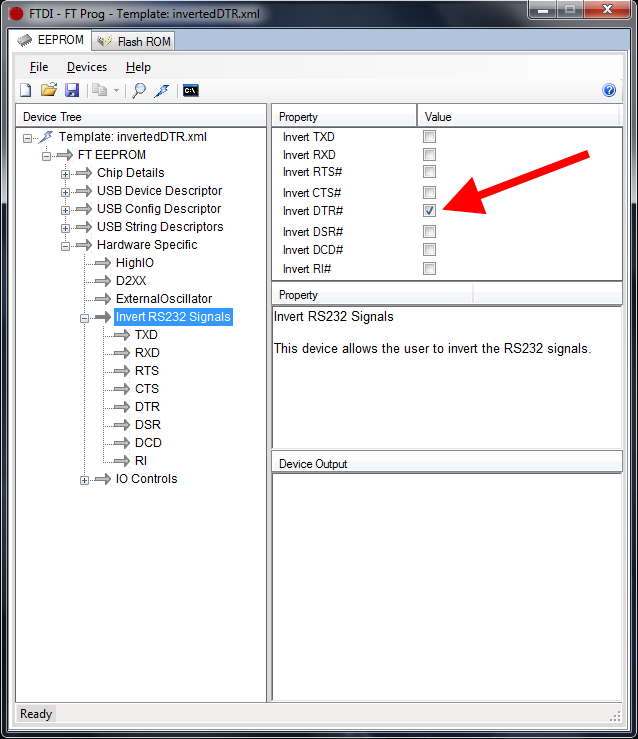
So I did a little research. FTDI makes their boards customizable, so I looked into the software from FTDI’s website and found a configuration utility called FT_PROG. From this utility, I was able to read the chip and then re-write the chip to invert the DTR signal. Note the screenshot below:
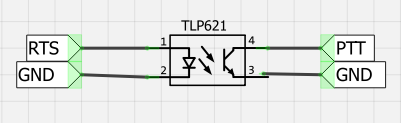
This allows me to use the FTDI board with an optoisolator and trigger the PTT. The schematic is below:
So now I just have to fix the USB soundcard issue…
-73-
A few weeks ago, I listed my plans for the summer. They seemed all good.
Then I went to the Dayton Hamvention and that changed everything.
So my new plans:
Balanced Line Antenna Tuner
I didn’t buy anything to change what I said in the last post. I saw two or three nice balanced line tuners, and they were out of my price range. Having the antenna analyzer might help on this, though, as I can do more tests on the tuner.
Ten Tec Rebel
I intend to buy a Rebel. Then I’m going to add an LCD screen to it so I can see things like the frequency. I went to the Ten Tec booth to discuss that with their salesperson.
APRS I-gate/Digipeater
There’s no changes to this. I do have to build another 2m groundplane antenna, and that antenna analyzer might help a little with that. 🙂
NEW: 6m Mobile Antenna
With differing work schedules for most of the locals I talk to on the repeater and the lack of getting a lot of time on my base/mobile rig, I’m considering moving that to the truck and running 6m.
Removed: Antenna Analyzer and Frequency Counter
The antenna analyzer replaces both of these, so there’s no point in me building them right now.
-73-
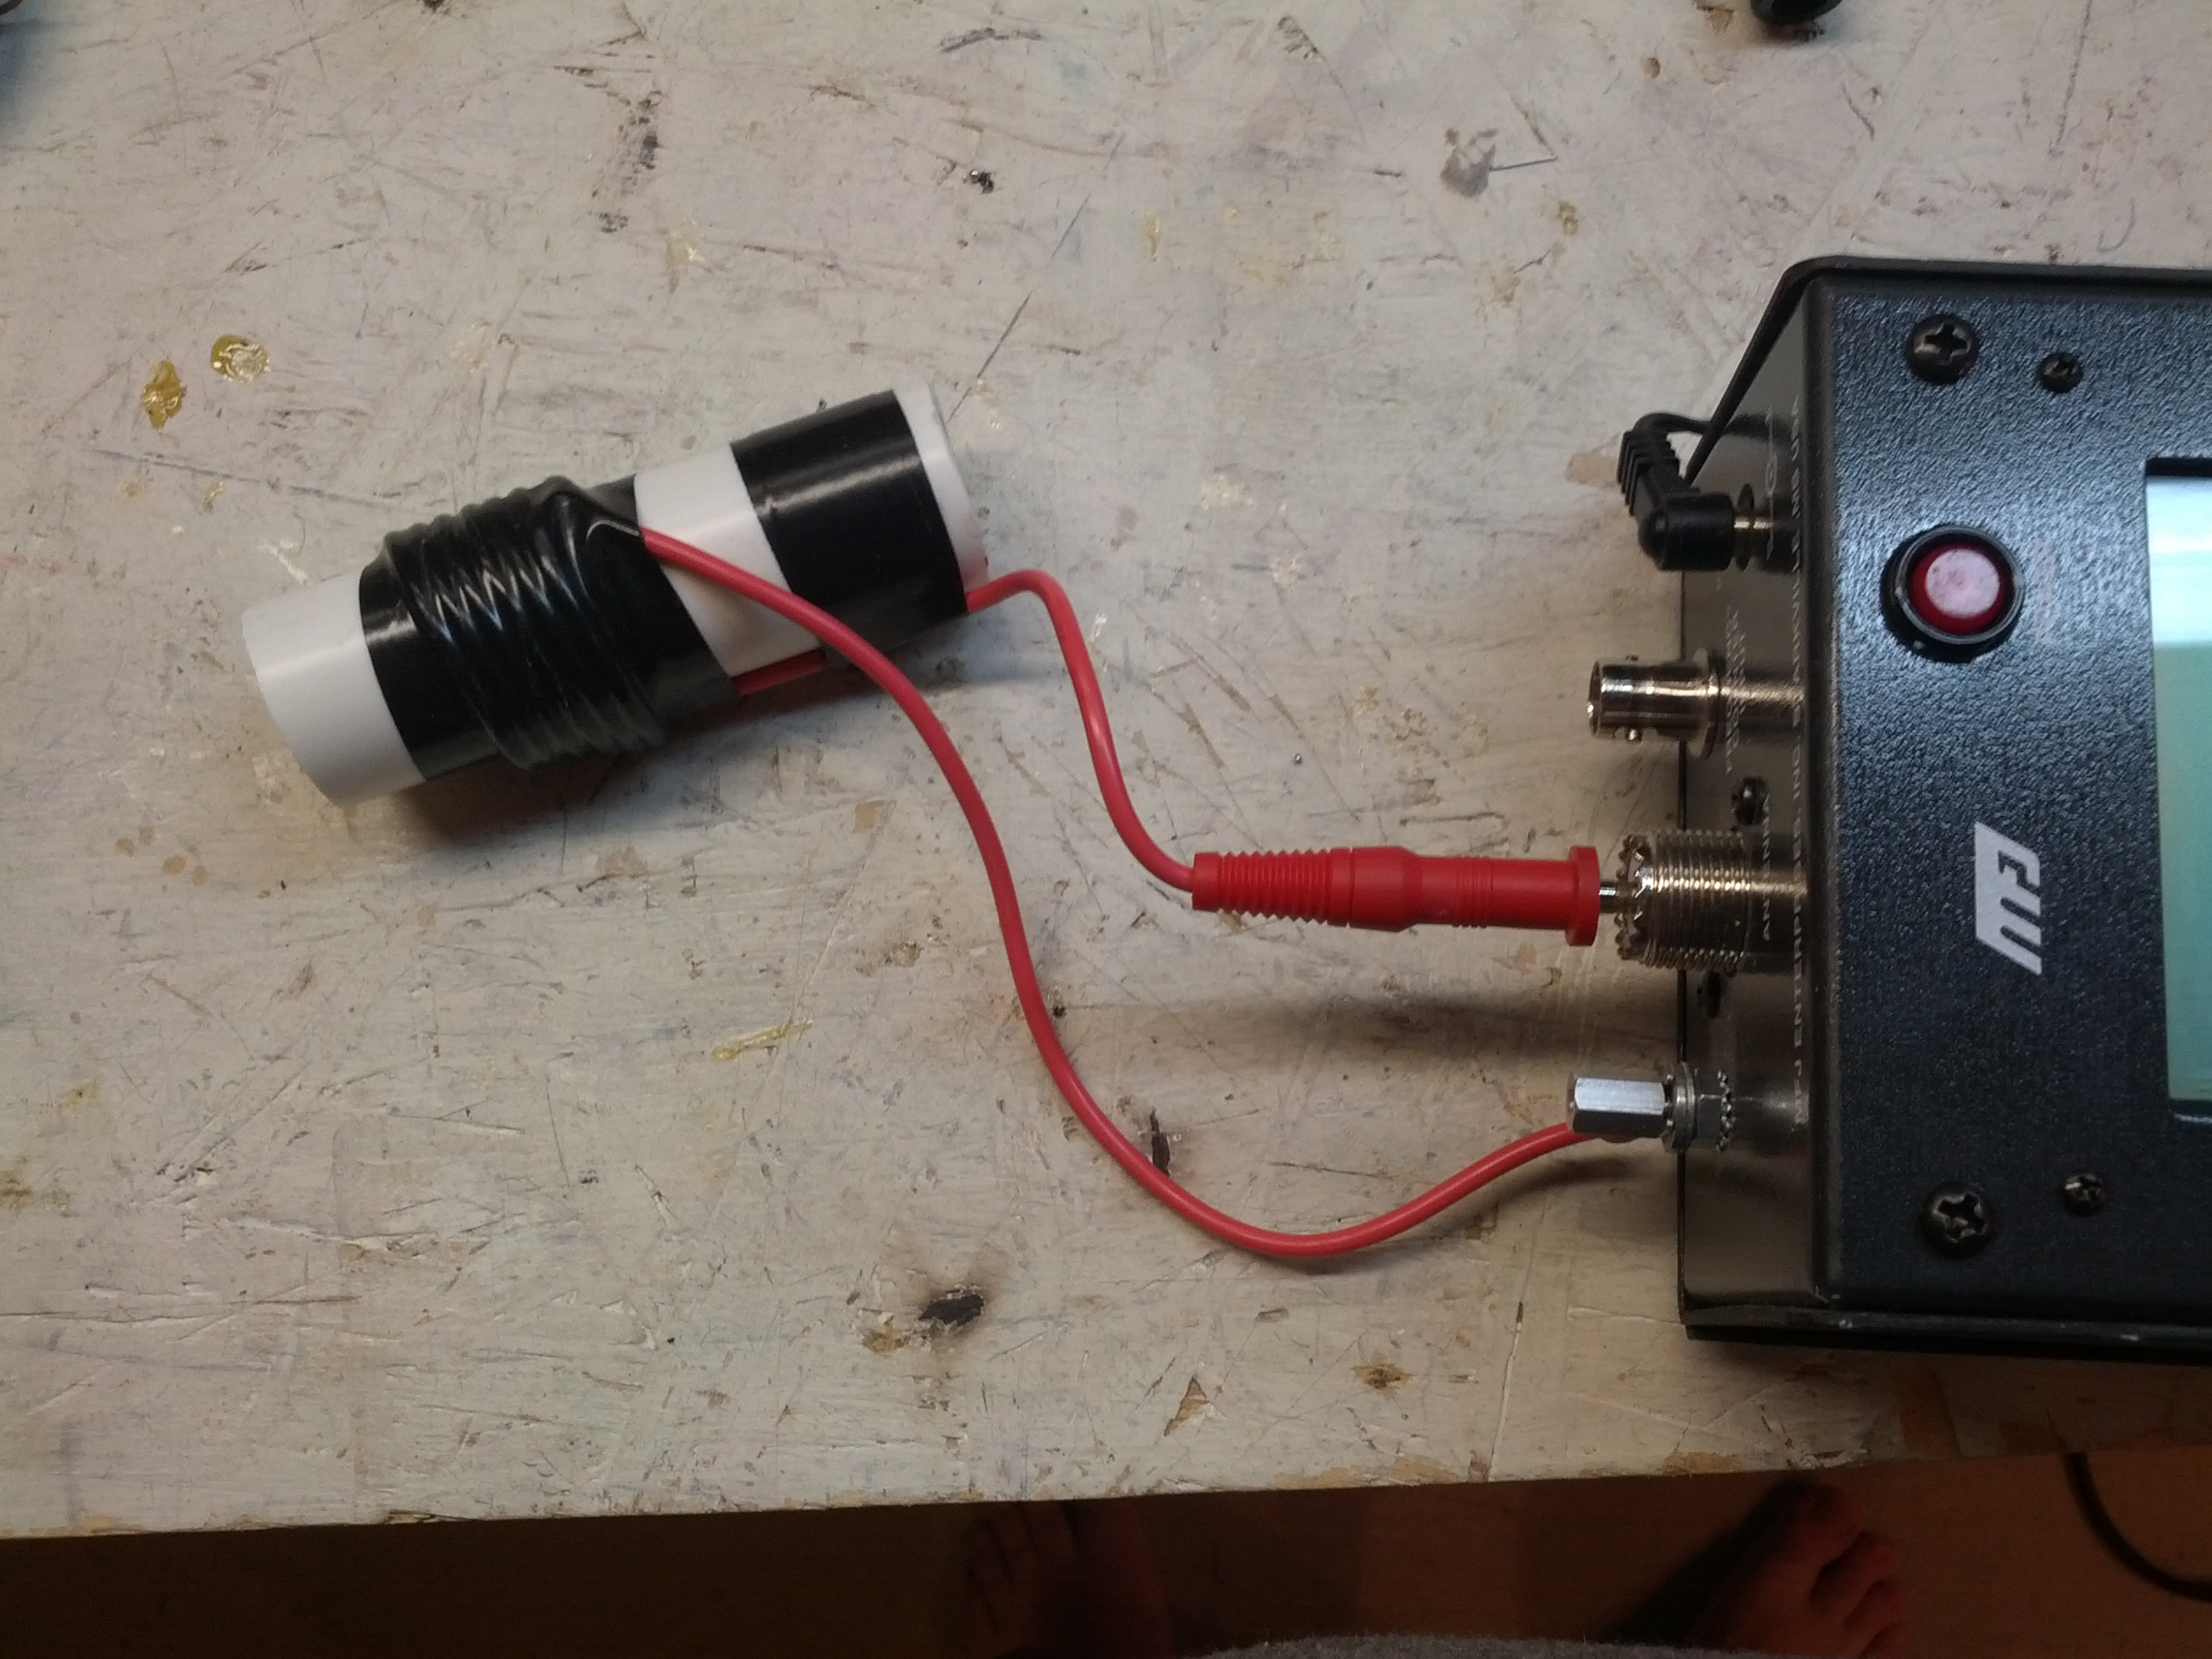
Since I had a few minutes after the XYL went to bad (after a *very* busy Saturday for both of us), I went into the basement and played with the antenna analyzer.
This isn’t the most ground-breaking post on my blog, but they don’t really teach much about antenna analysis in traffic engineering classes!
Scop’d
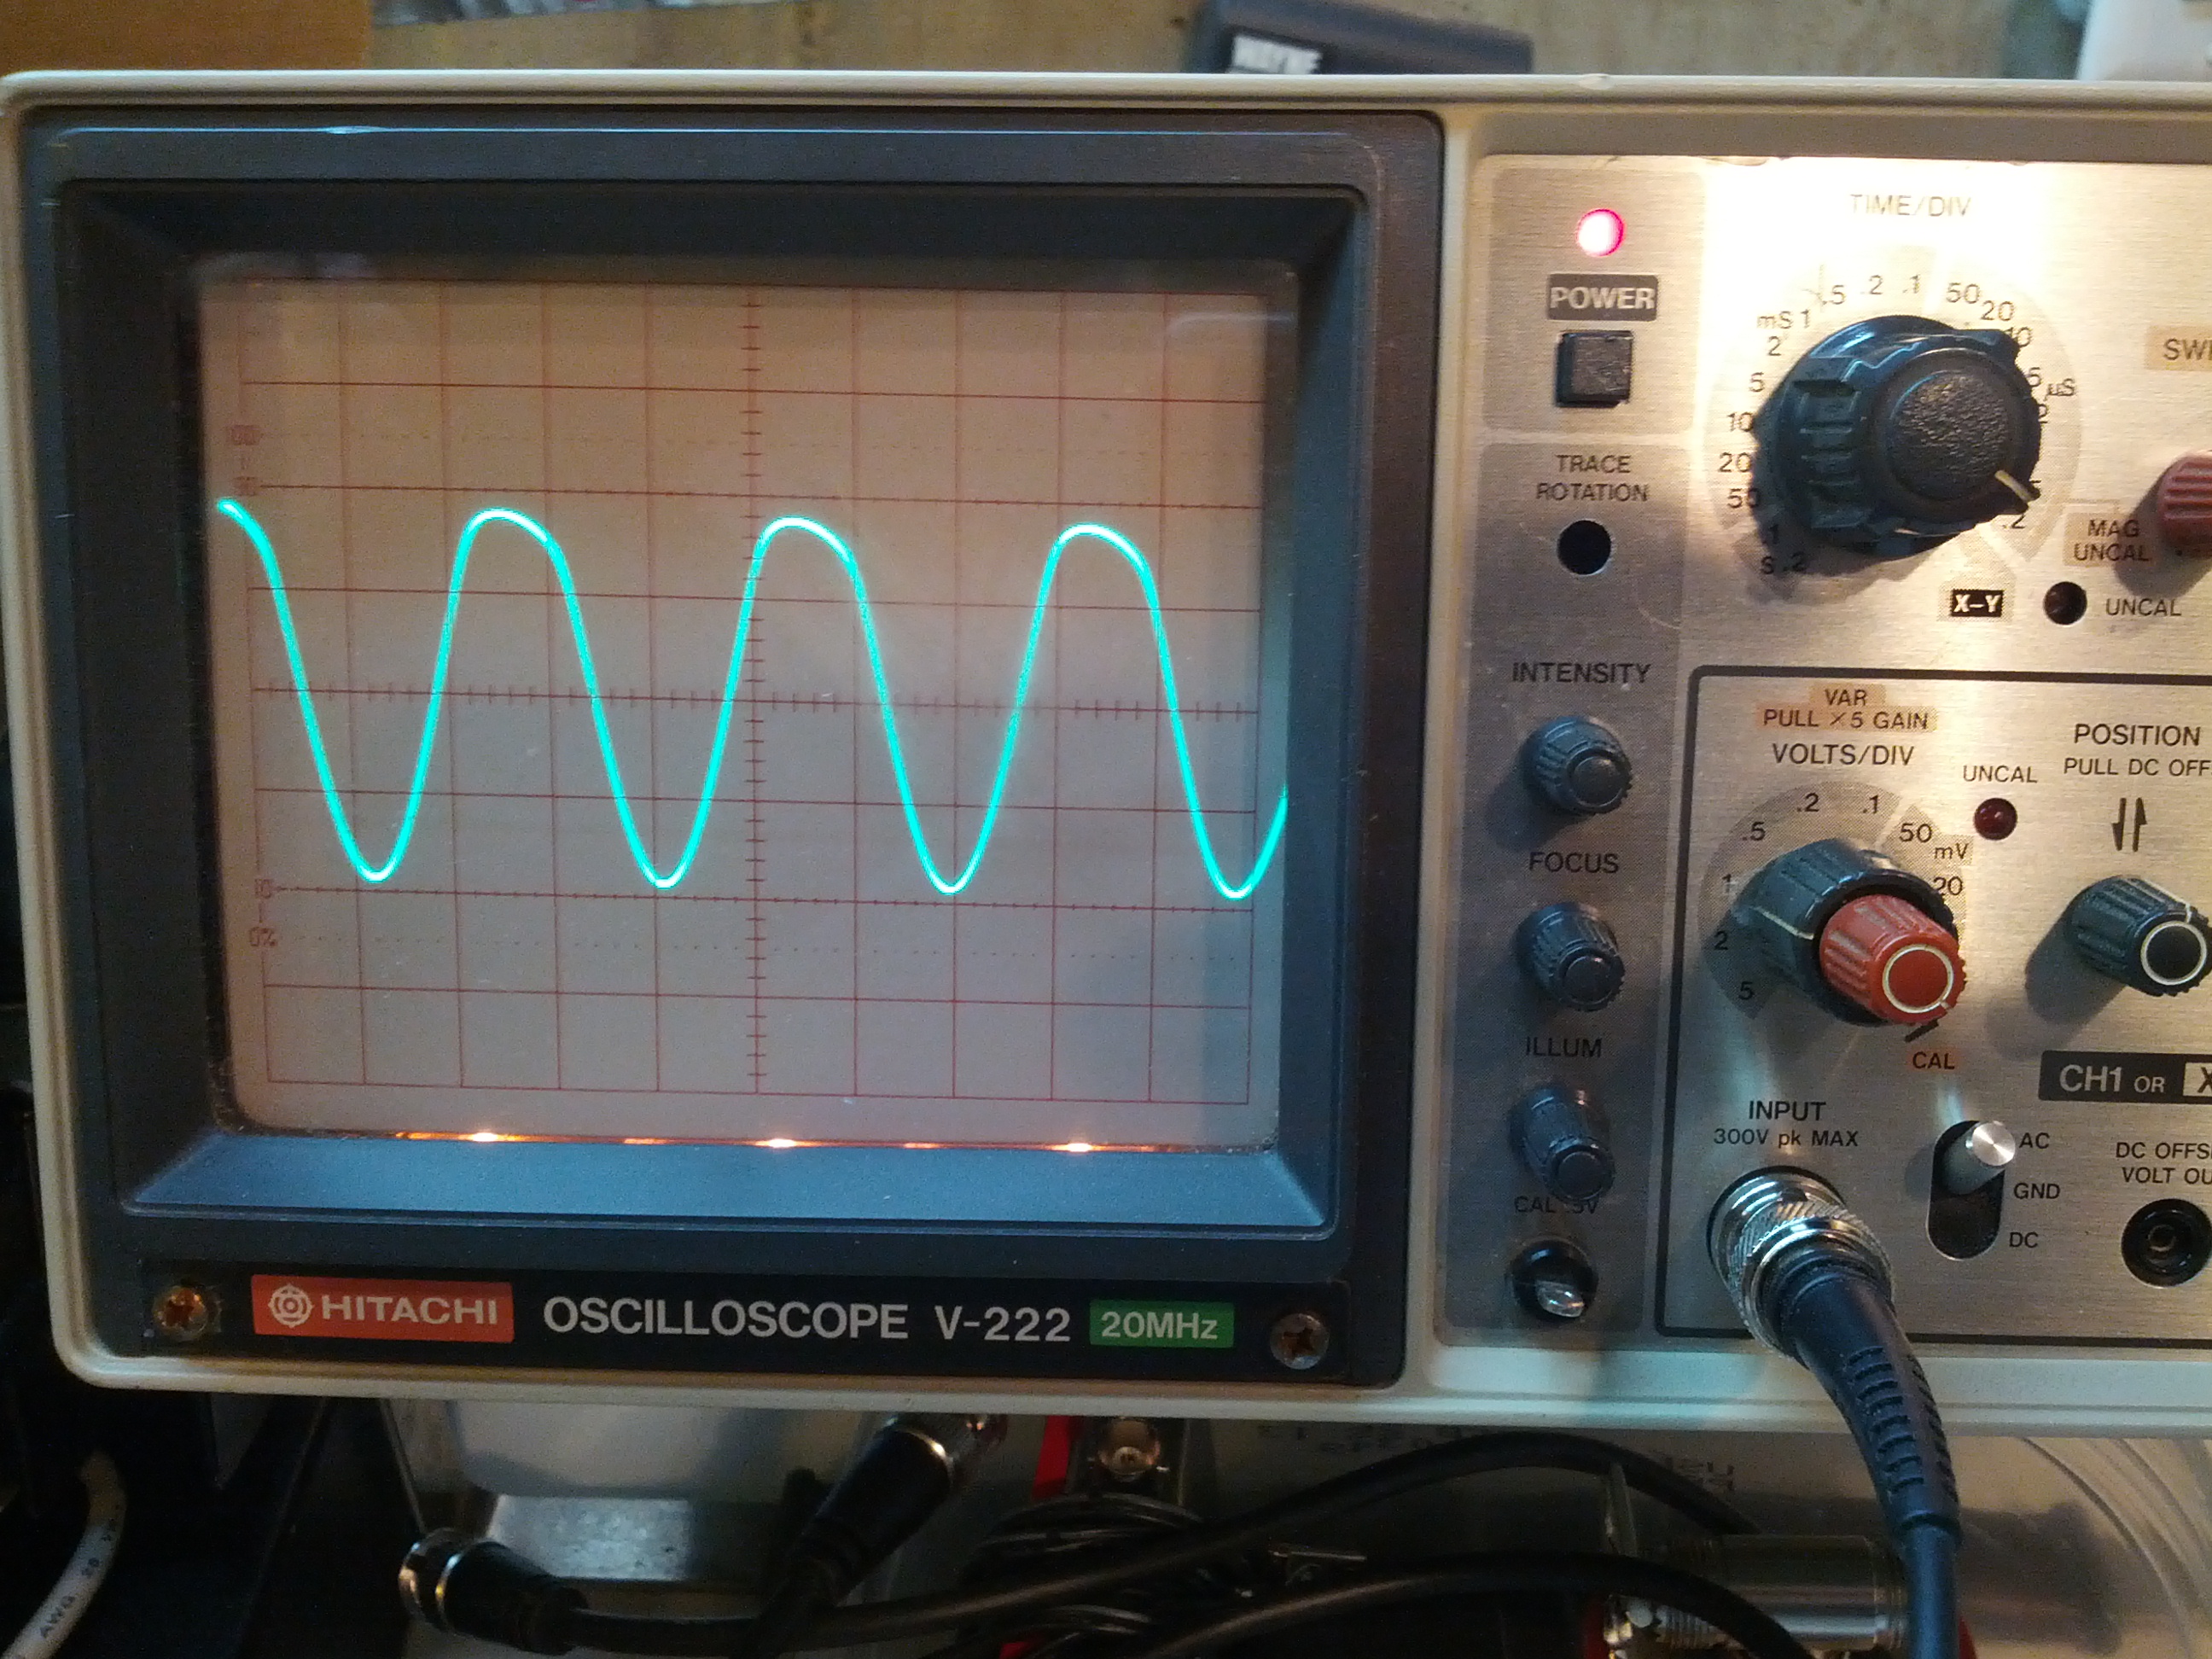
The first thing I did was drop the frequency of the analyzer to something low and see how much power the analyzer puts out. 4V peak-peak.
SWR Check – 25 Ohms
SWR is based on the mismatch between the impedance of the source and the load. So a 2:1 SWR could mean that the load is twice or half the source impedance. So I decided to put a few resistor arrangements on the analyzer and see if what happens is what I thought would happen.
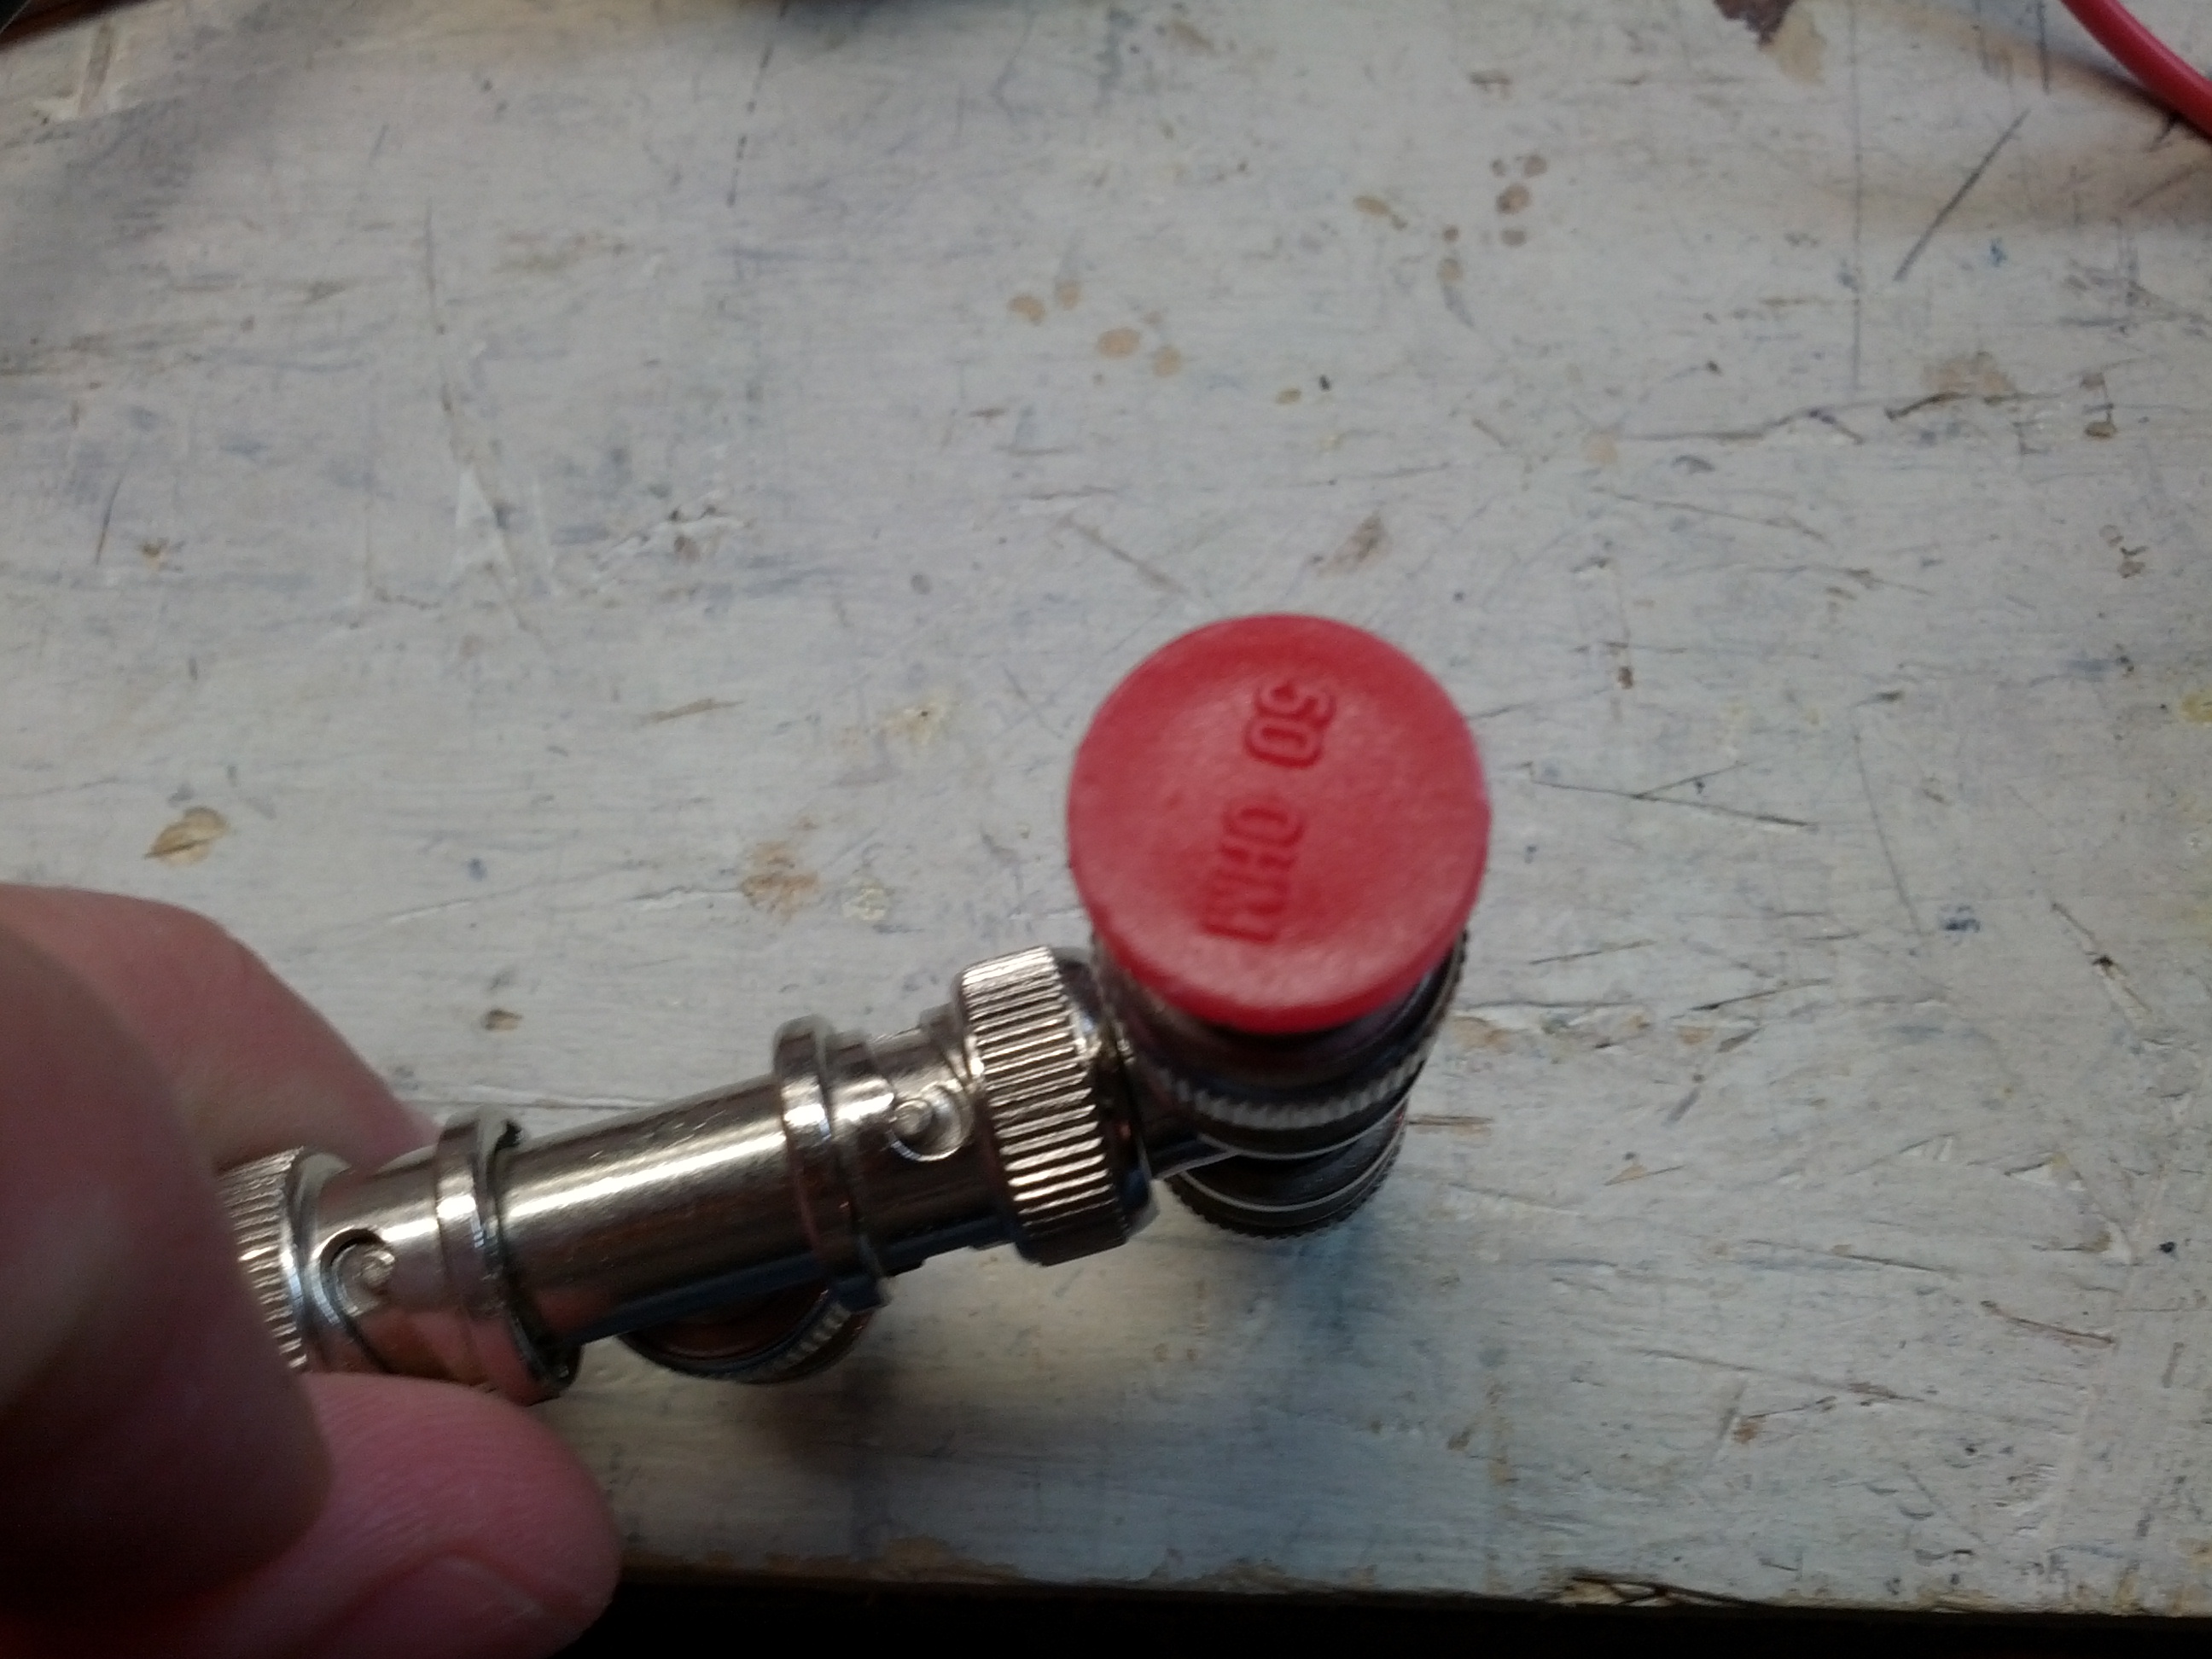
So I had these terminators from way back when they used BNC token ring networks. I’ve never worked with anything but Ethernet (using RJ-45 connectors), so I’m not sure how I got these, but they came in handy for this.
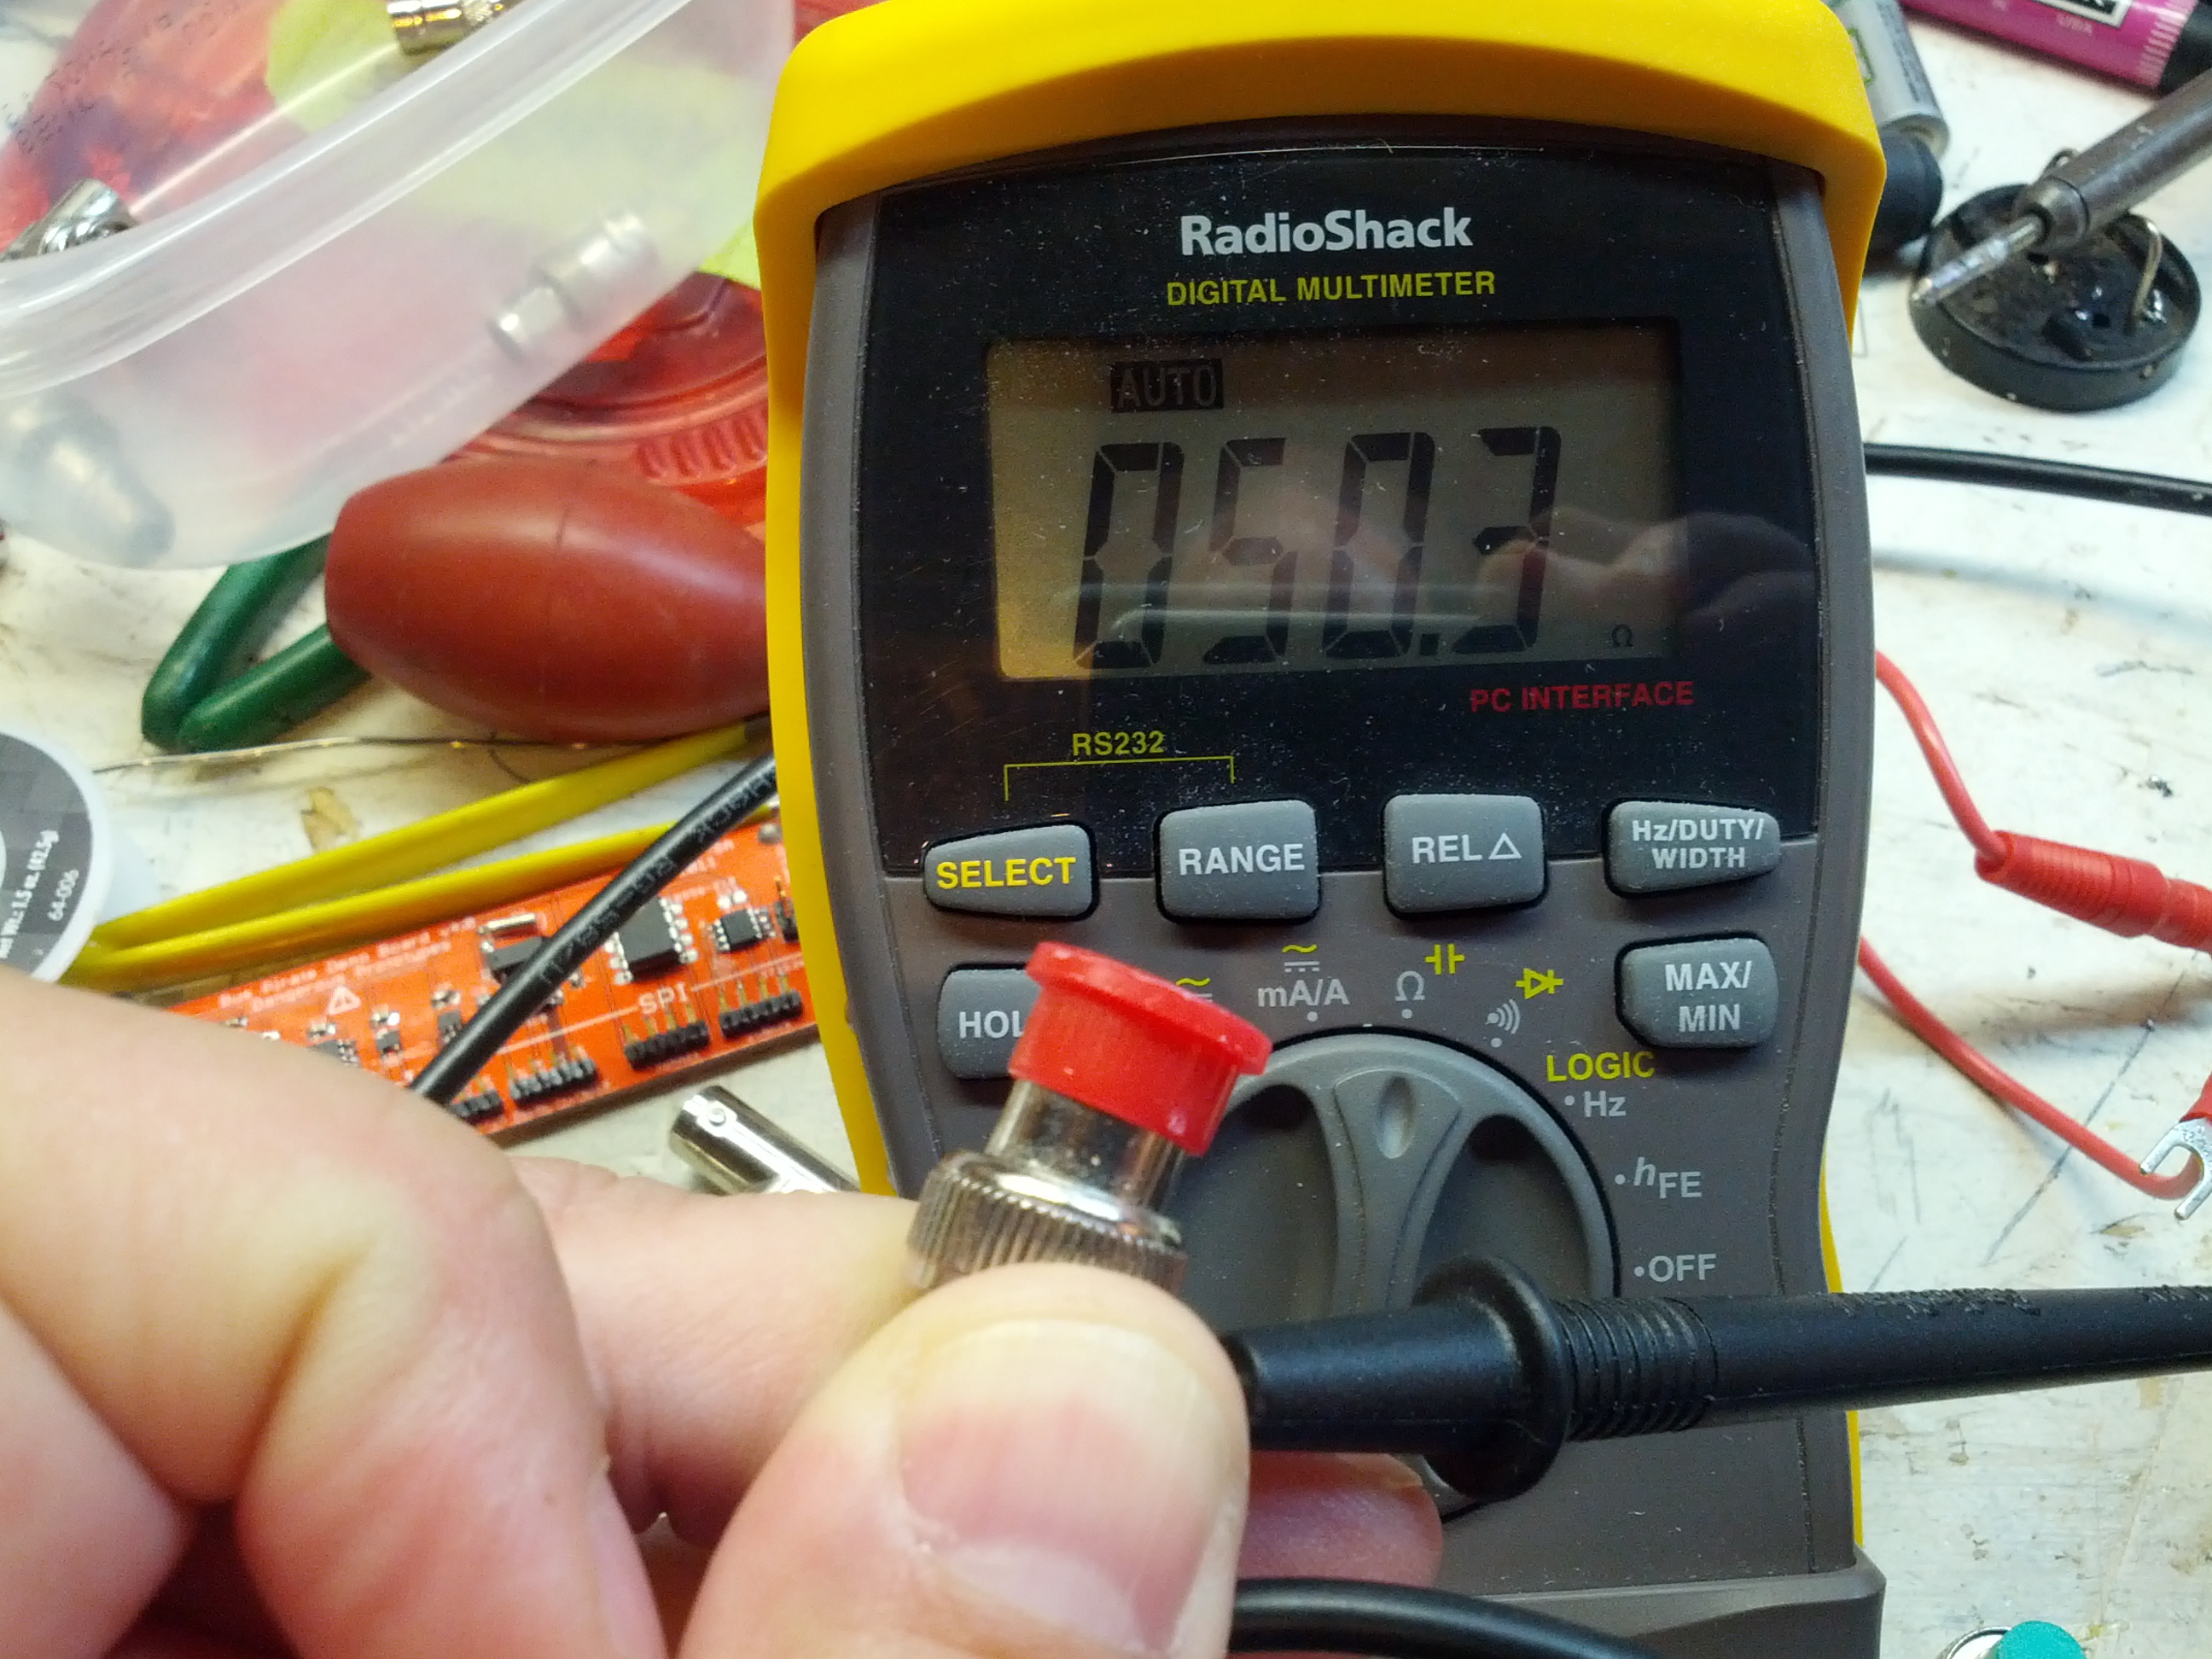
This one is 50.3 ohms. Within a 1% tolerance.
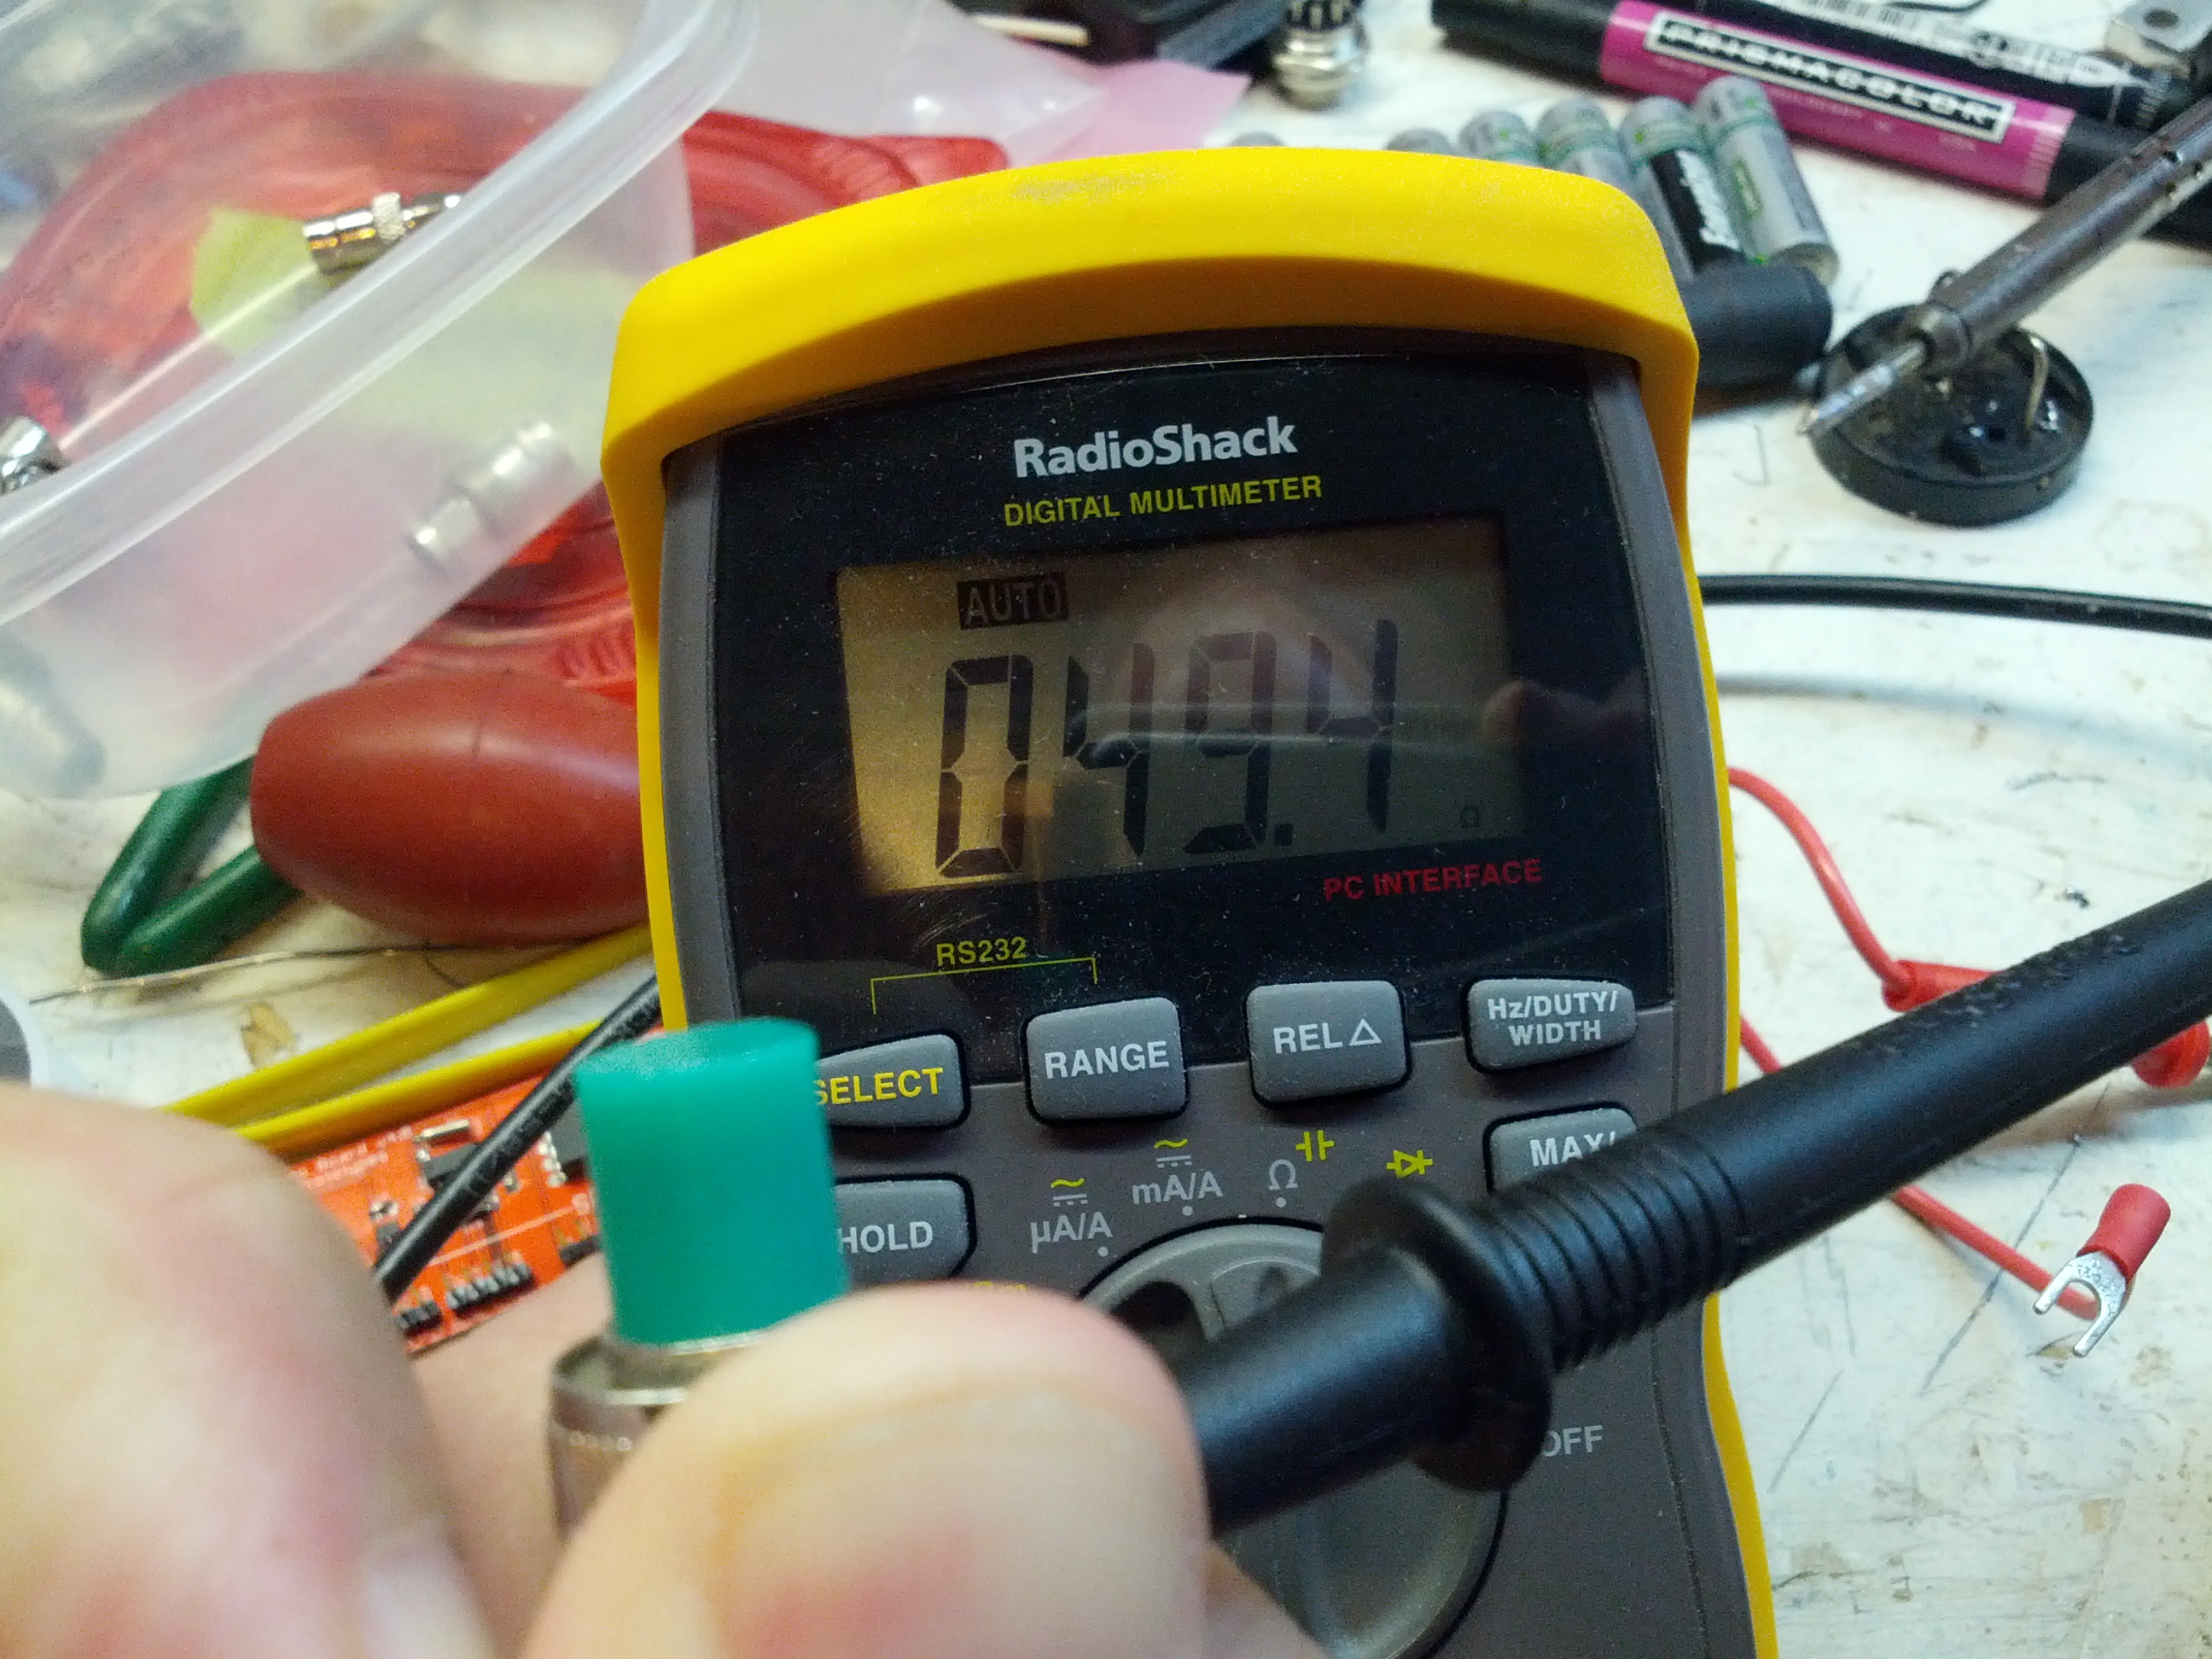
This other one is 49.4 ohms. Just around 1% off. For what I’m doing, close enough.
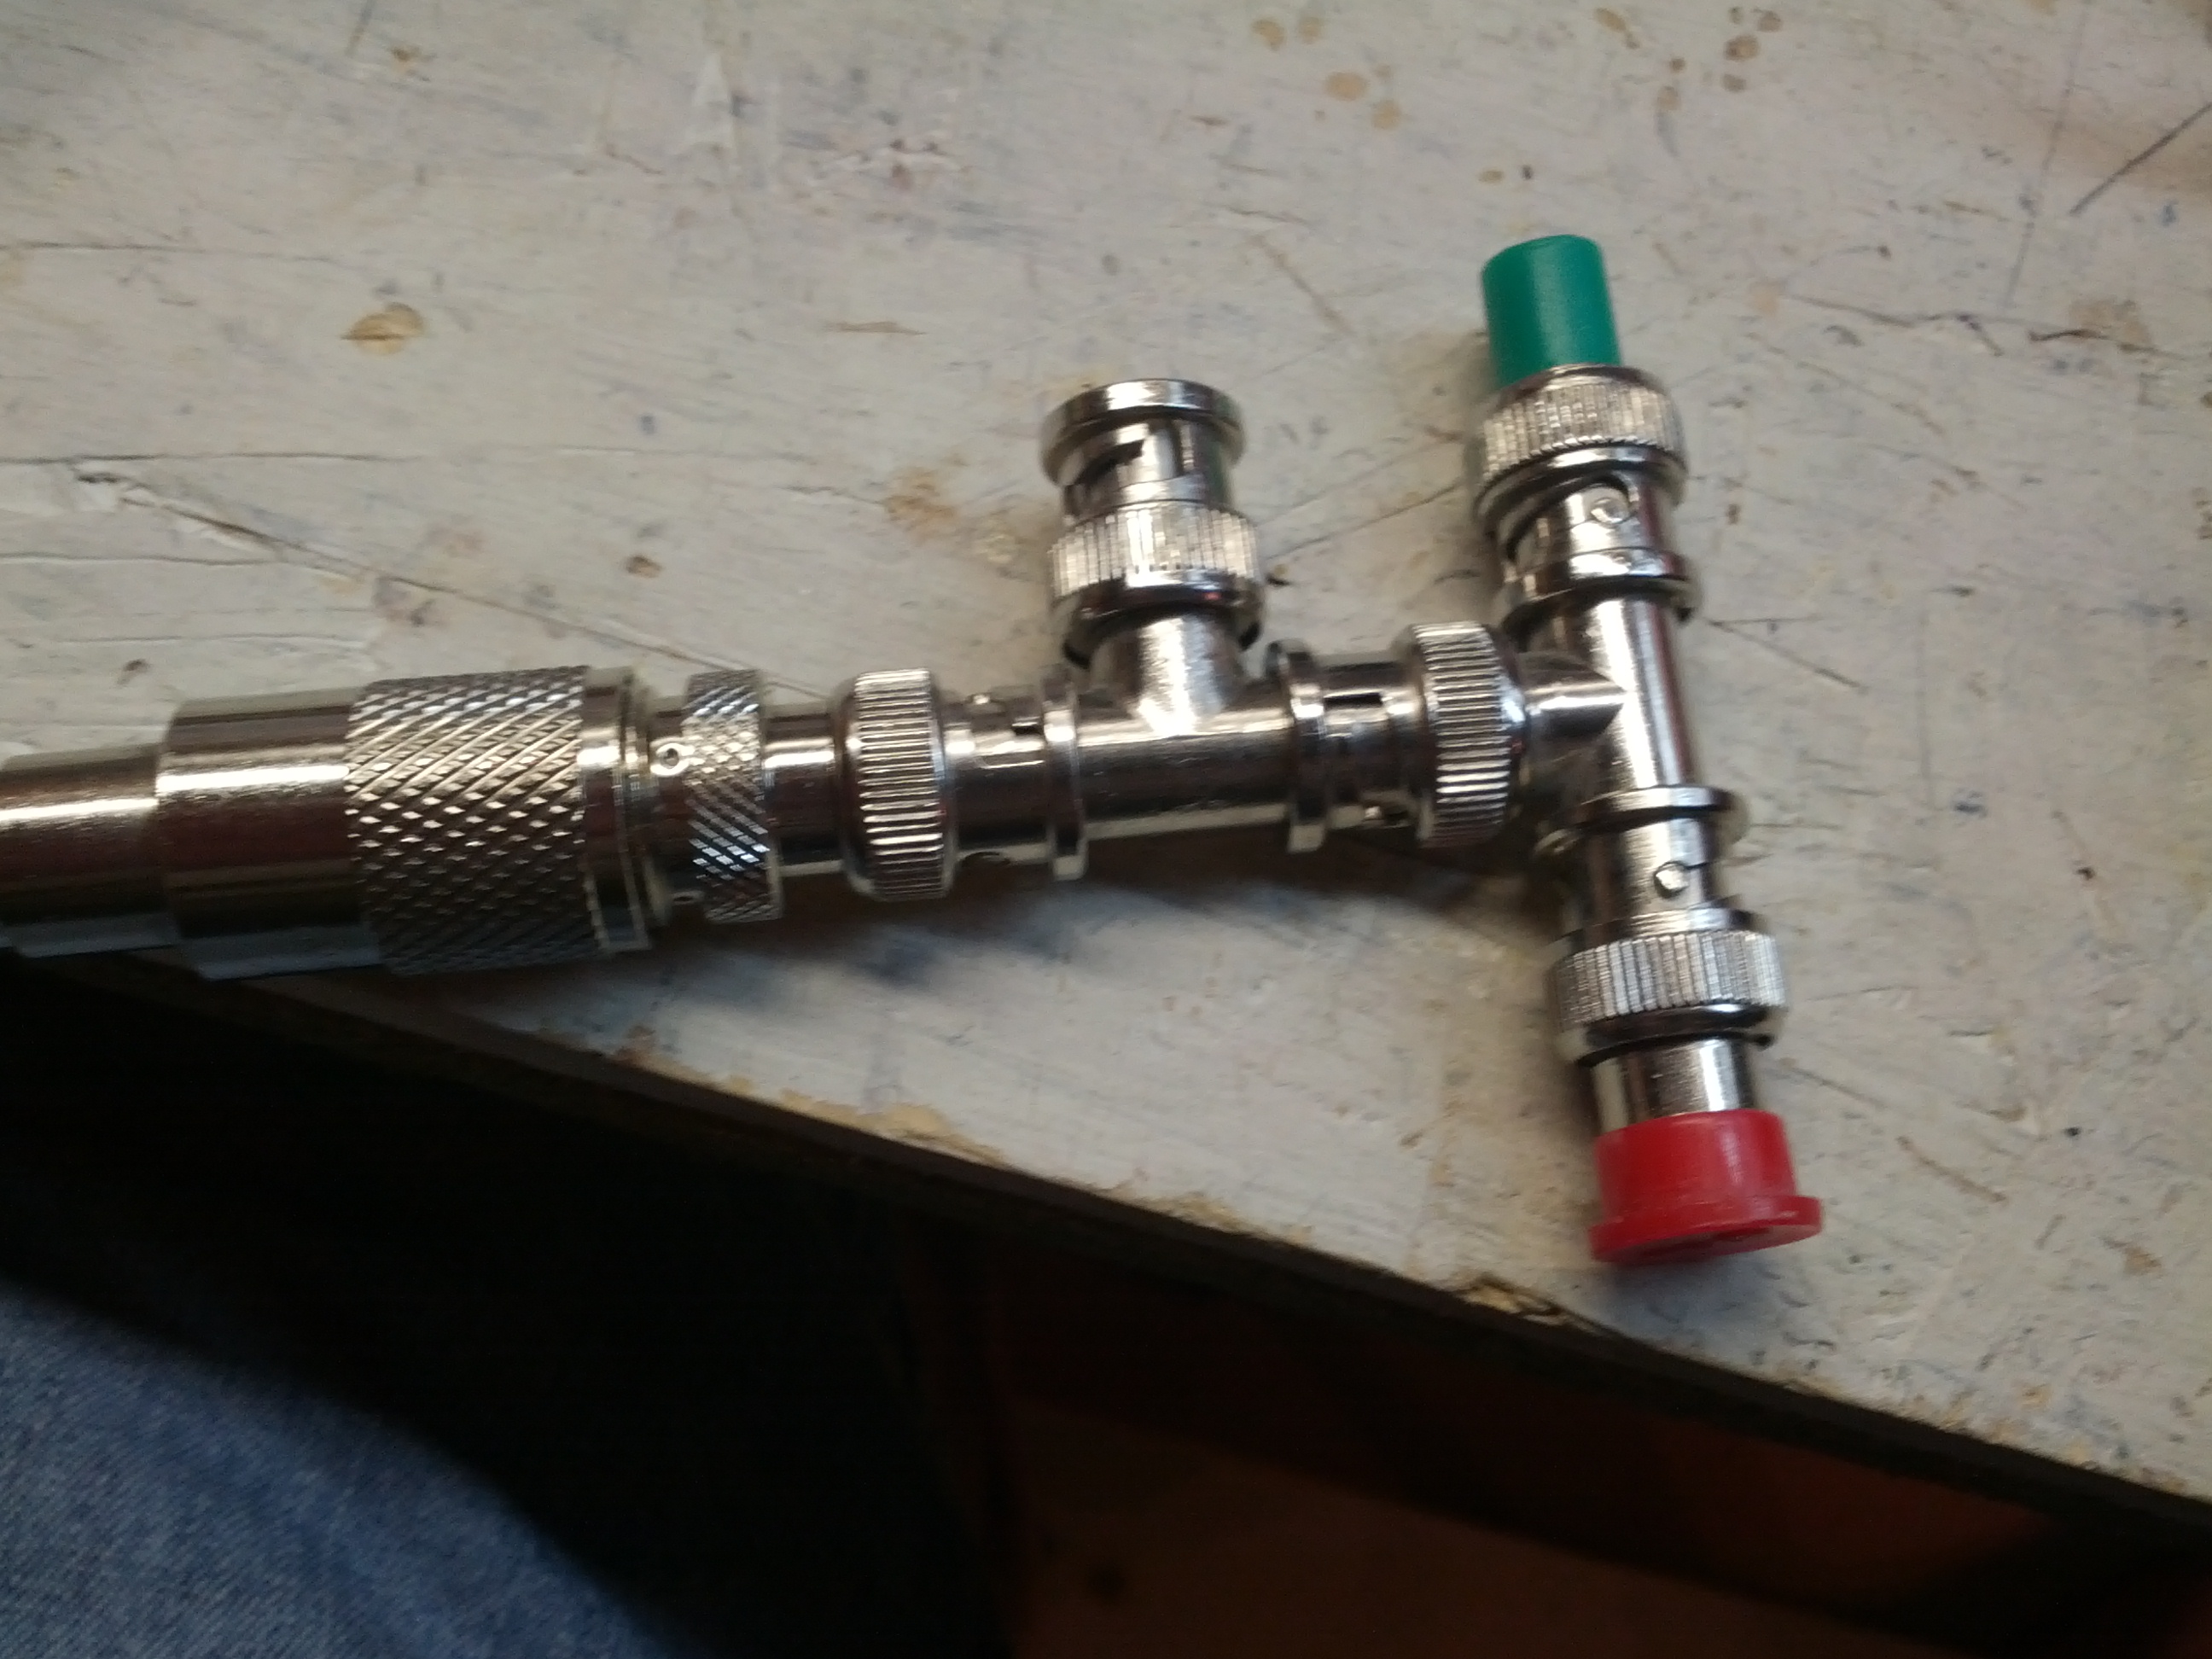
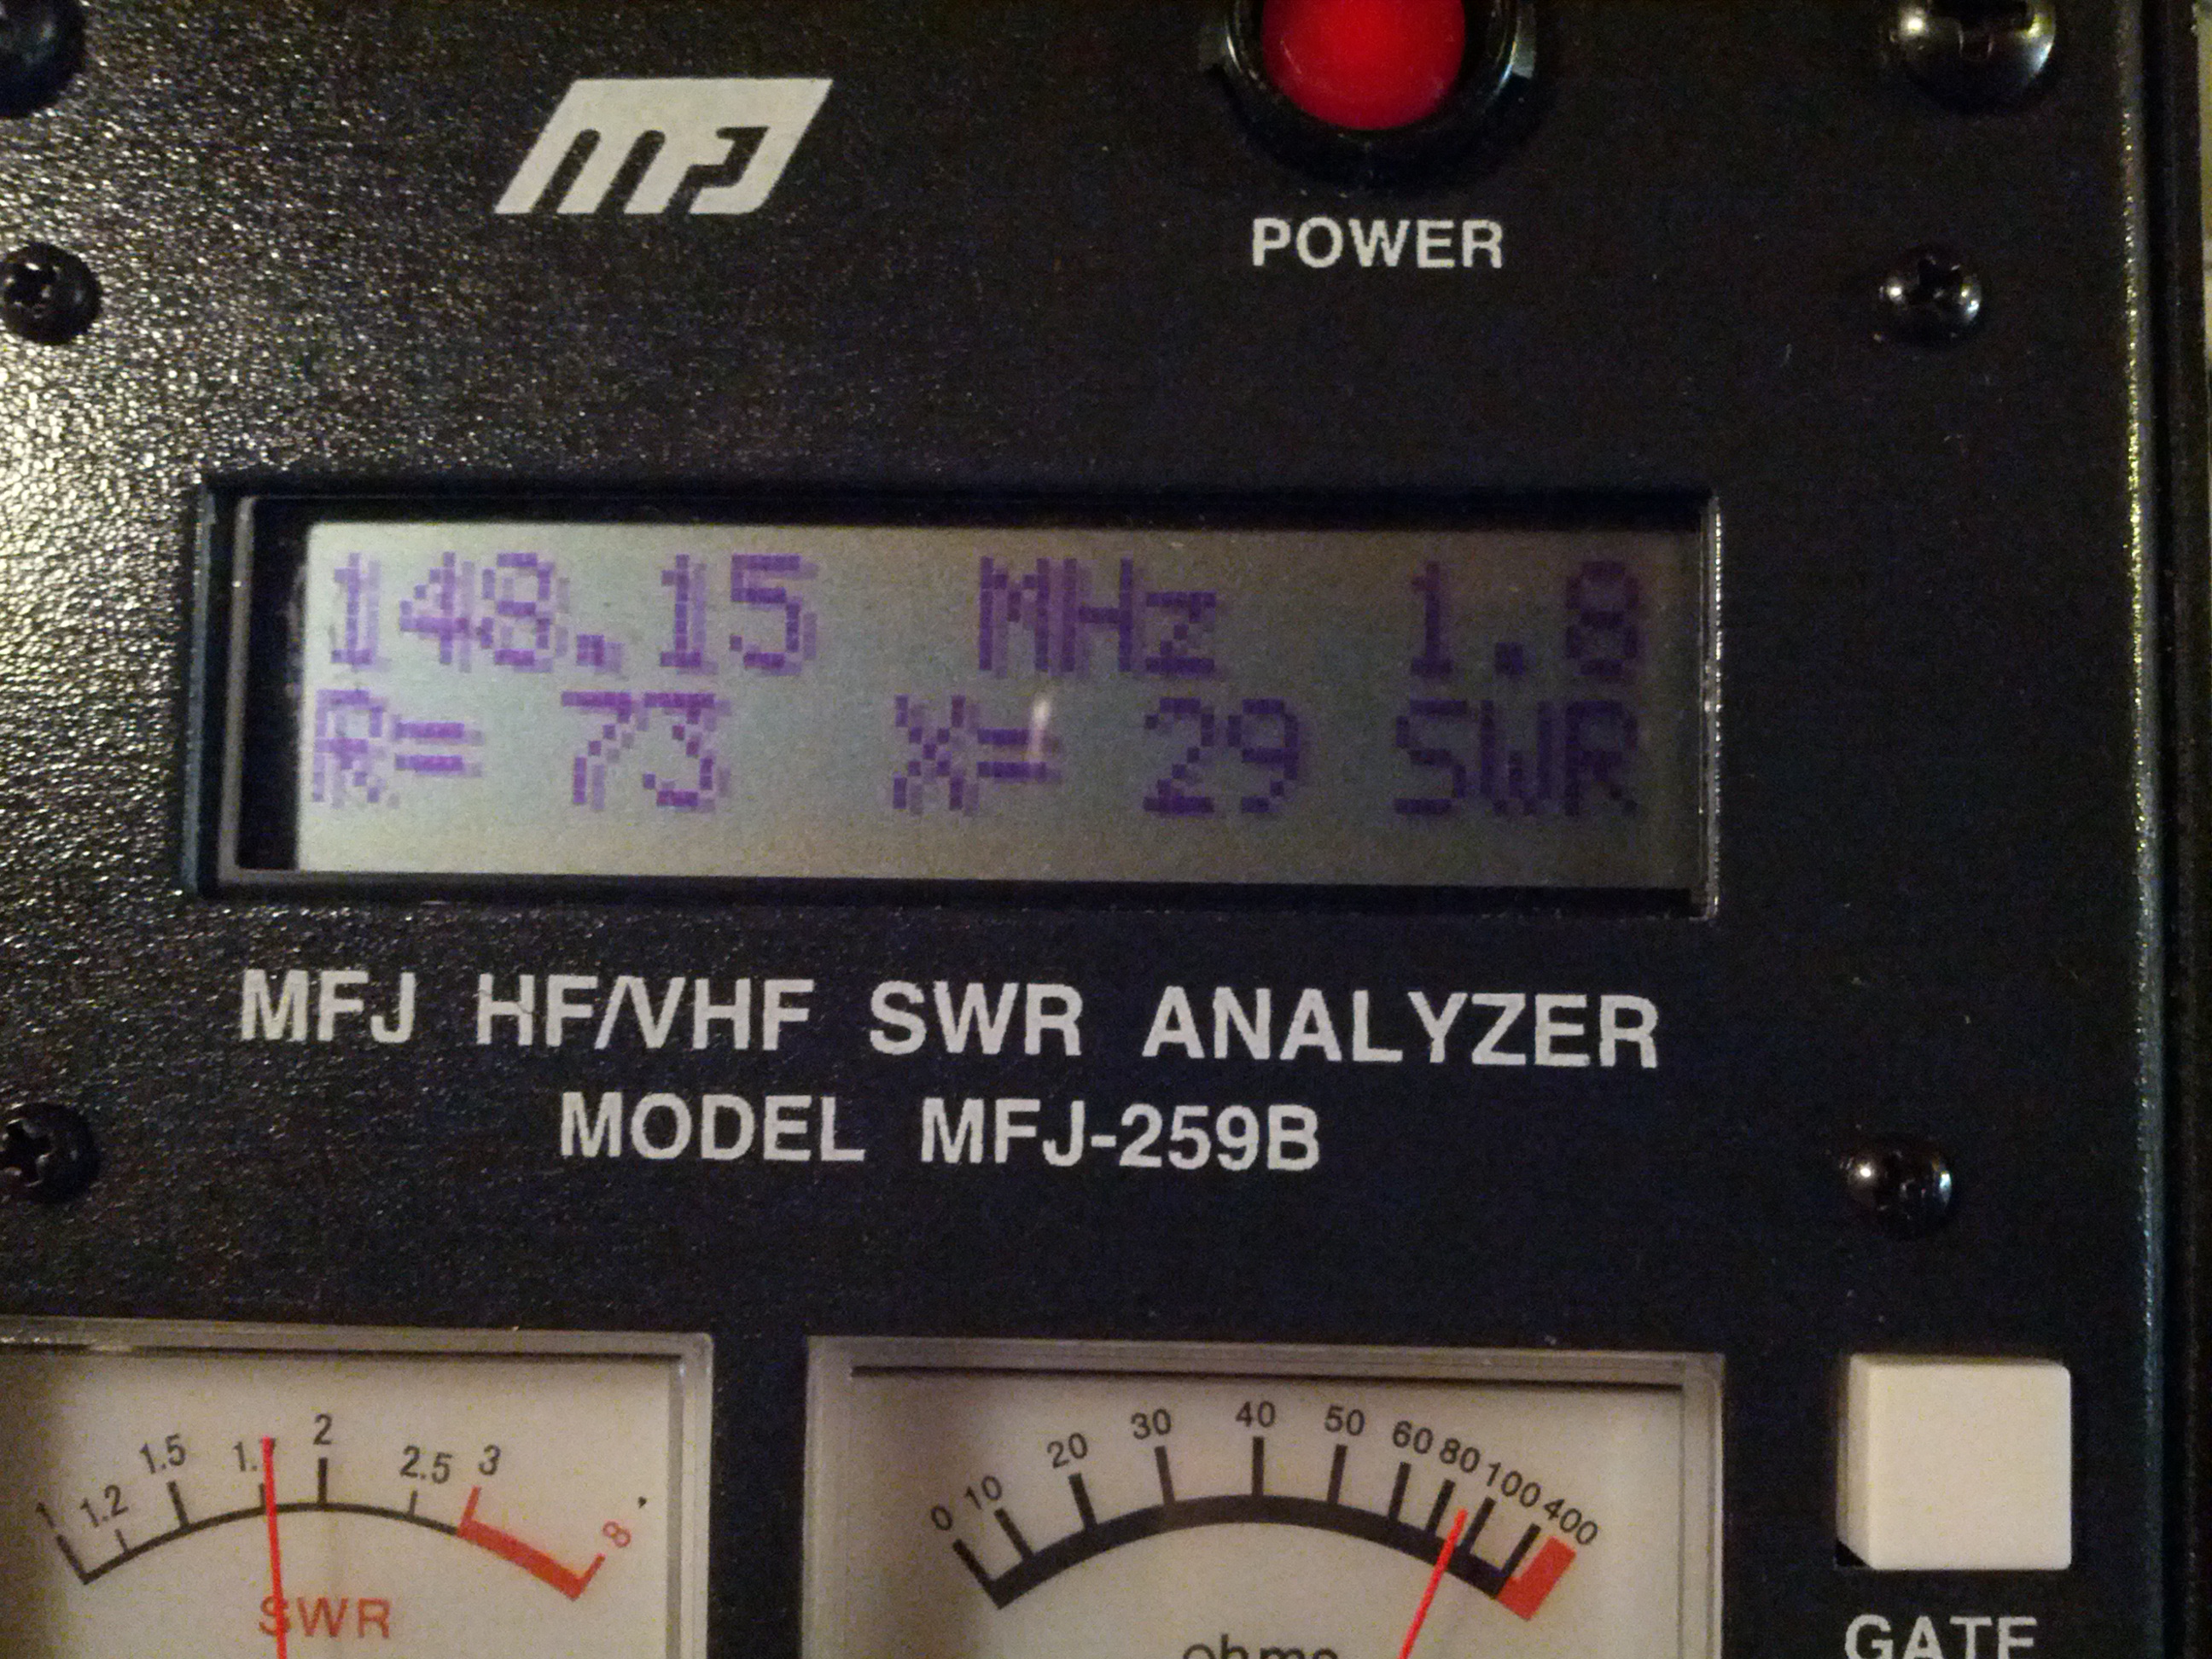
This was my redneck arrangement. This basically put the two 50 ohm terminator resistors in parallel.
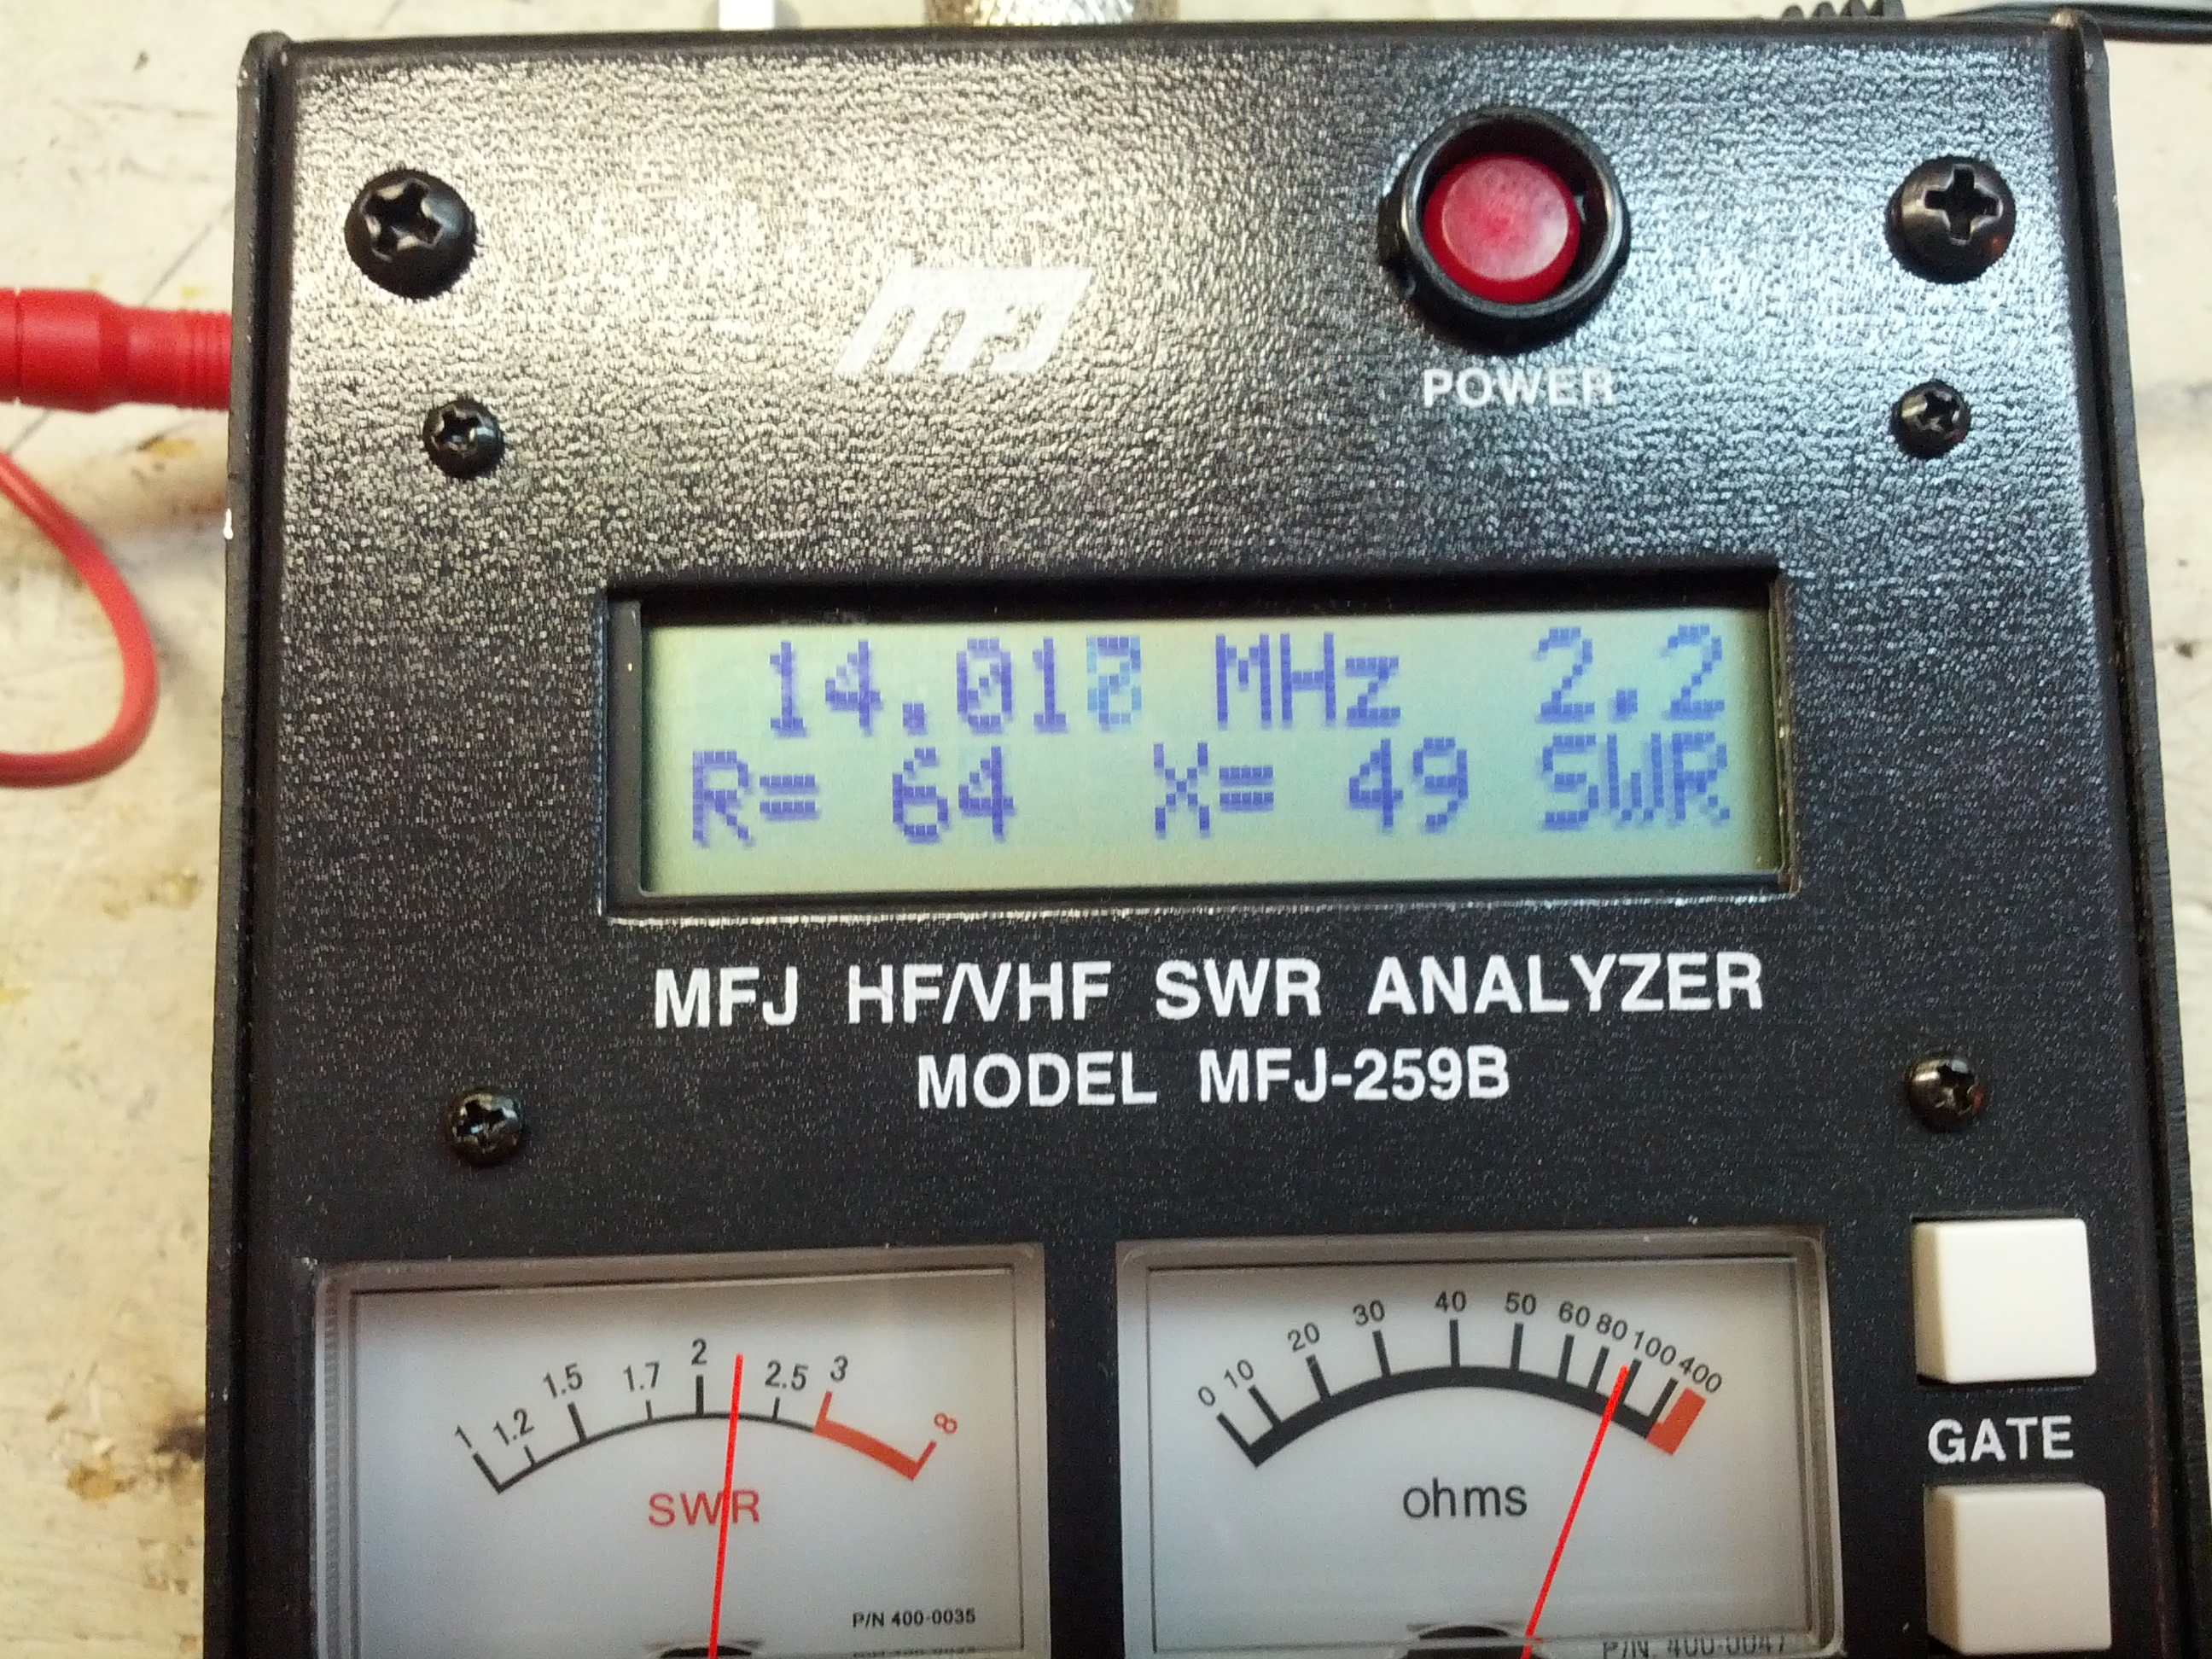
This doesn’t quite have the resistance I was expecting, but the SWR is correct. Of course, there’s all sorts of stuff going on with the open end, the many connectors, and the 4 foot piece of RG-58. Given the fact that I had two 50 ohm resistors in parallel, I think I should be seeing 25 ohms R and (ideally) 0 ohms X.
This seems a little more like it. Still a nearly 2:1 SWR and close to 25 ohms R, with very little reactive ohms.
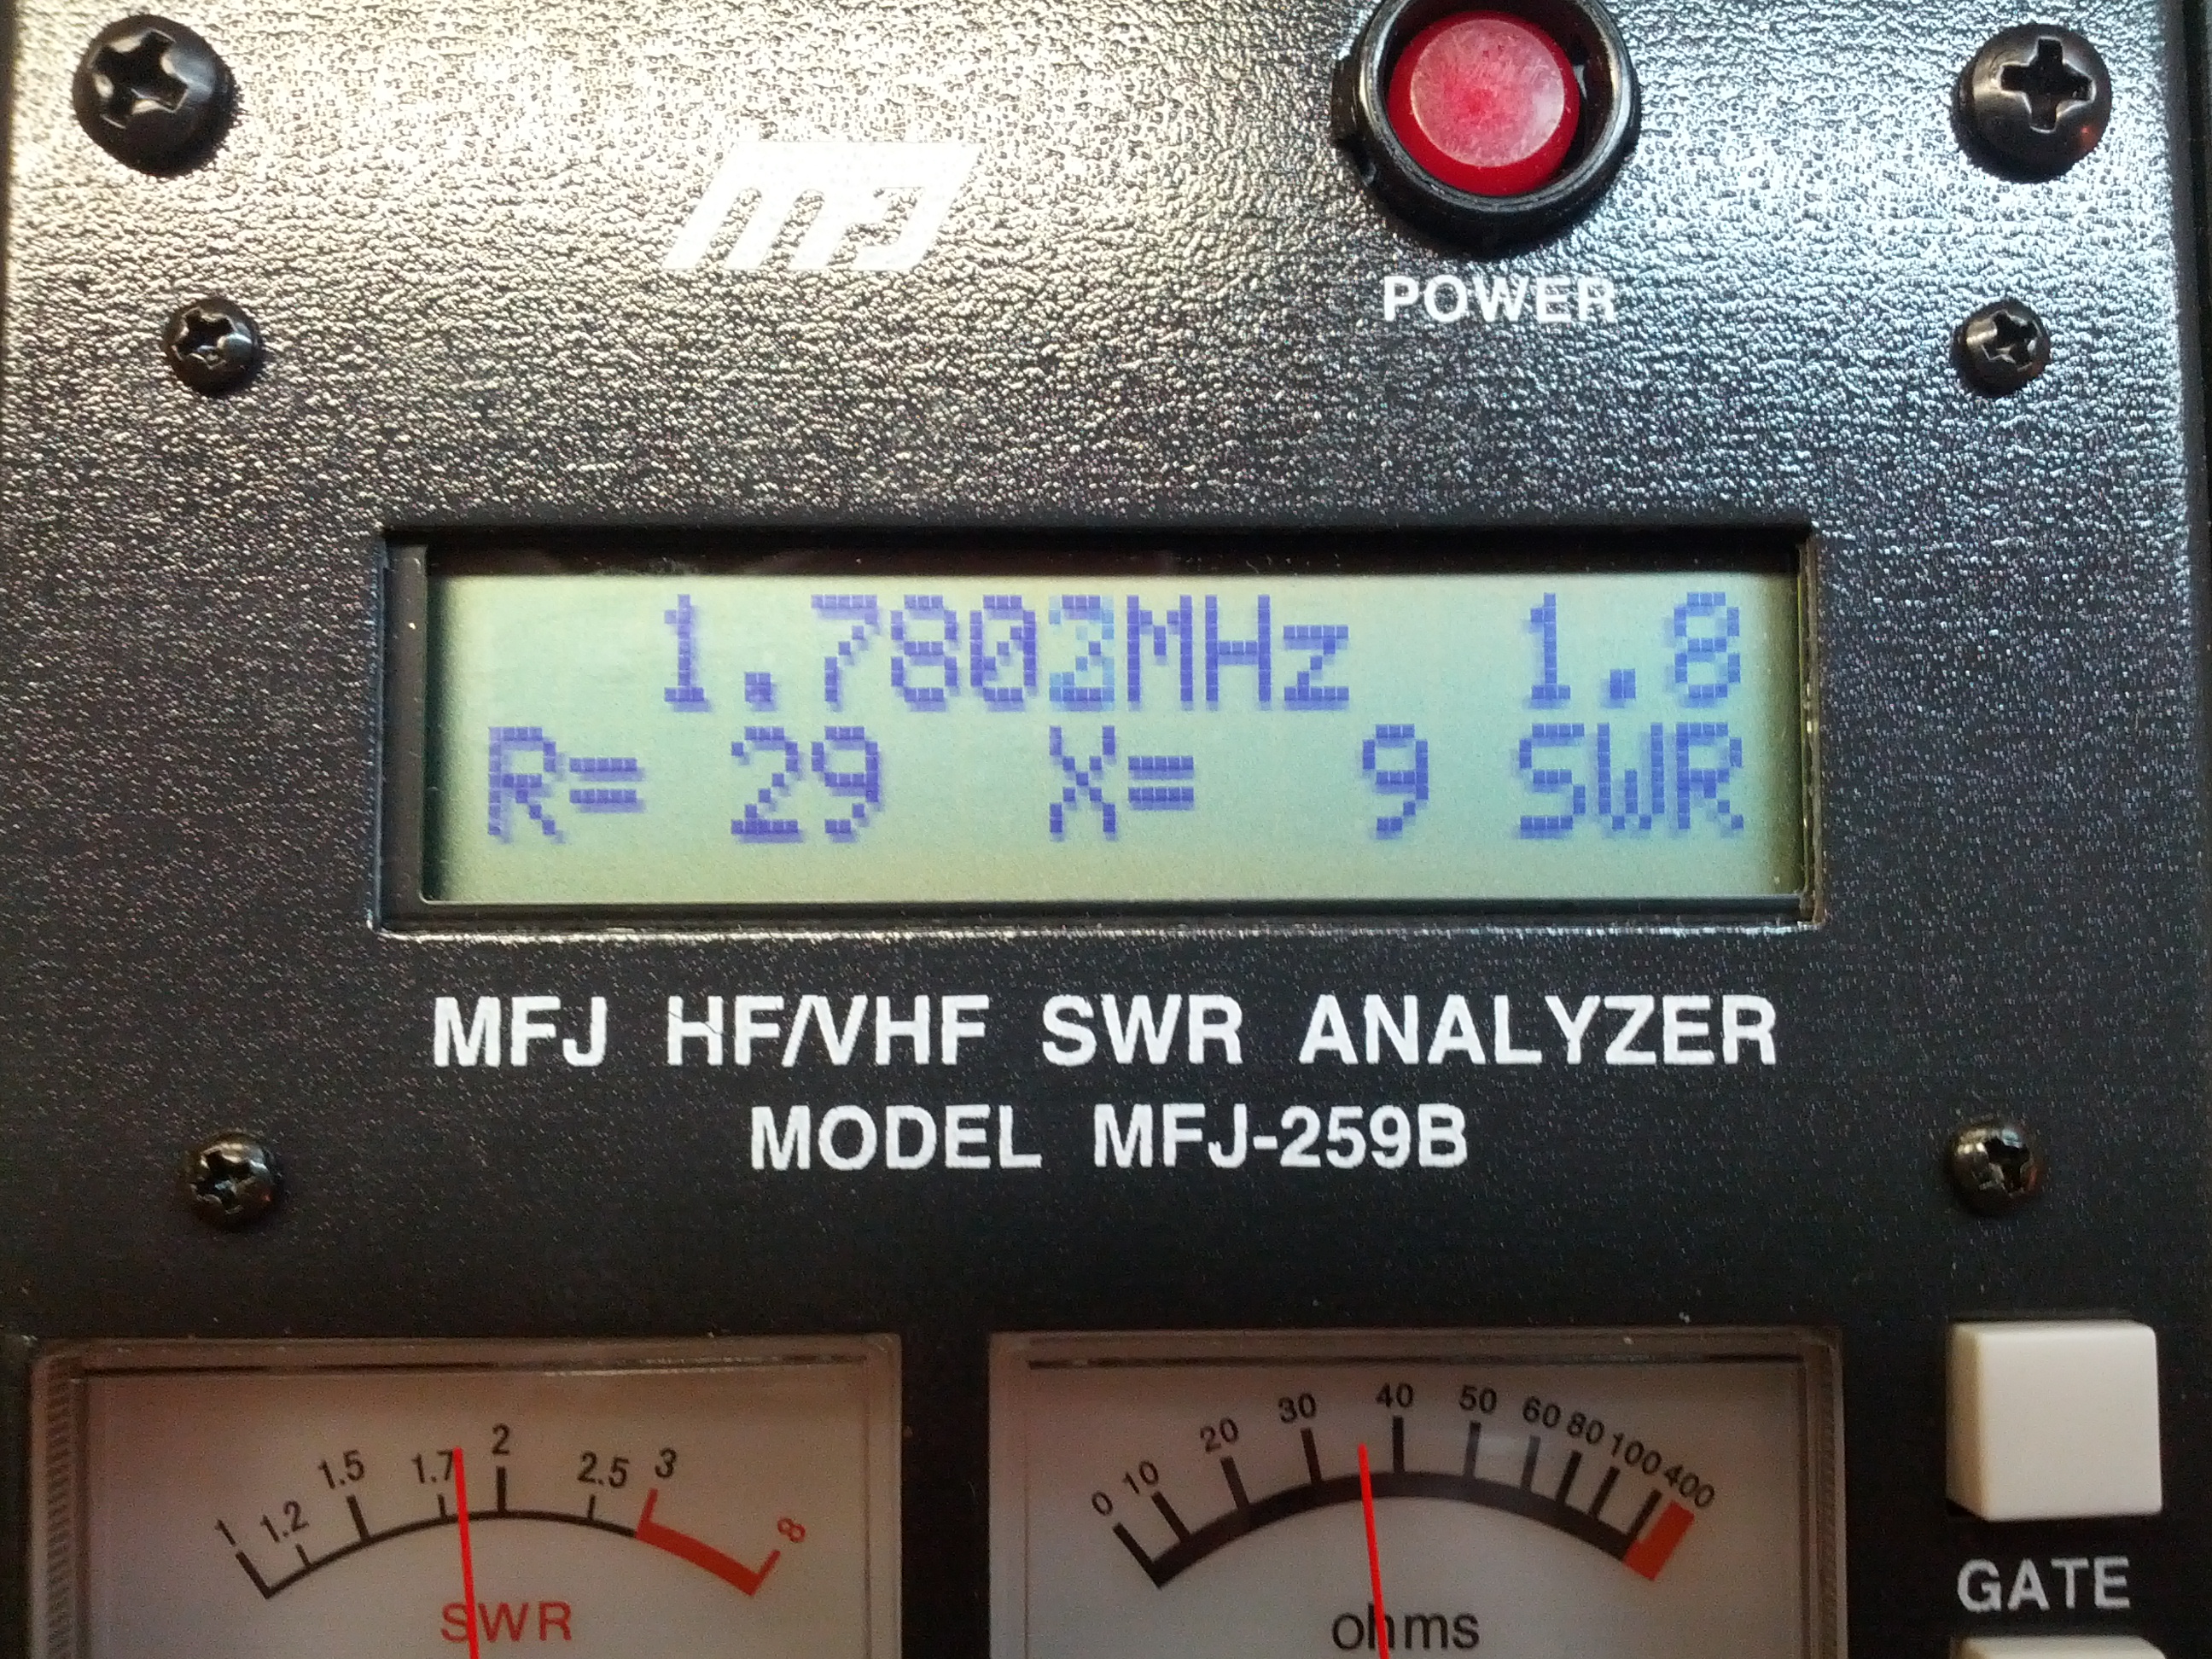
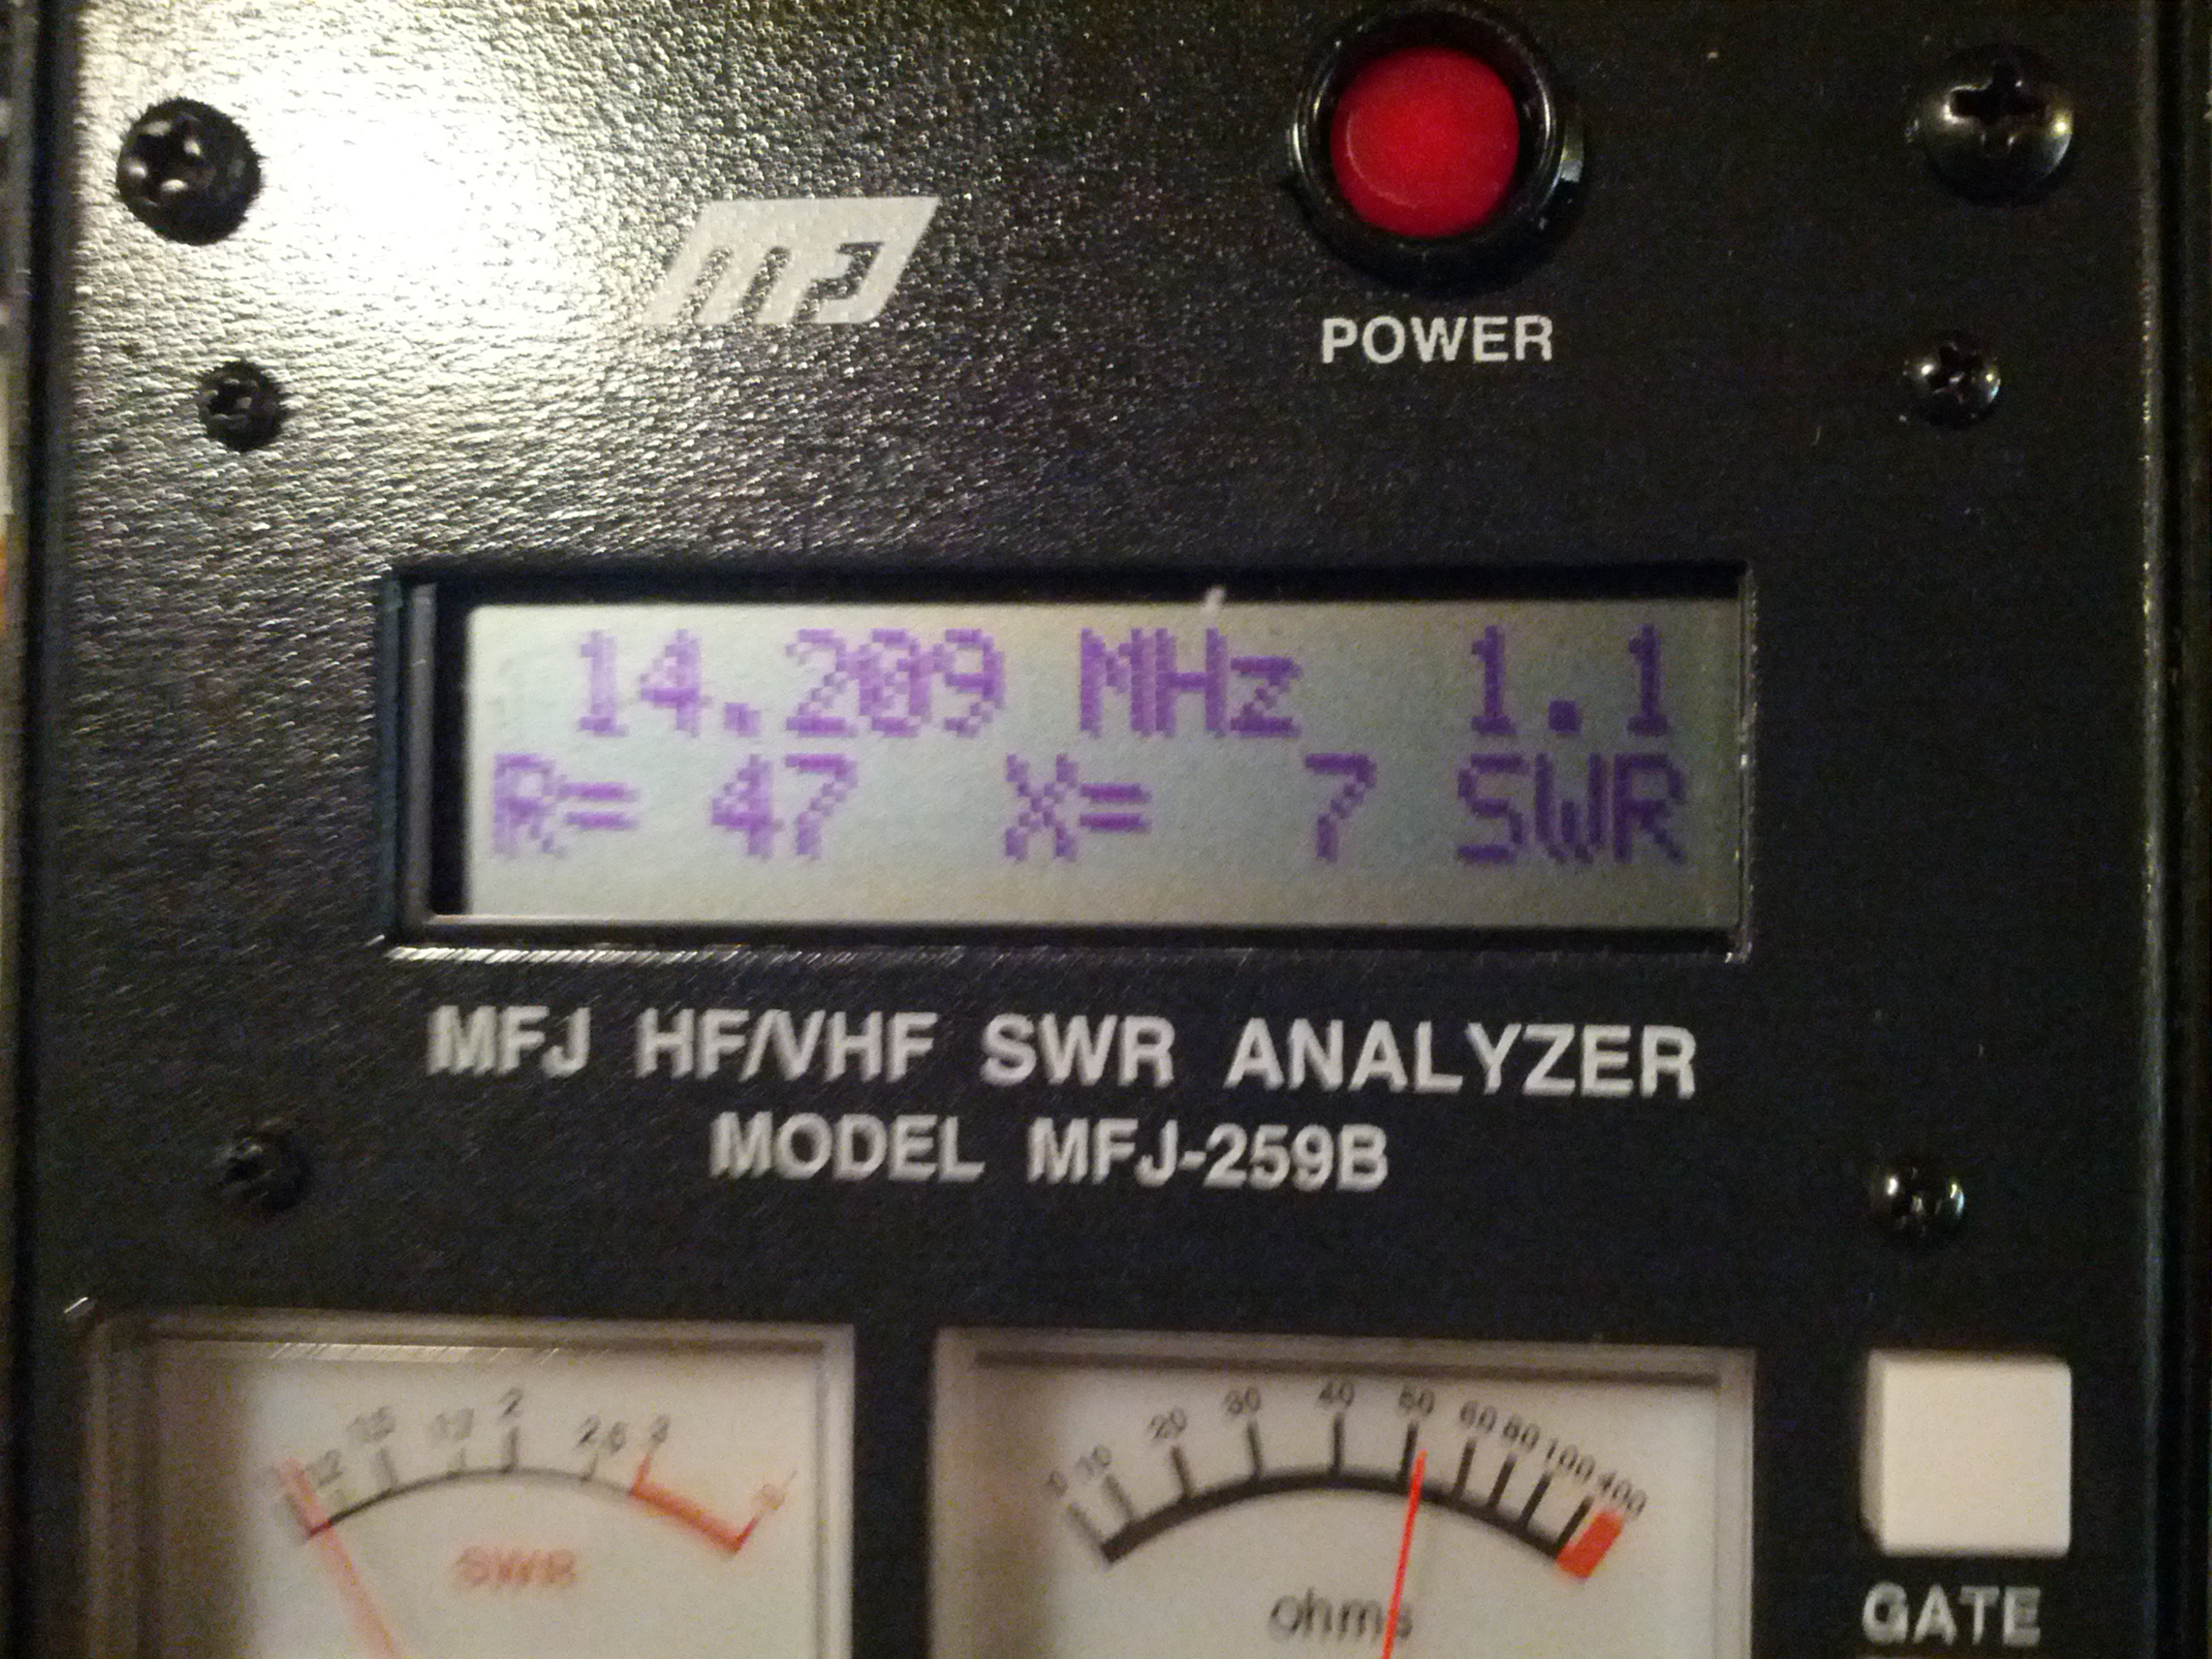
SWR Check – 100 Ohms
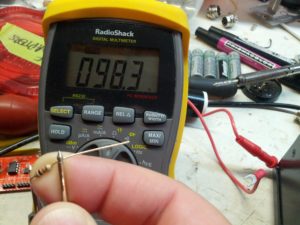
Since I couldn’t figure out a way to make my two BNC terminators in series, I pulled a resistor out of my parts bin. It was really a 98.3 ohm resistor, according to my non-lab-grade Radio Shack meter, so I figure that’s close enough!
Close enough to 100 ohms.

This is how I did it.
Hey look, exactly as expected. 100 ohms resistive, and 0 ohms reactive.
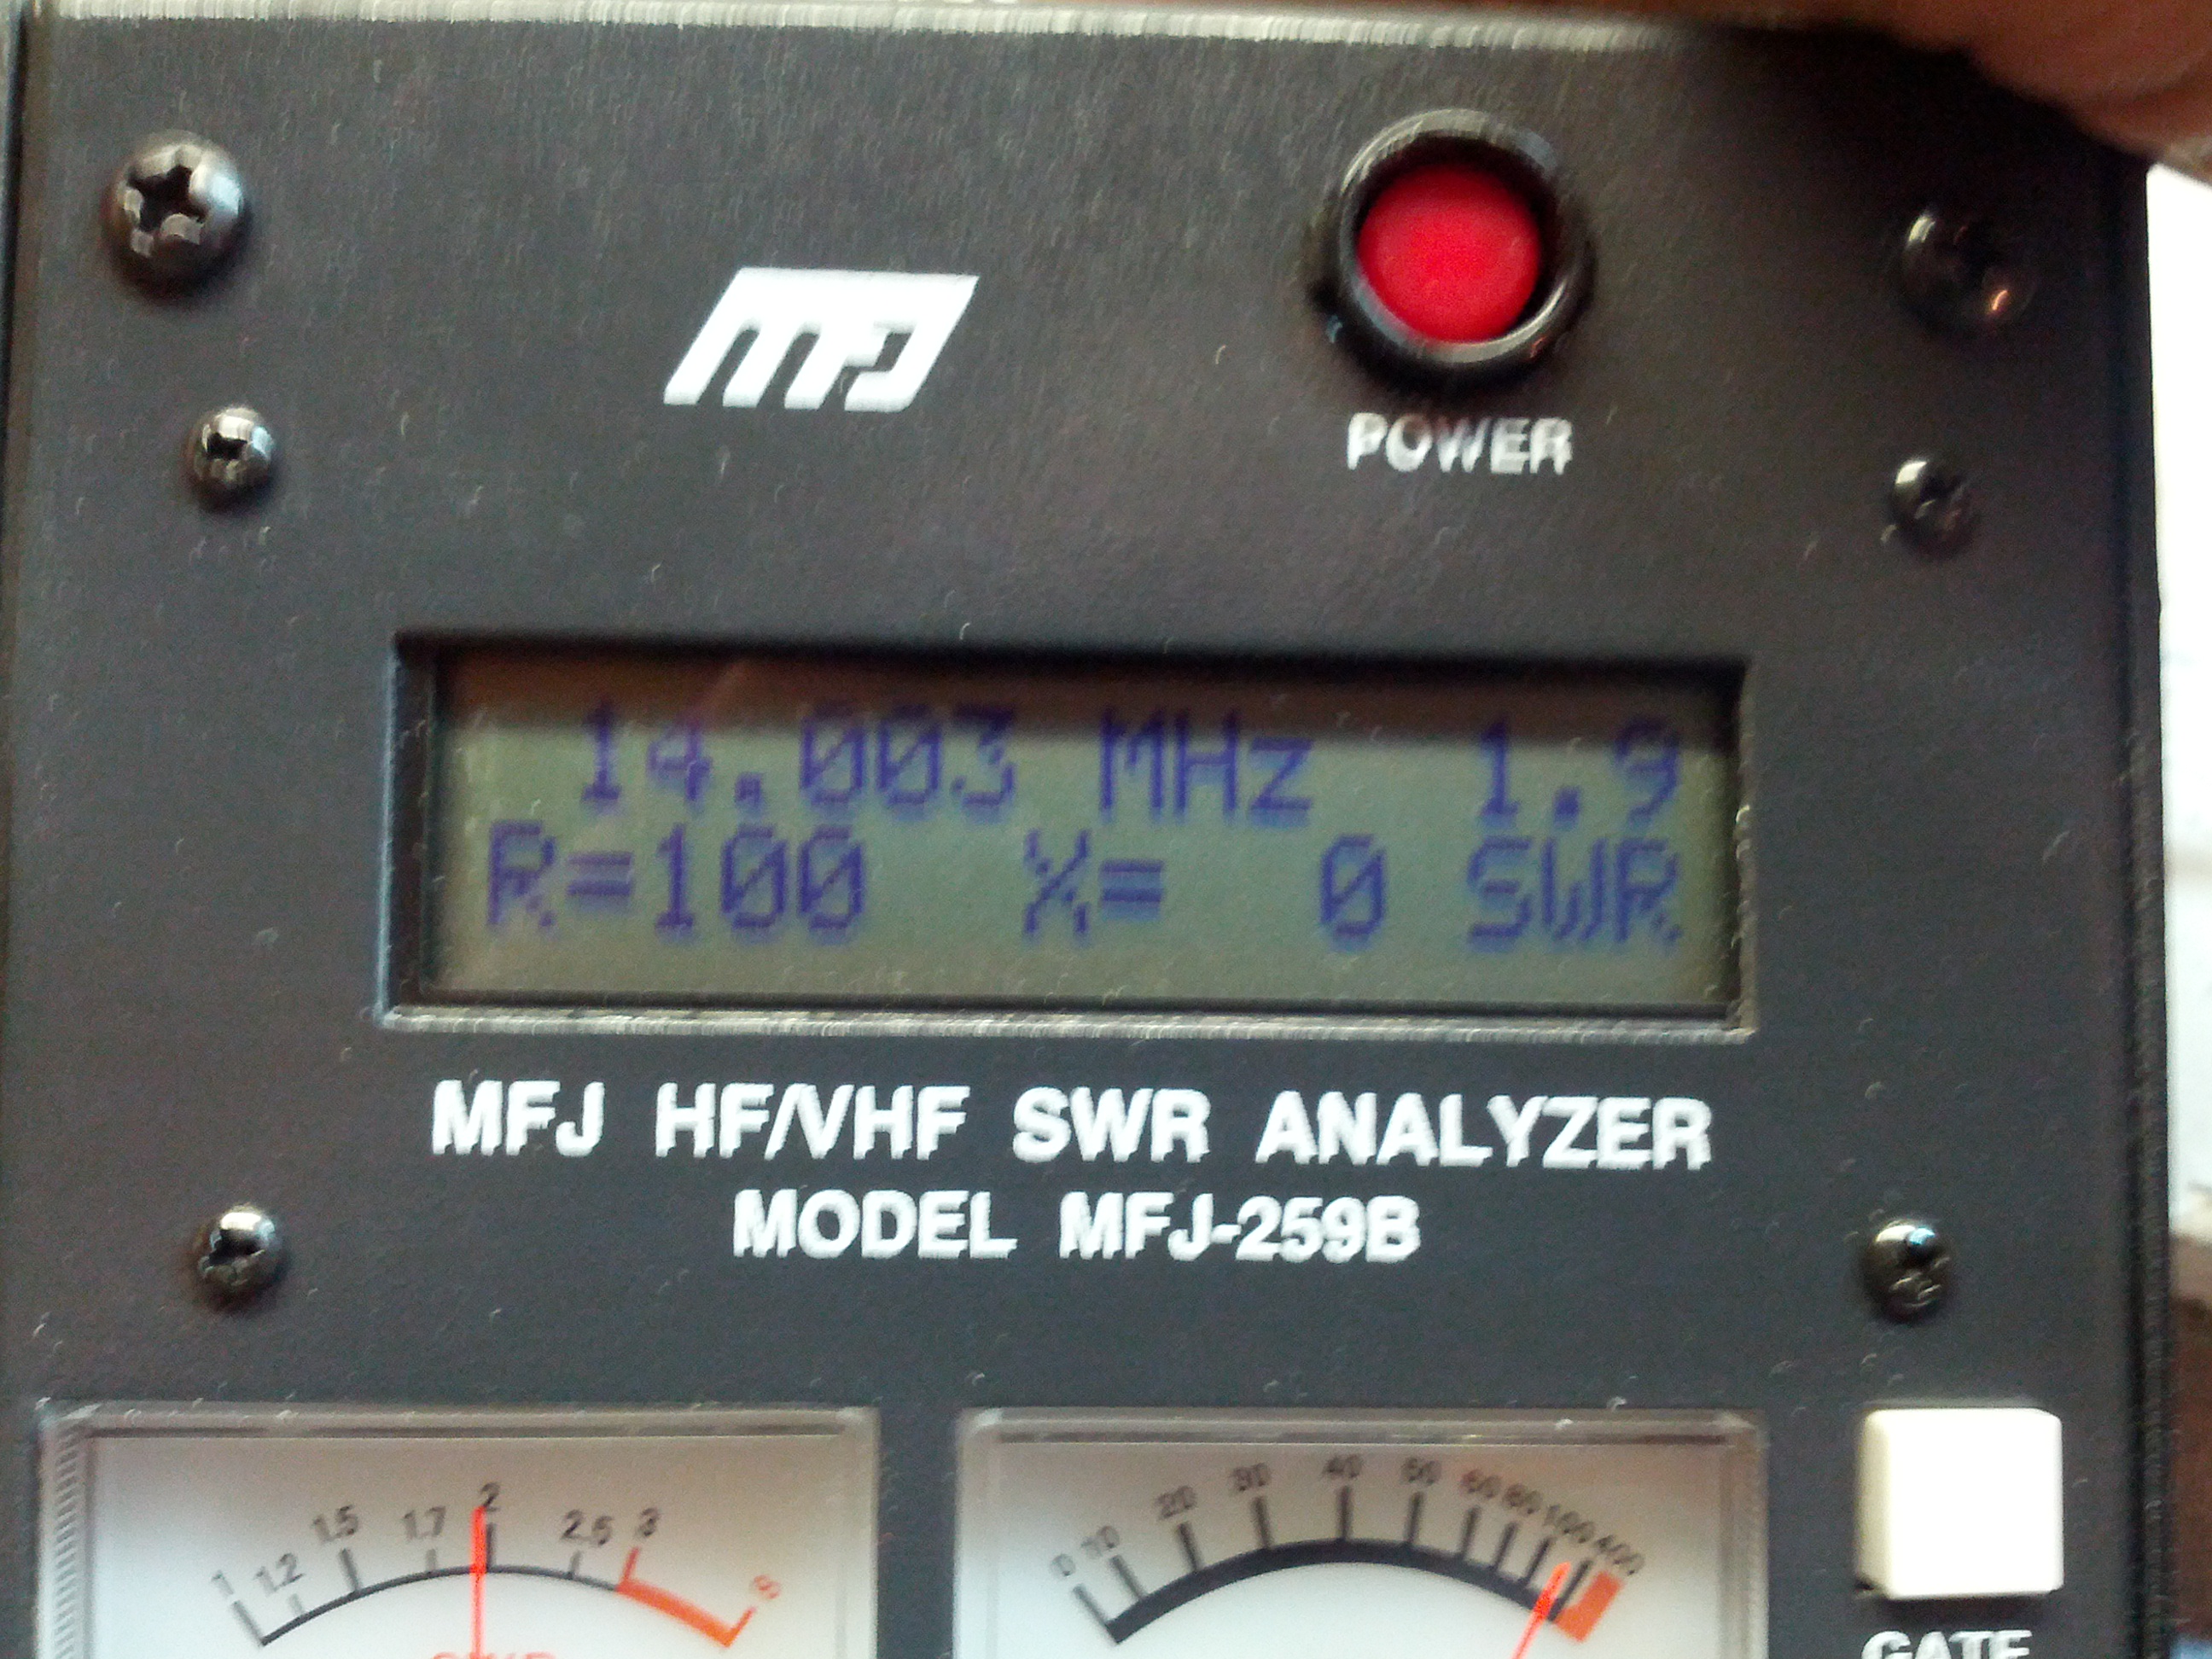
Other Dummy Load Test
I had a dummy load I built for QRP uses (specifically the Softrock). I built it a while back, which is why the callsign is wrong.
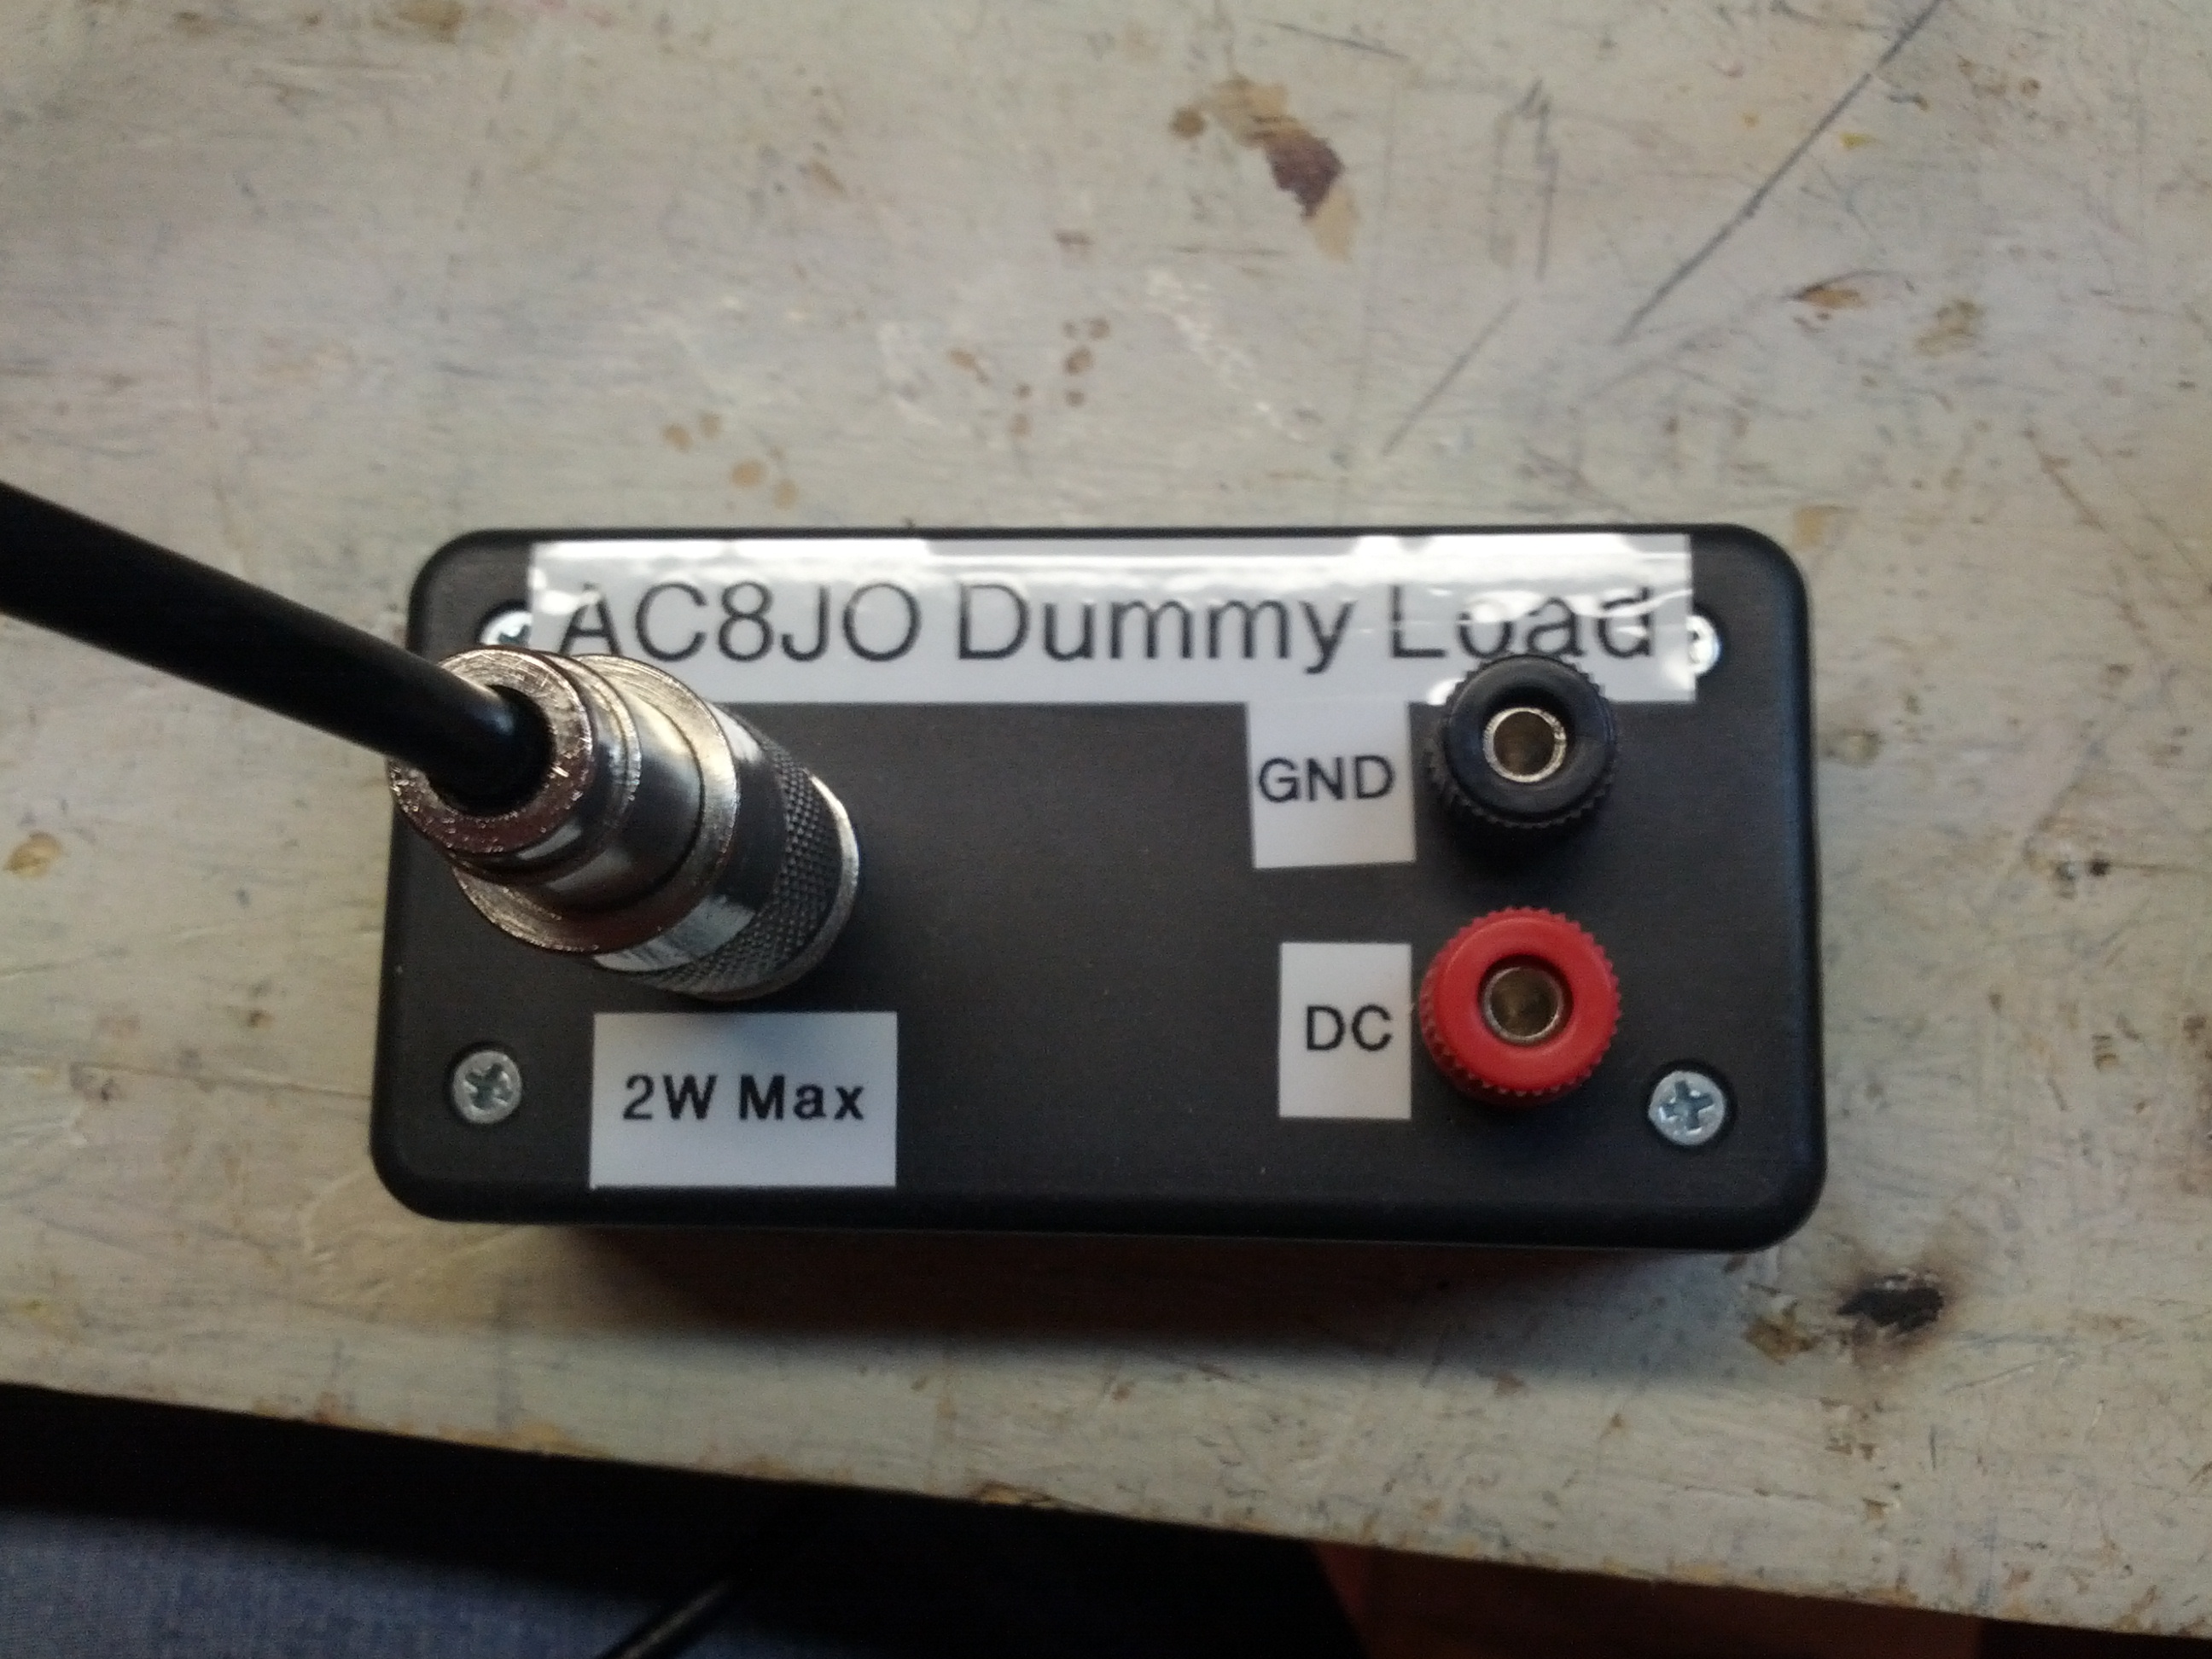
Just pretend it says “KE8P Dummy Load” 🙂

70 and 4? SEVENTY AND FOUR? WTF, it should be 50 and 0!!! I’ll just blame the extra resistance and all the reactance on the cable…
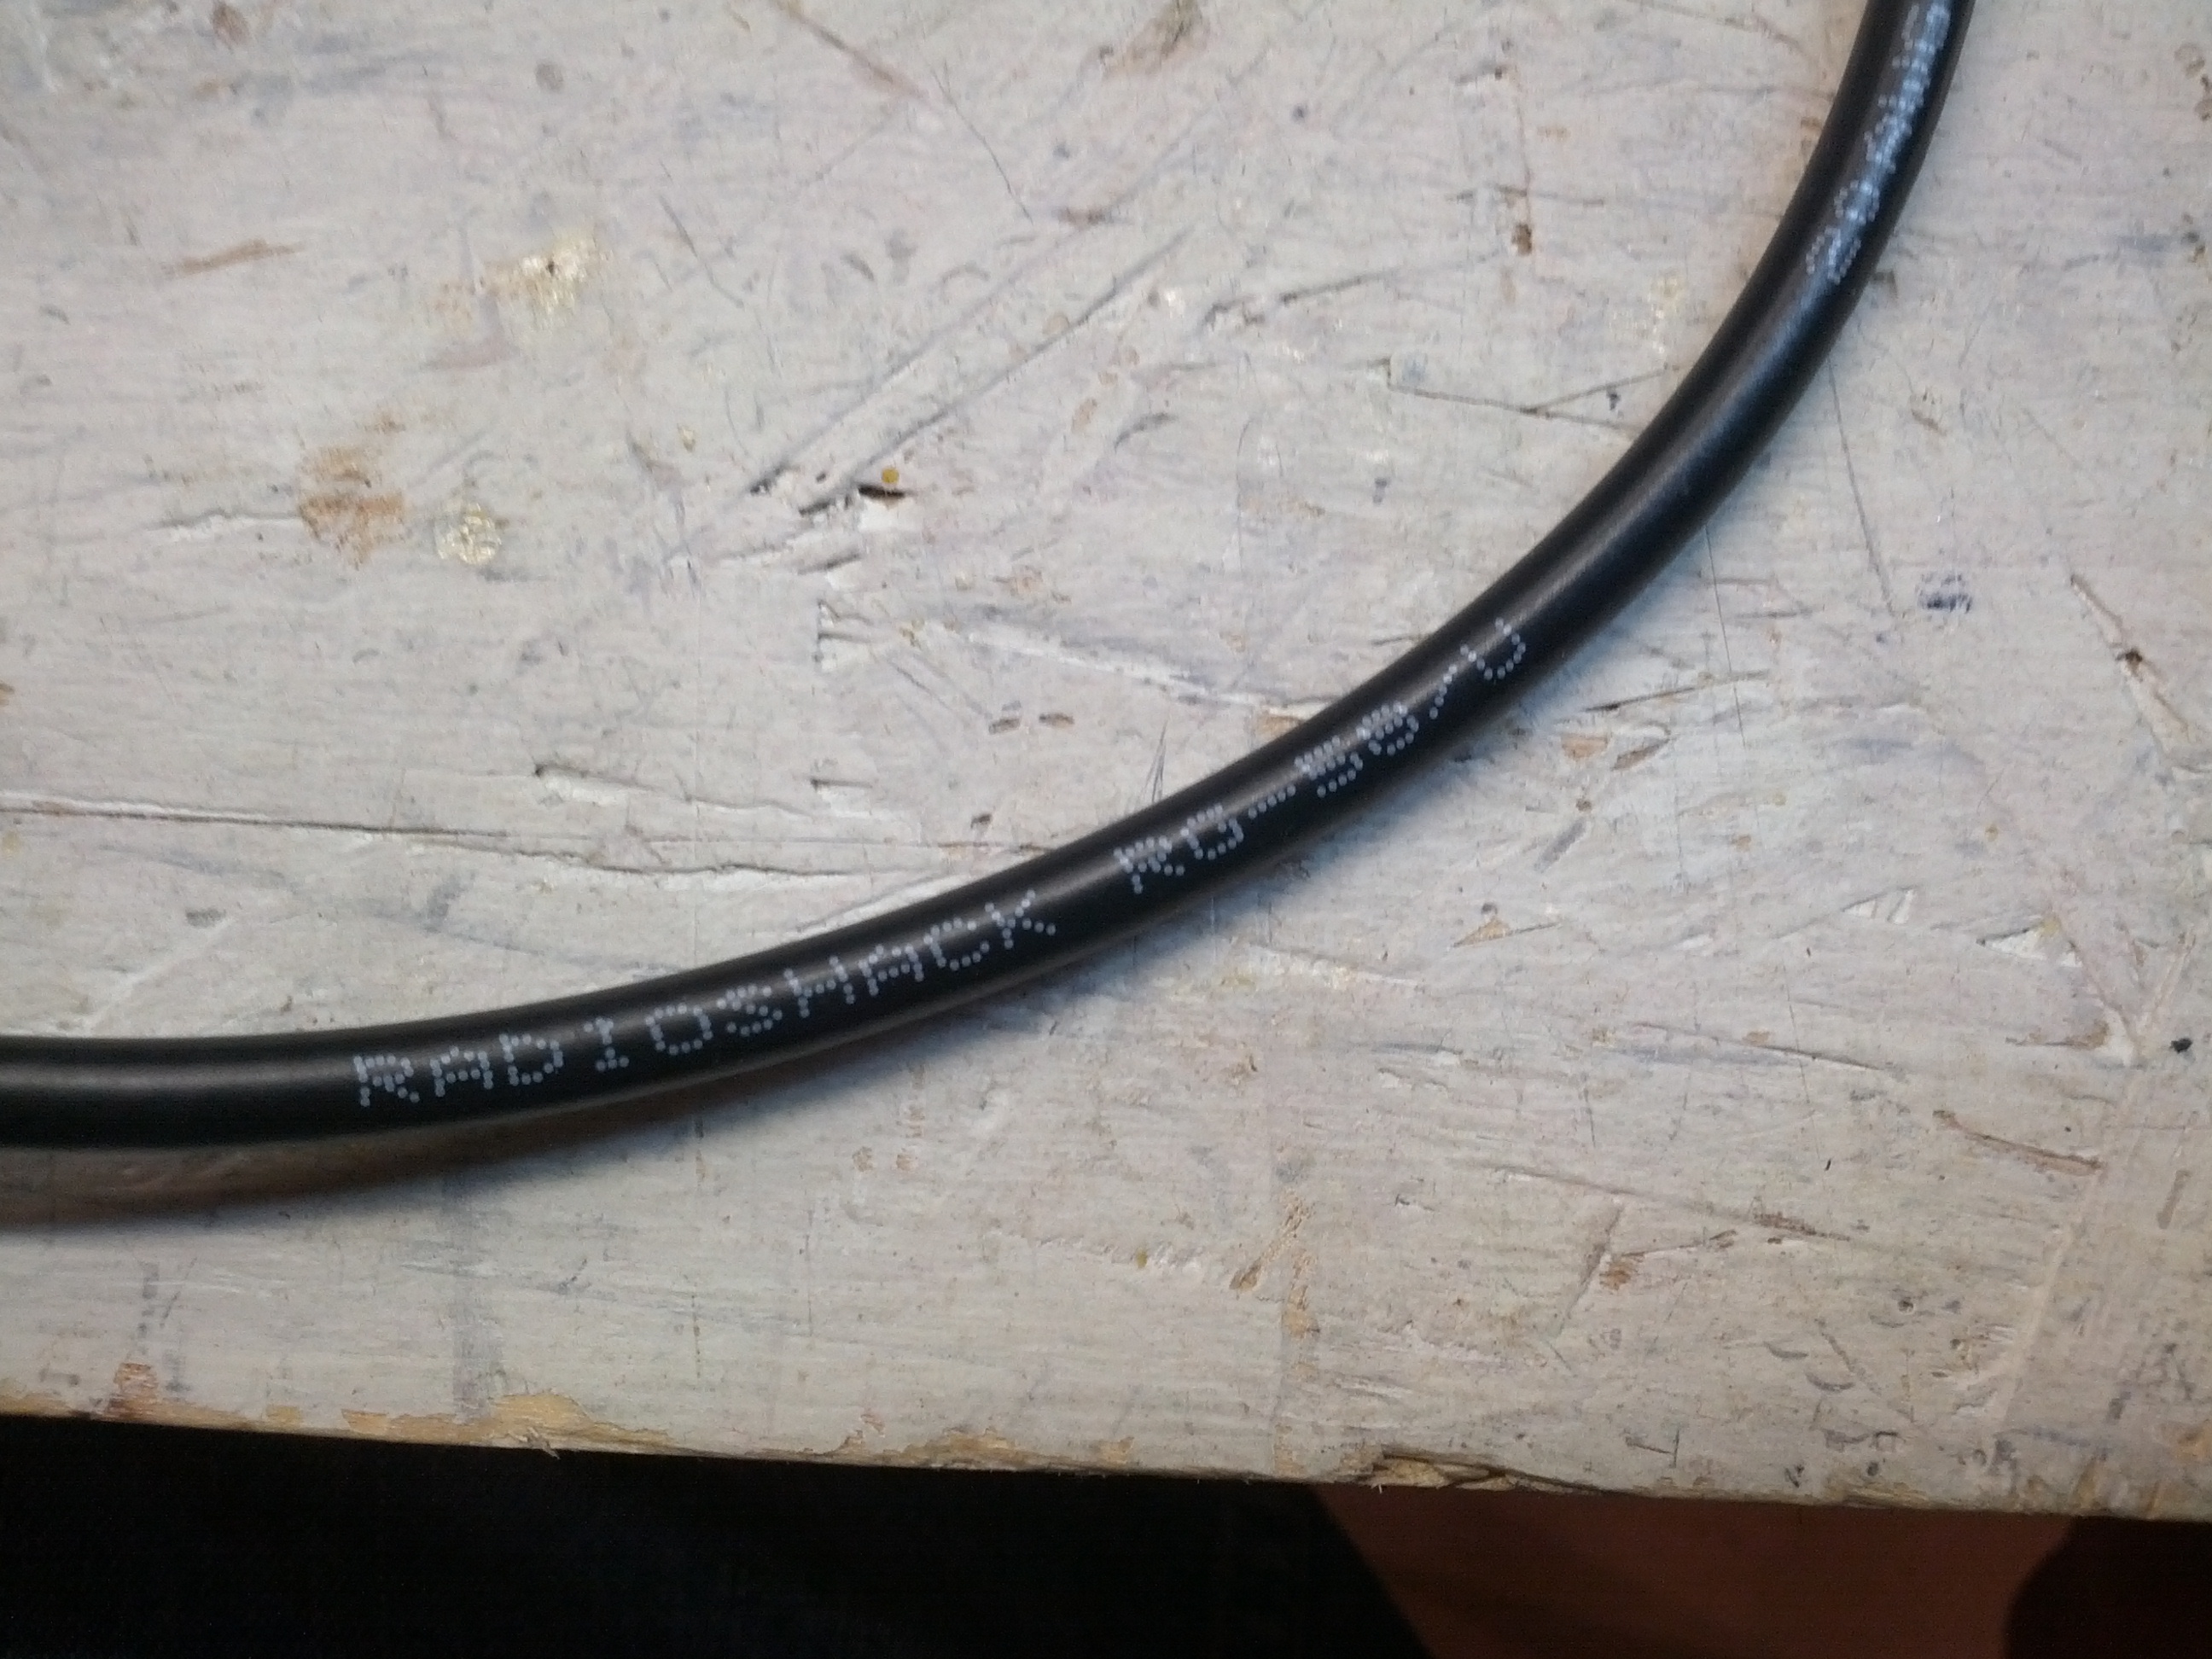
Maybe this is why it isn’t perfect. My coax isn’t exactly Belden or Times.
Capacitance Checks
So the MFJ-259B has a capacitance check on it. This is really for the capacitance of an antenna, not for what I did in the pictures below. I basically took a ceramic disk capacitor and clipped one end to the ground and the other I held into the center conductor of the antenna port. This is a 10,000 pF capacitor.
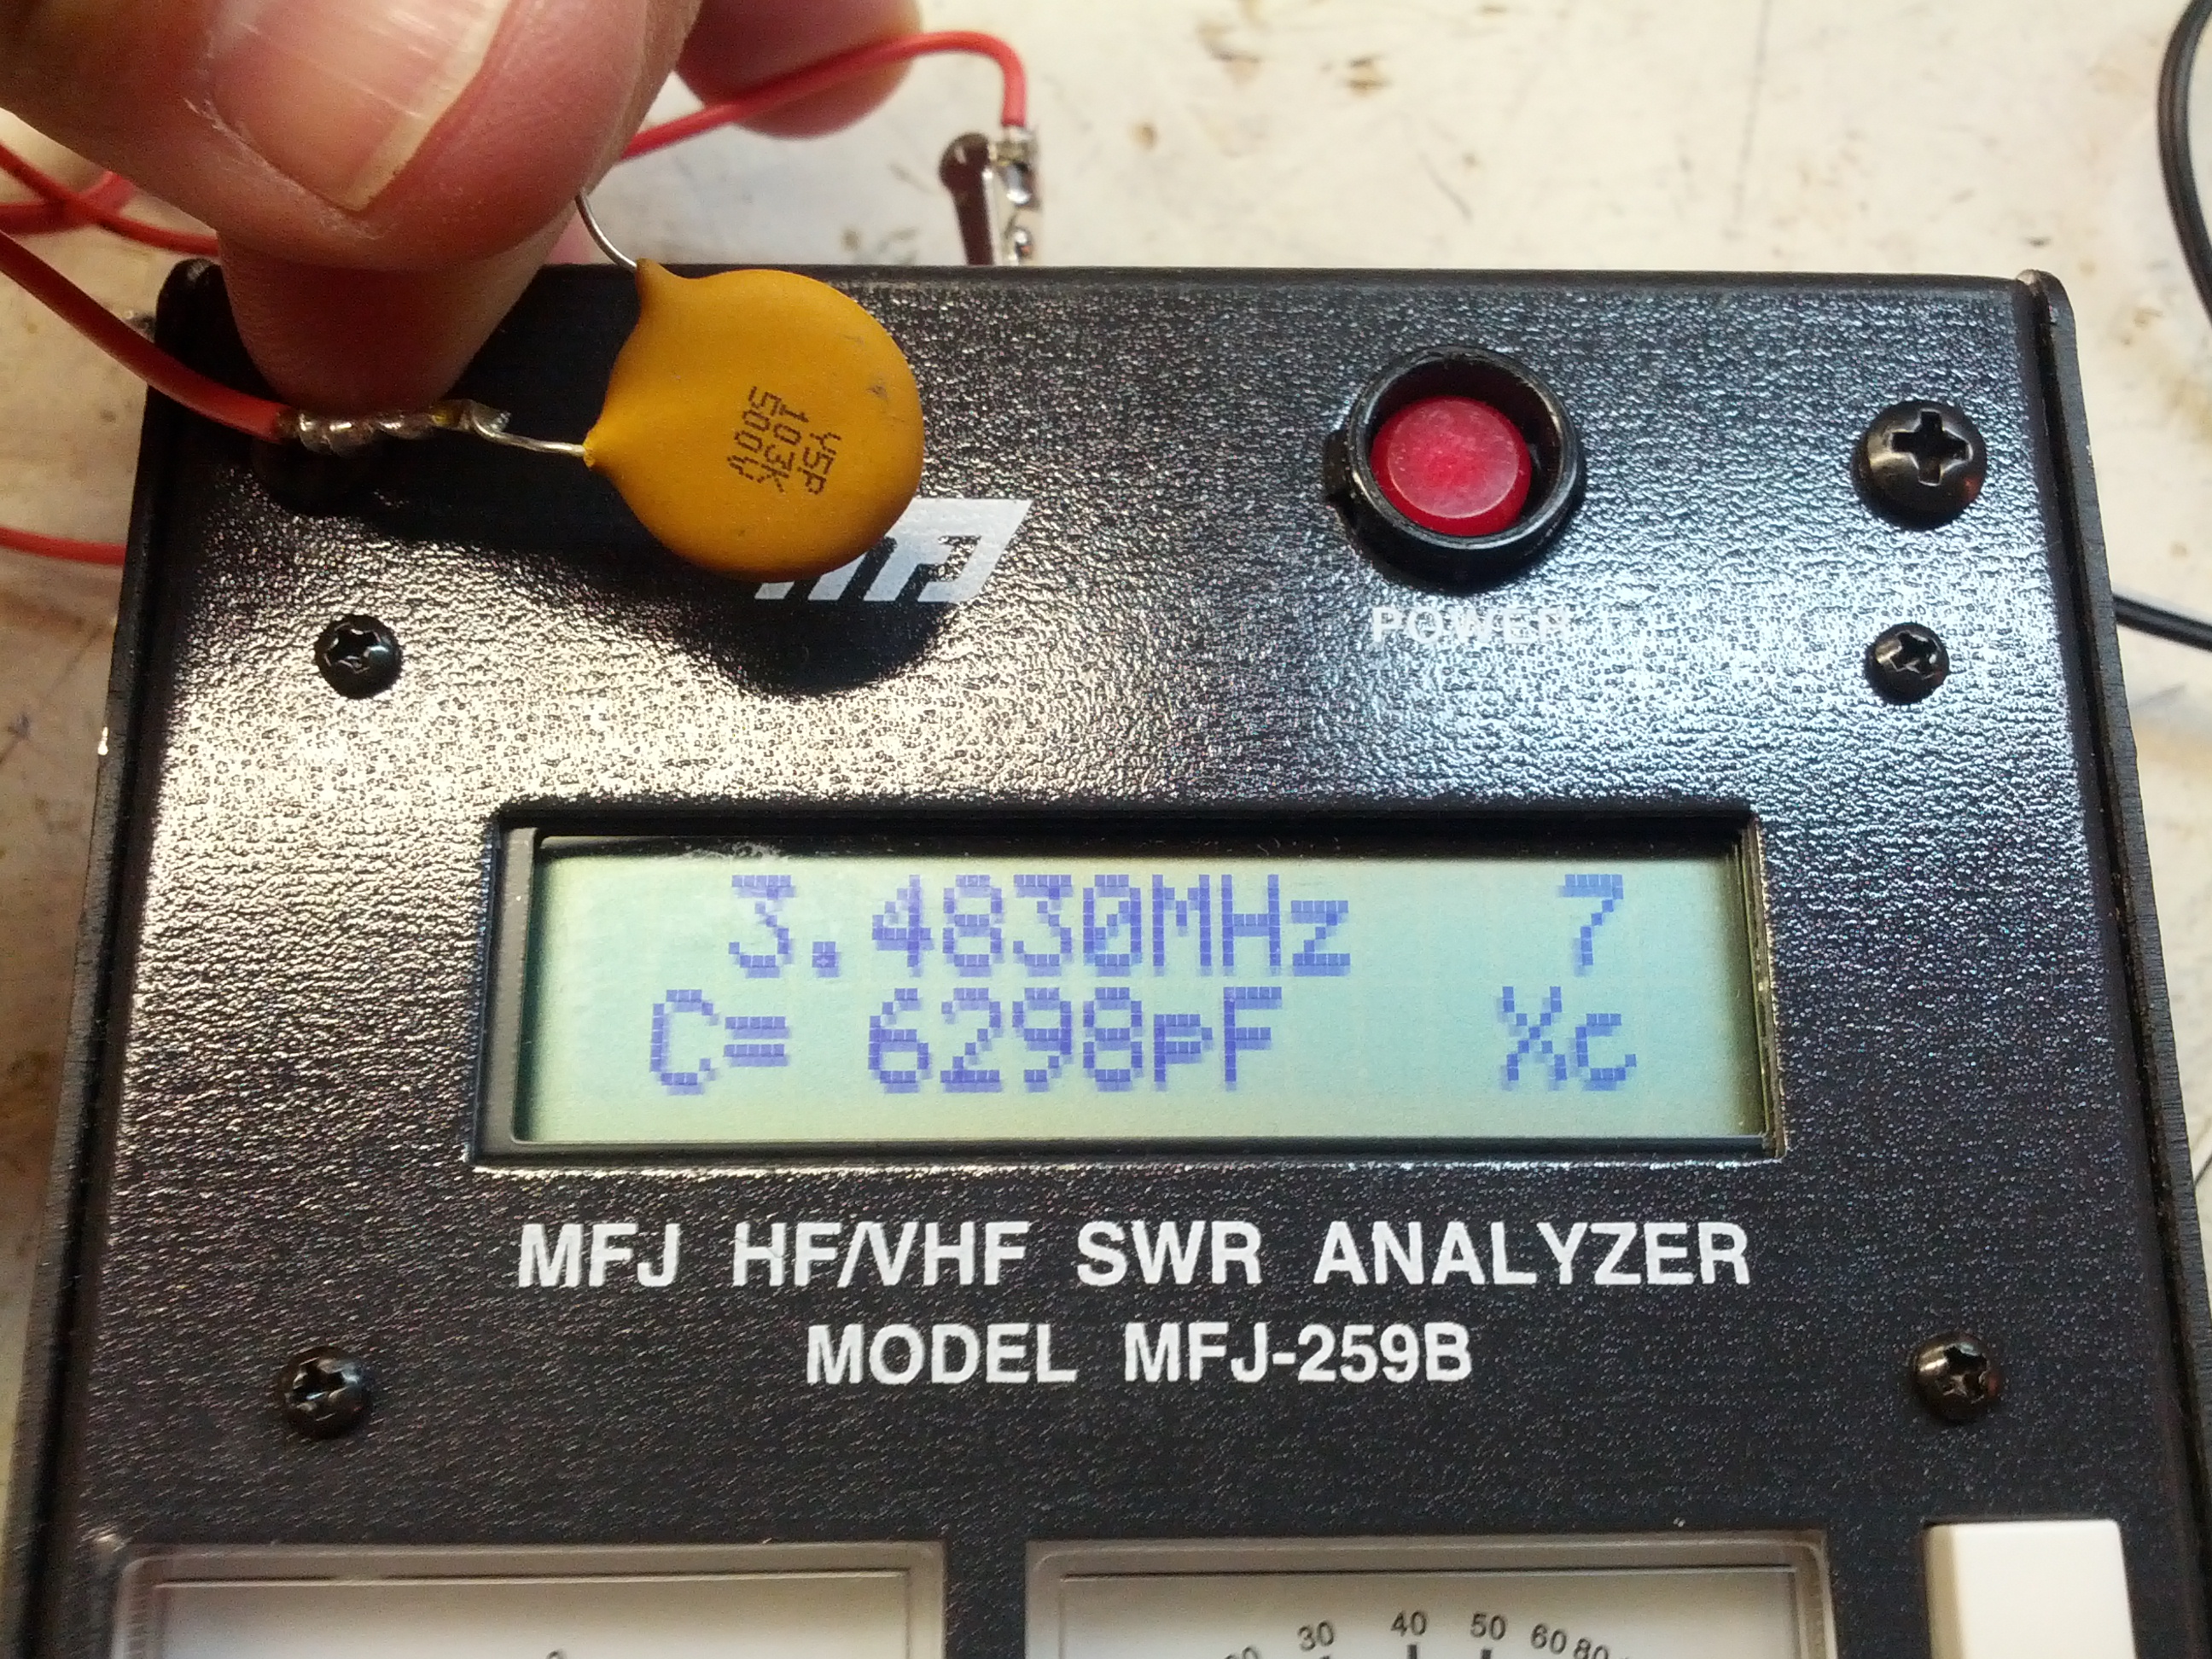
On 80m, this capacitor has 6,298 pf.
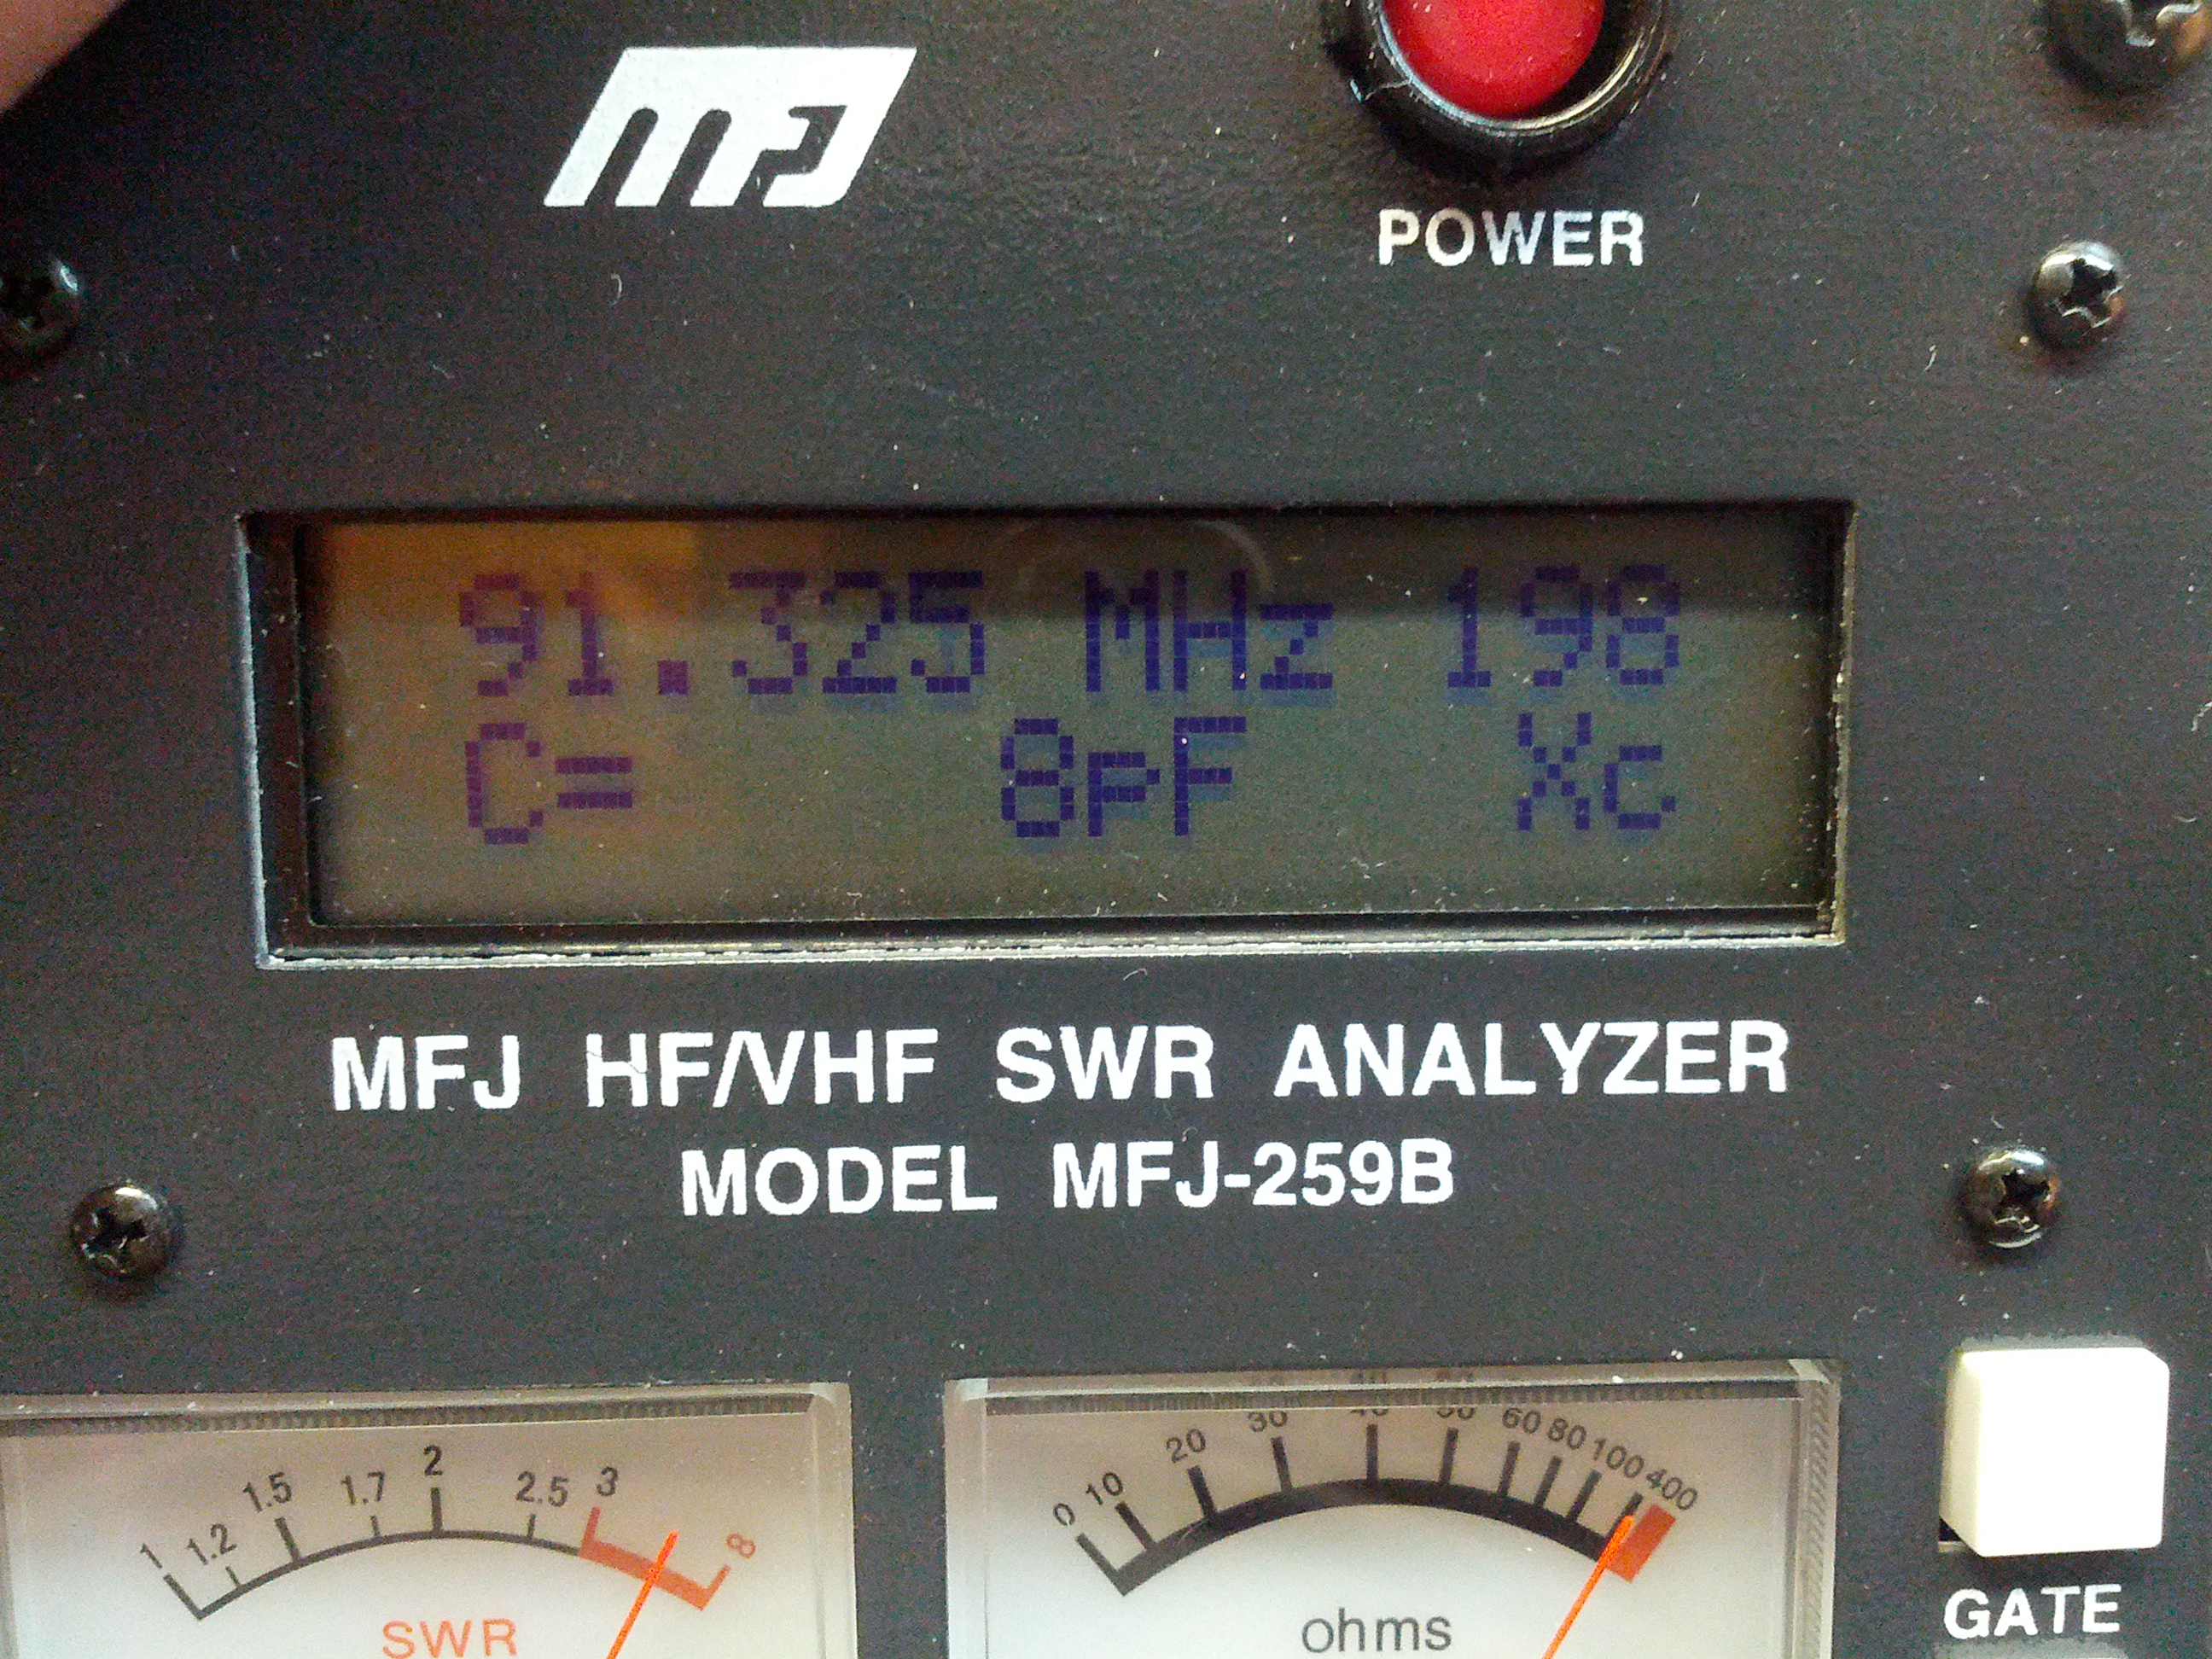
Up at 91 MHz, there’s only 8 pF of capacitance.
I figured the stuff above was a little more fun than me talking about how I tested every antenna I own… again.
-73-
Oh crap, that probably sounds bad. Ah well.

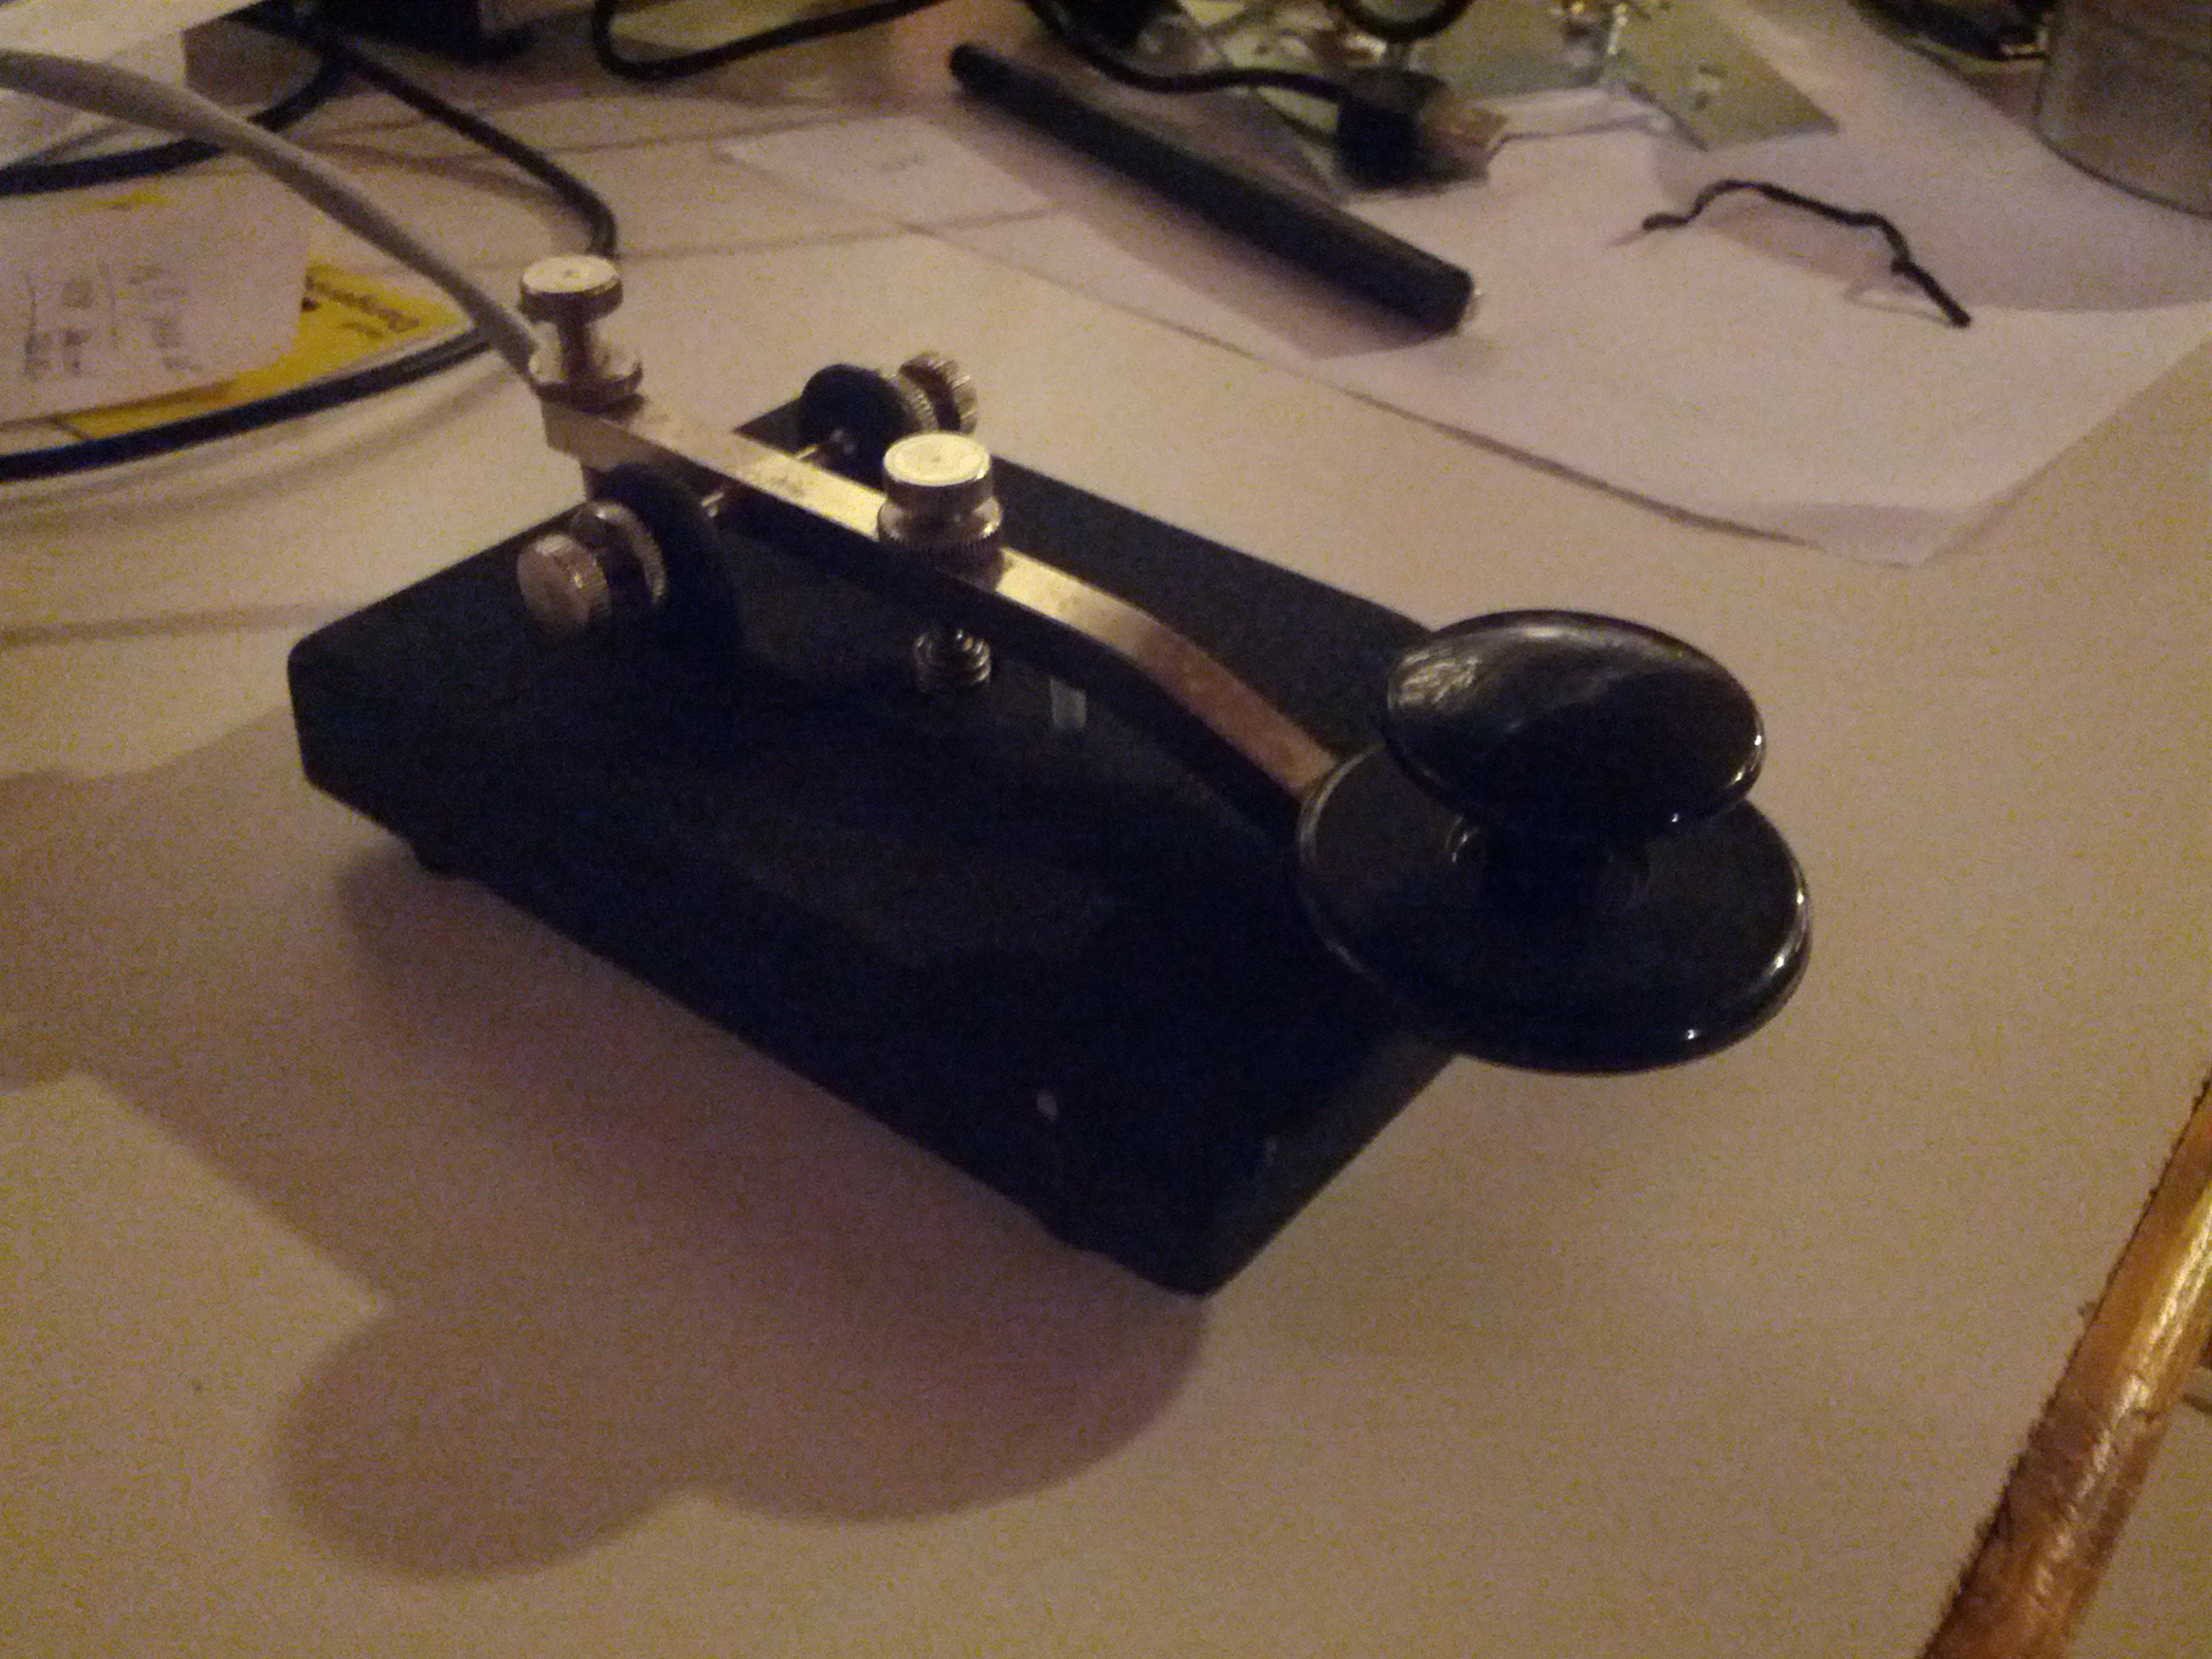
So my first find was a key. It’s nice, heavy, and probably has a history, which I added “purchased for $35 by KE8P” to.

I found this. For $165. Like any normal ham that likes to push buttons and turn knobs, I turned it on, just to be greeted with it flashing “LOW VOLTAGE 6.5V”. I figured that was a sign that it probably works.
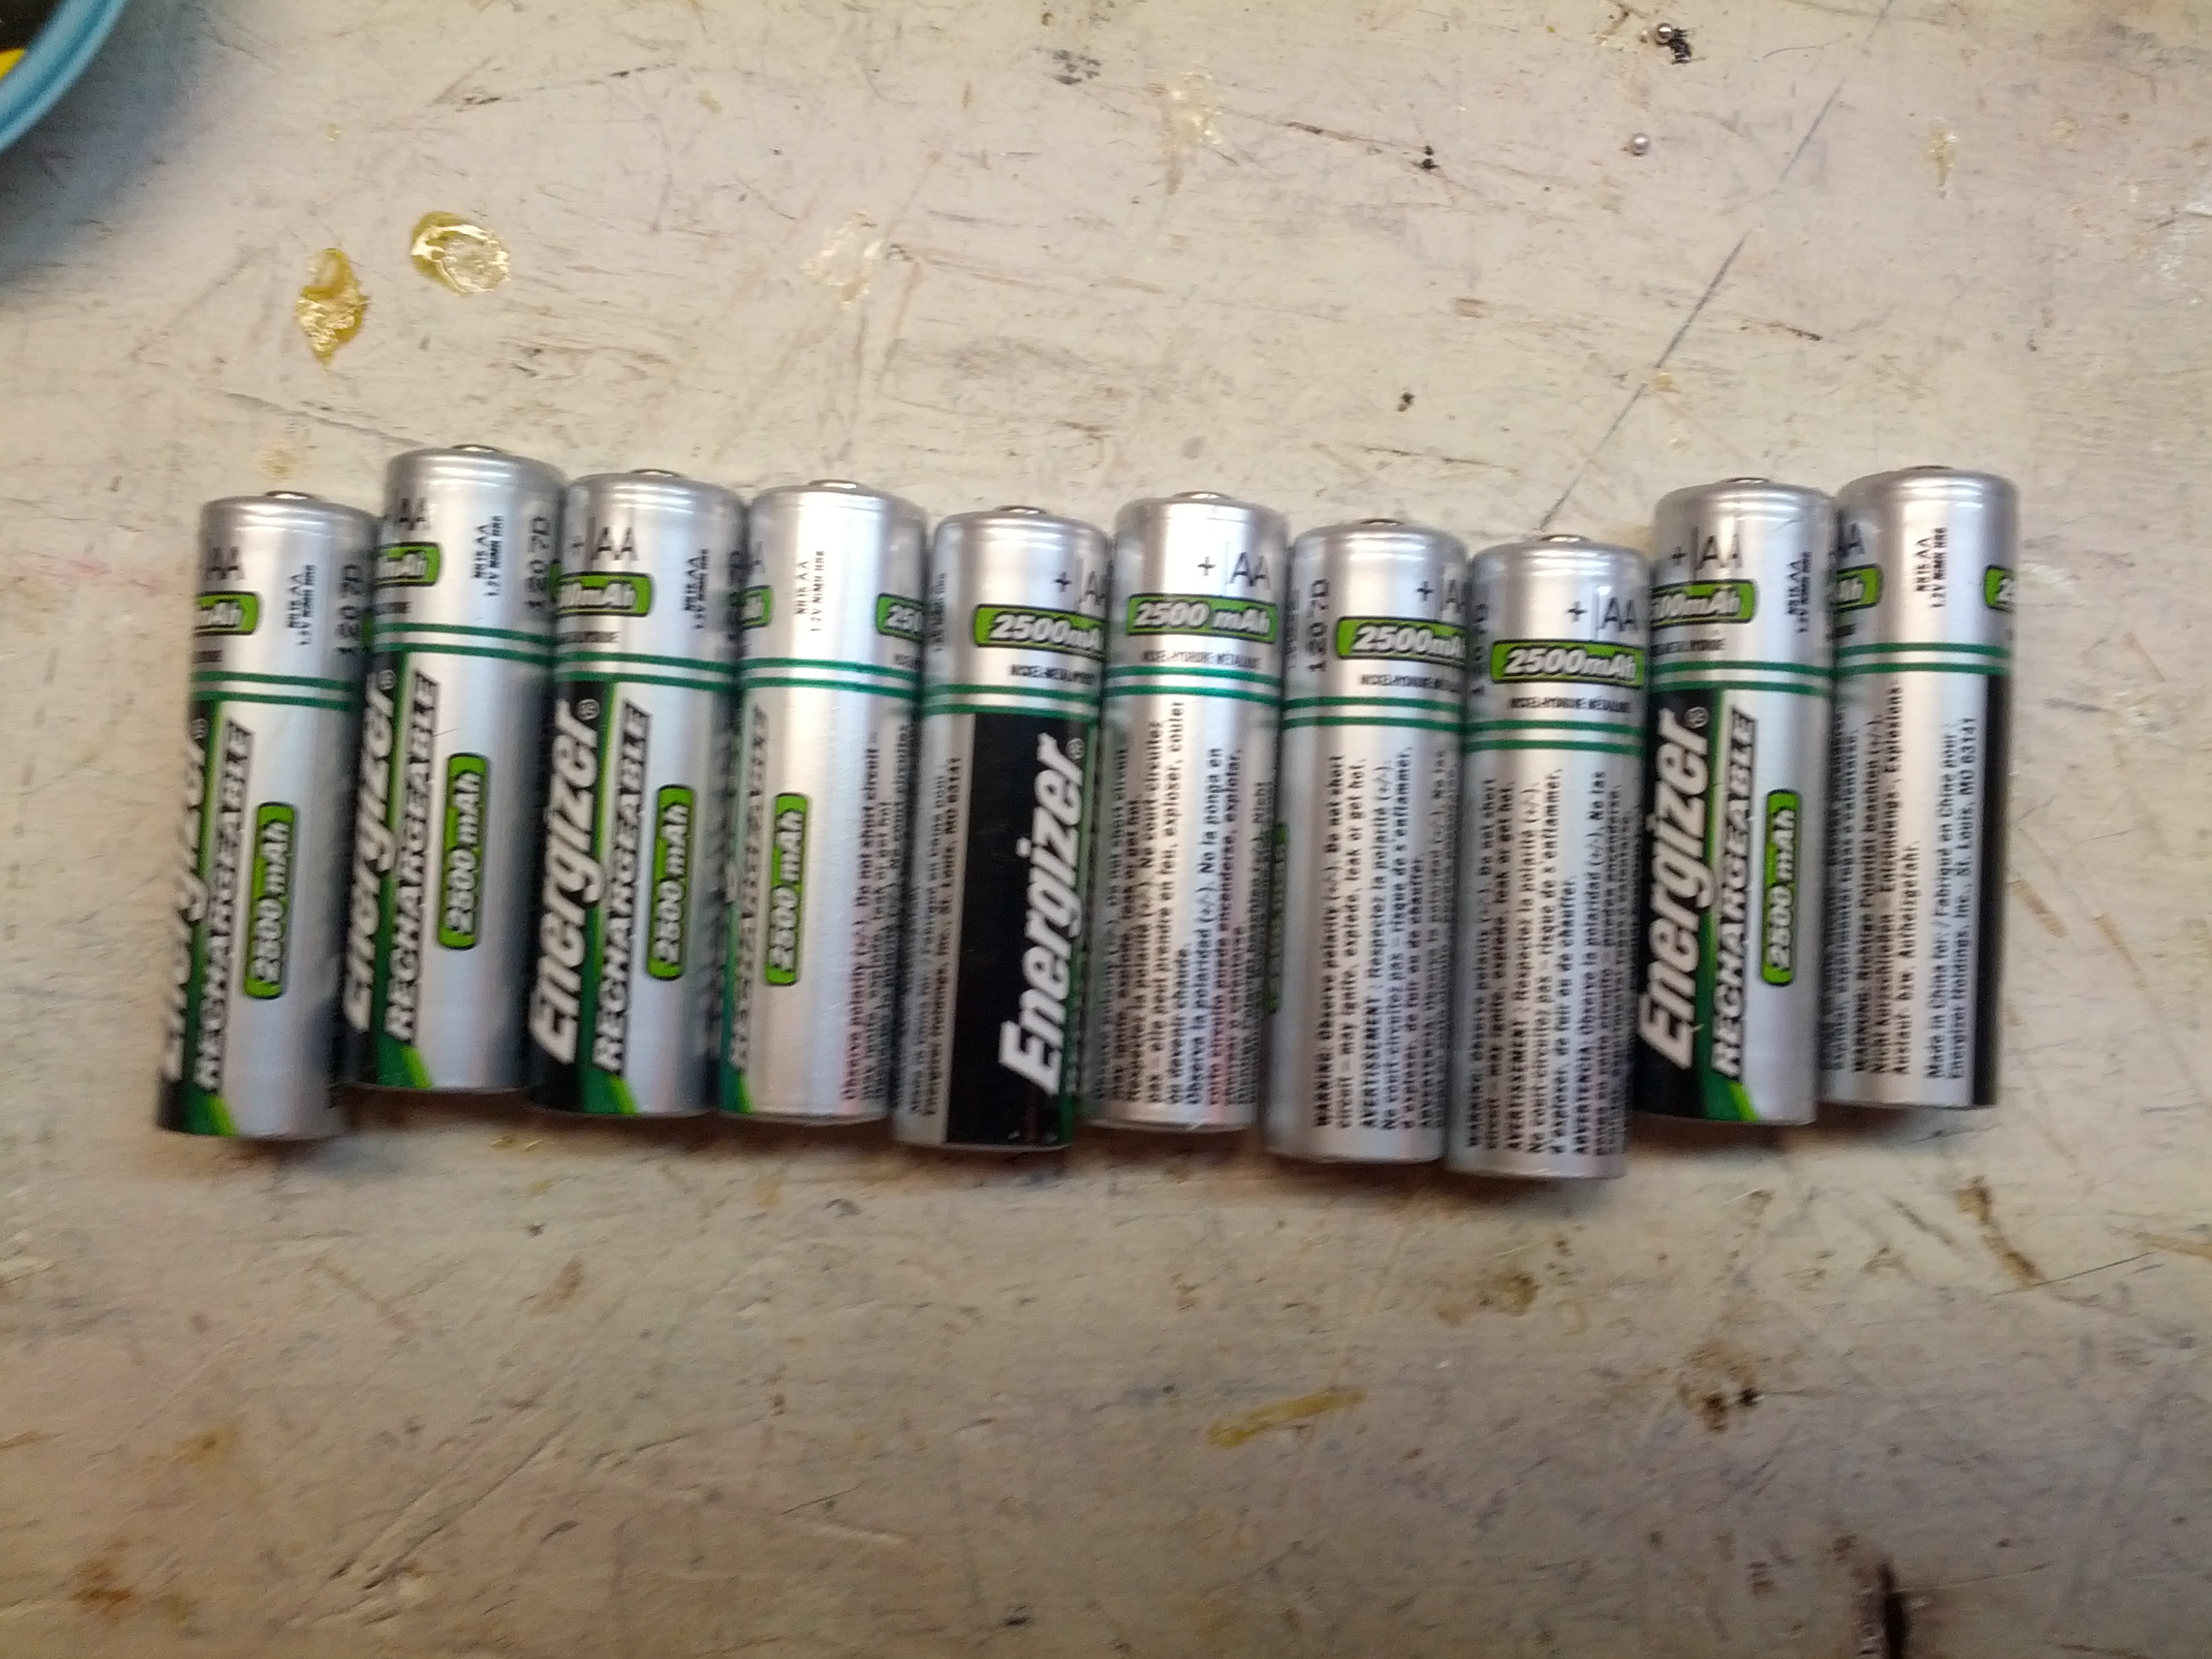
And when I got it home, I found these in it. Ten Energizer rechargeable batteries.
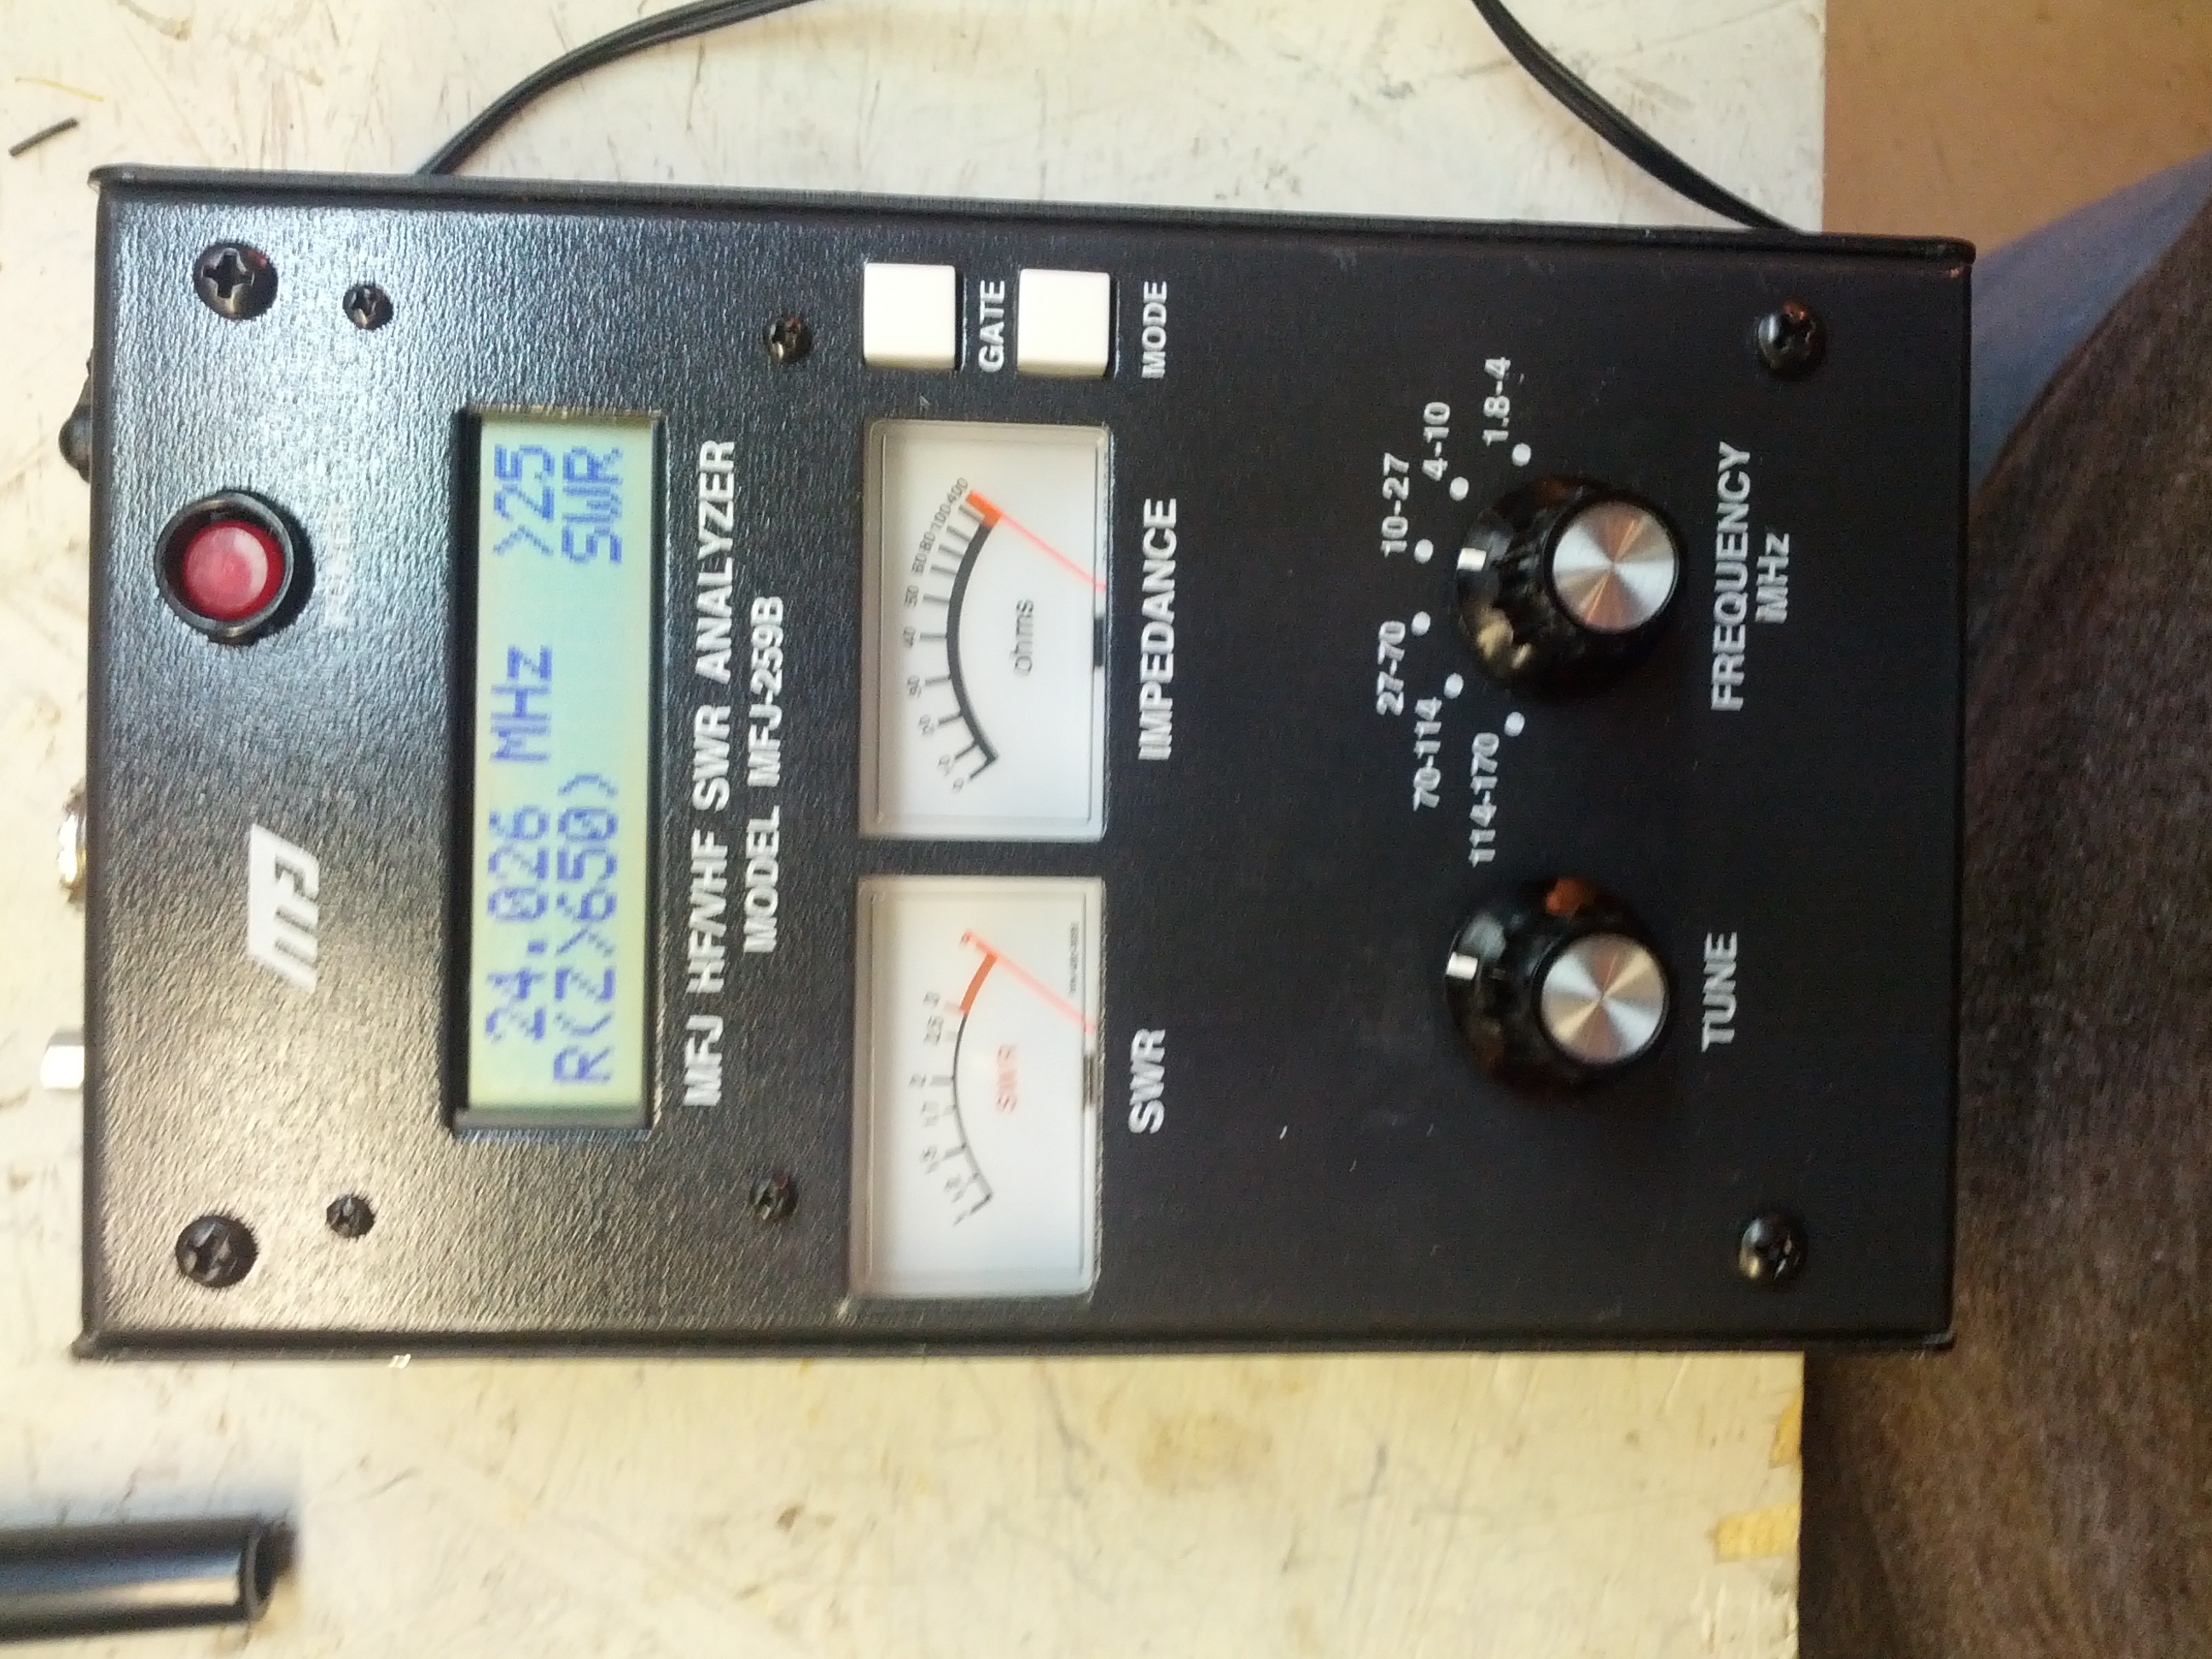
So I removed the batteries and plugged in a wall wart. I was greeted with “VOLTAGE OK 15V” and something like the display in the picture above. I did check my dummy load, it claims it is around 50 ohms at 1-1.3 SWR. Guess it works!
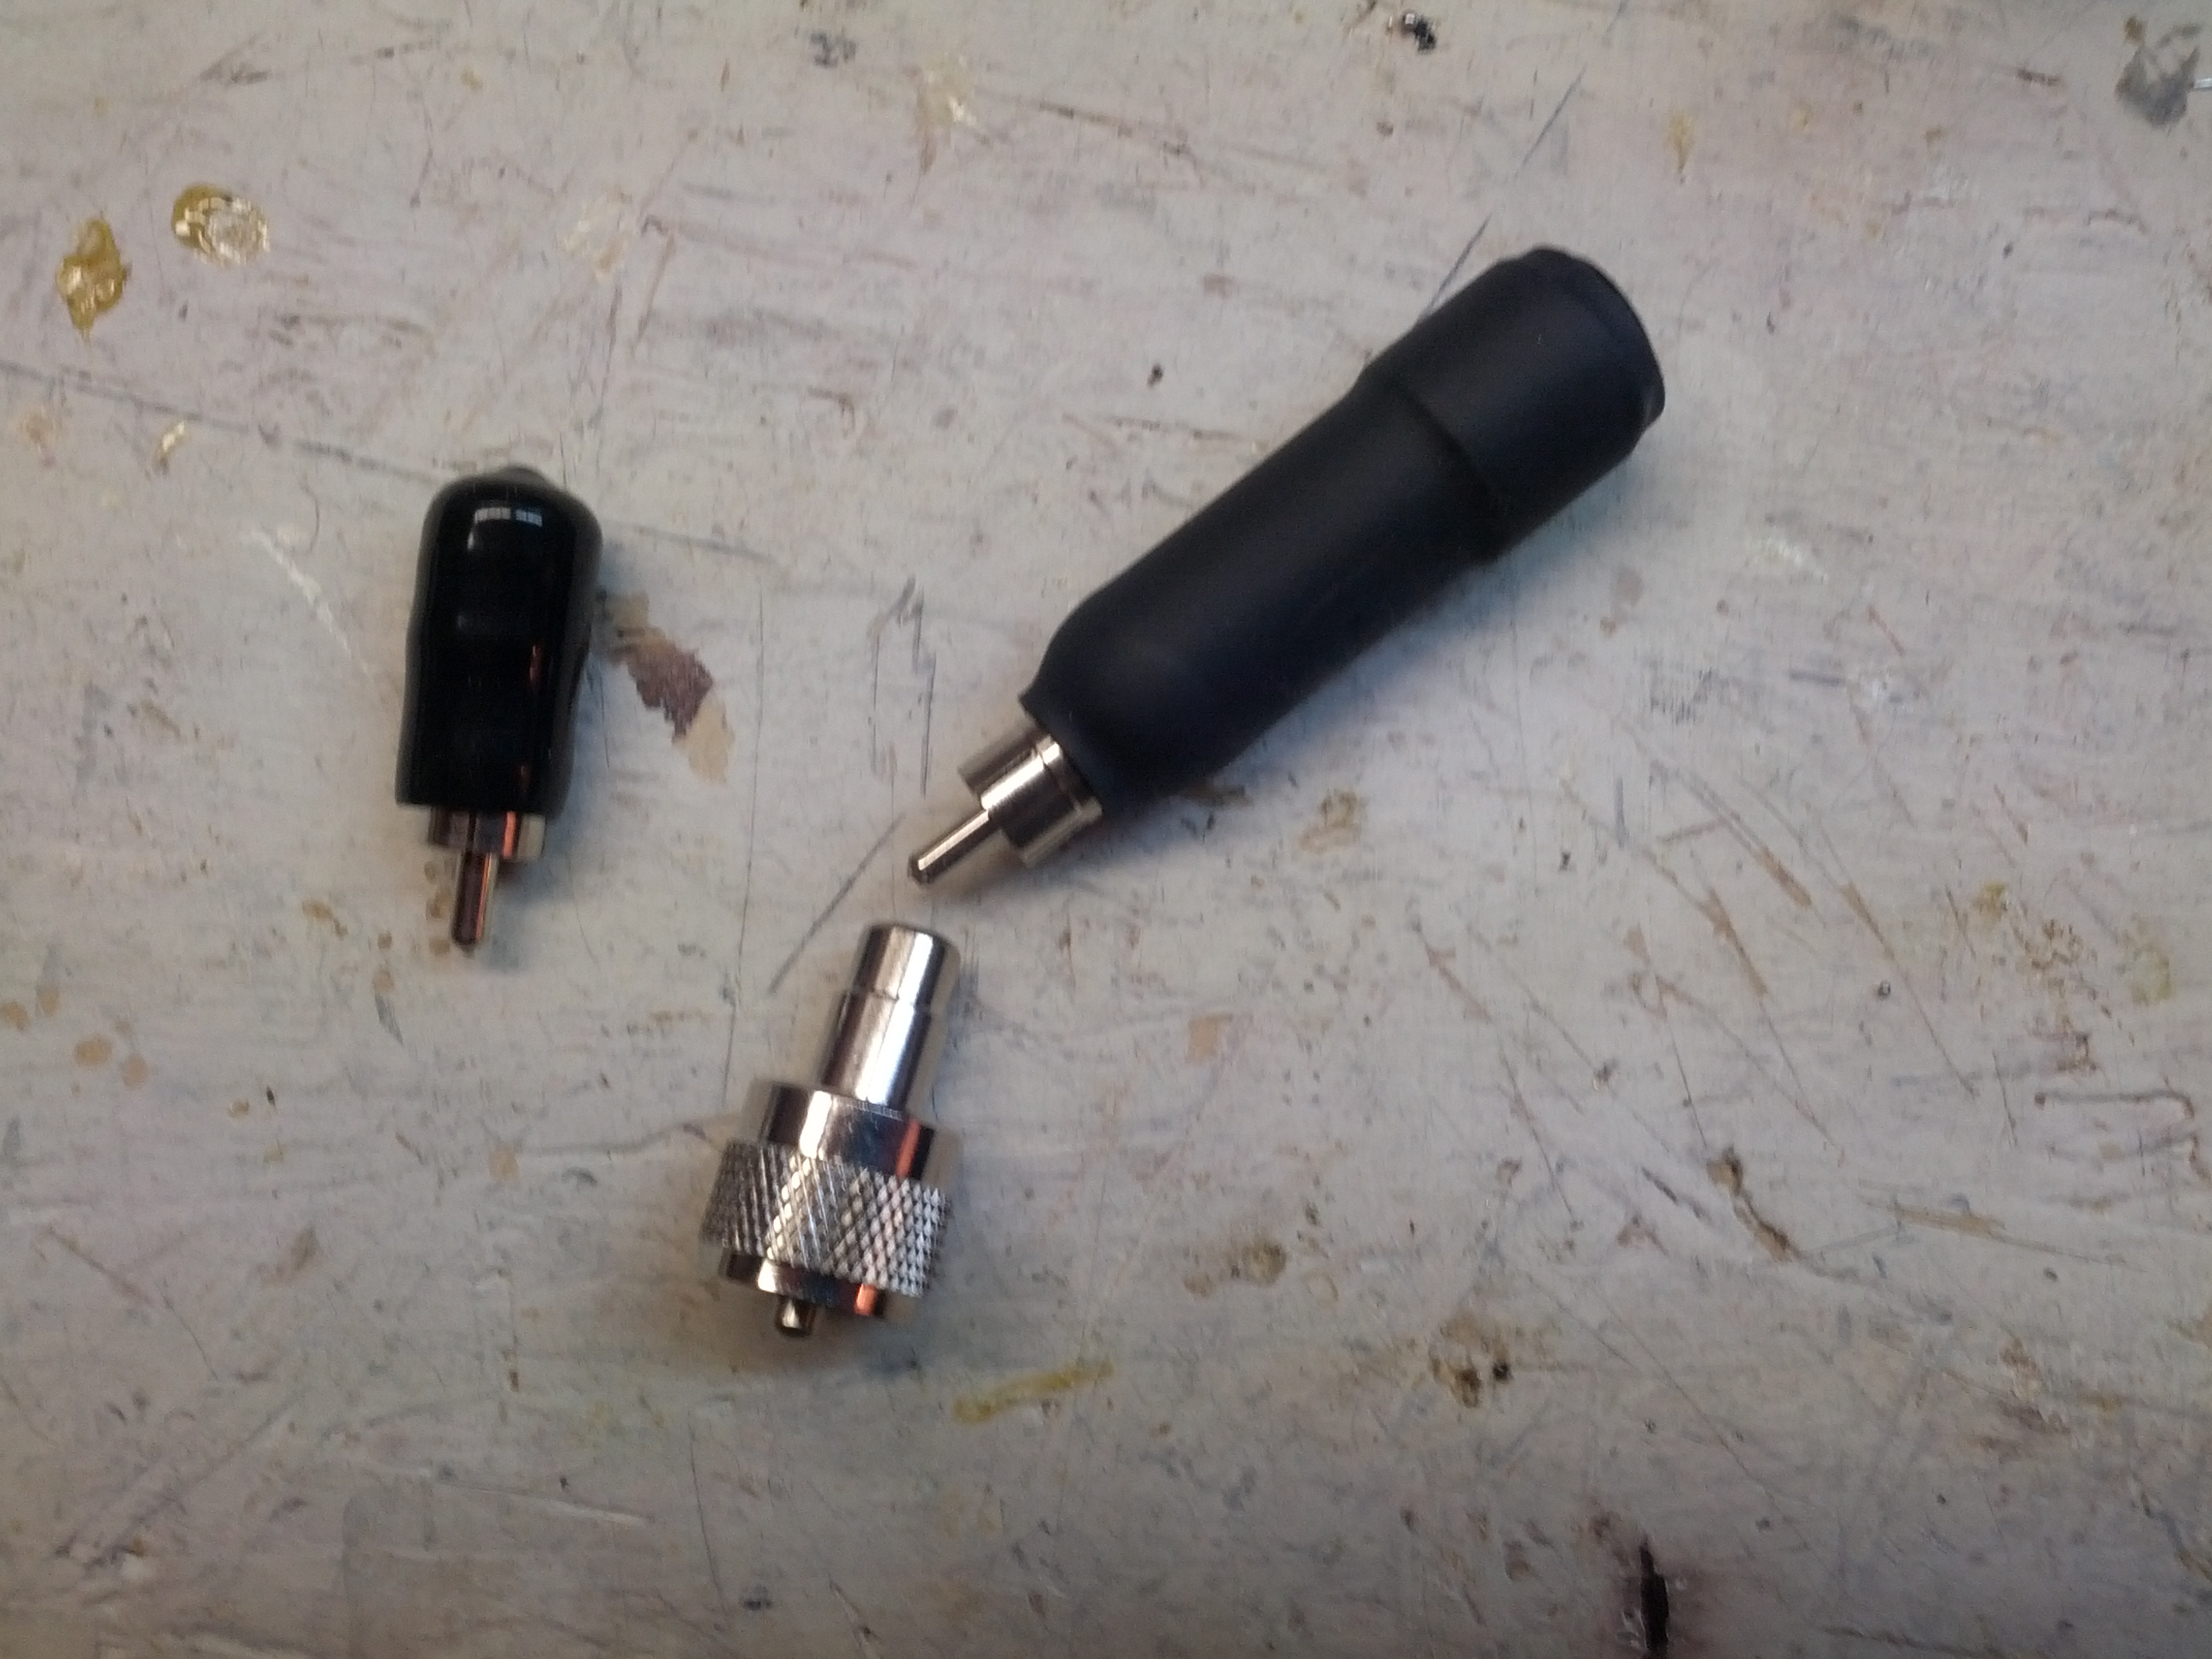
Also included were these. They are coils to use the analyzer as a dip meter. I didn’t really need these, as I built one (they’re really quite simple). My built version worked quite well for the coax traps on my attic trap dipole.
So I did try it with my HF and 2m antennas…

Not bad for the severe destruction of 5 clothes hangars
My HF antenna isn’t too bad on 2m…
…and it does okay on 20 meters, too…
The third purchase was a case for my SoftRock
The last thing I got was some fiberglass mast. I didn’t take a picture of that.
I didn’t take as many pics as last year, but I did take some…

The view walking in on Friday morning.
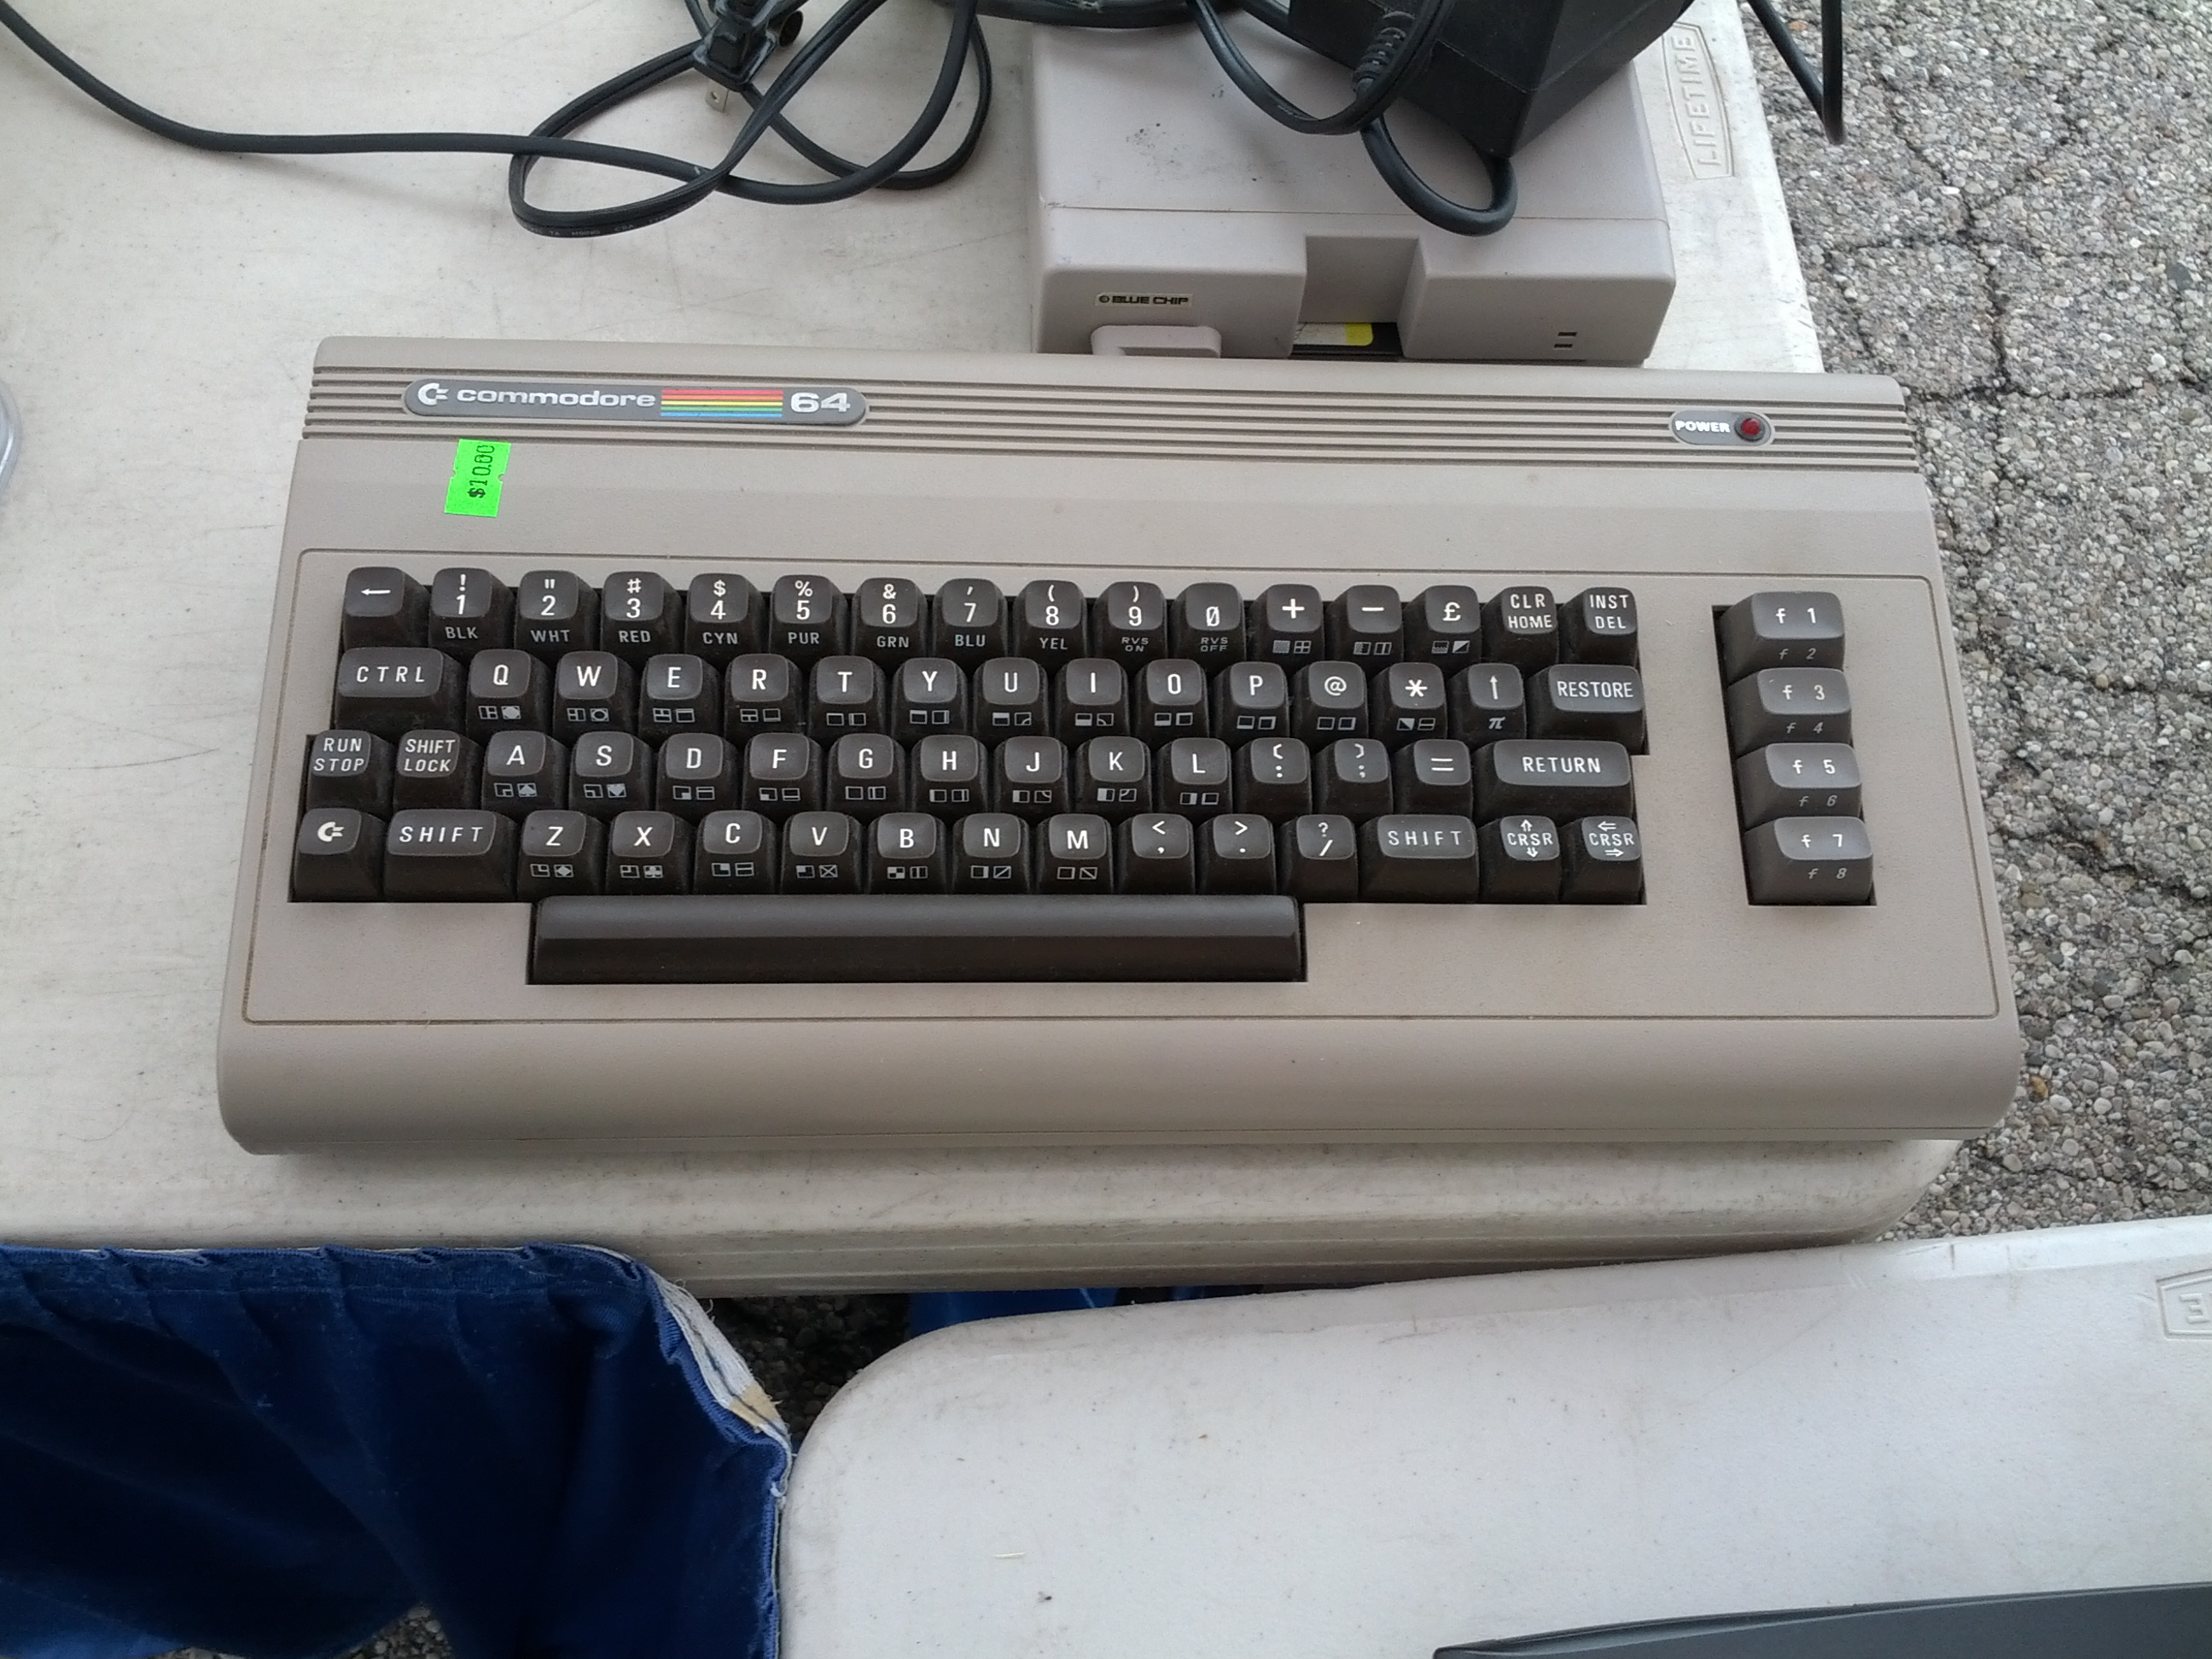
A Commodore 64. The seller claims it still works. $10.

The straight key I bought
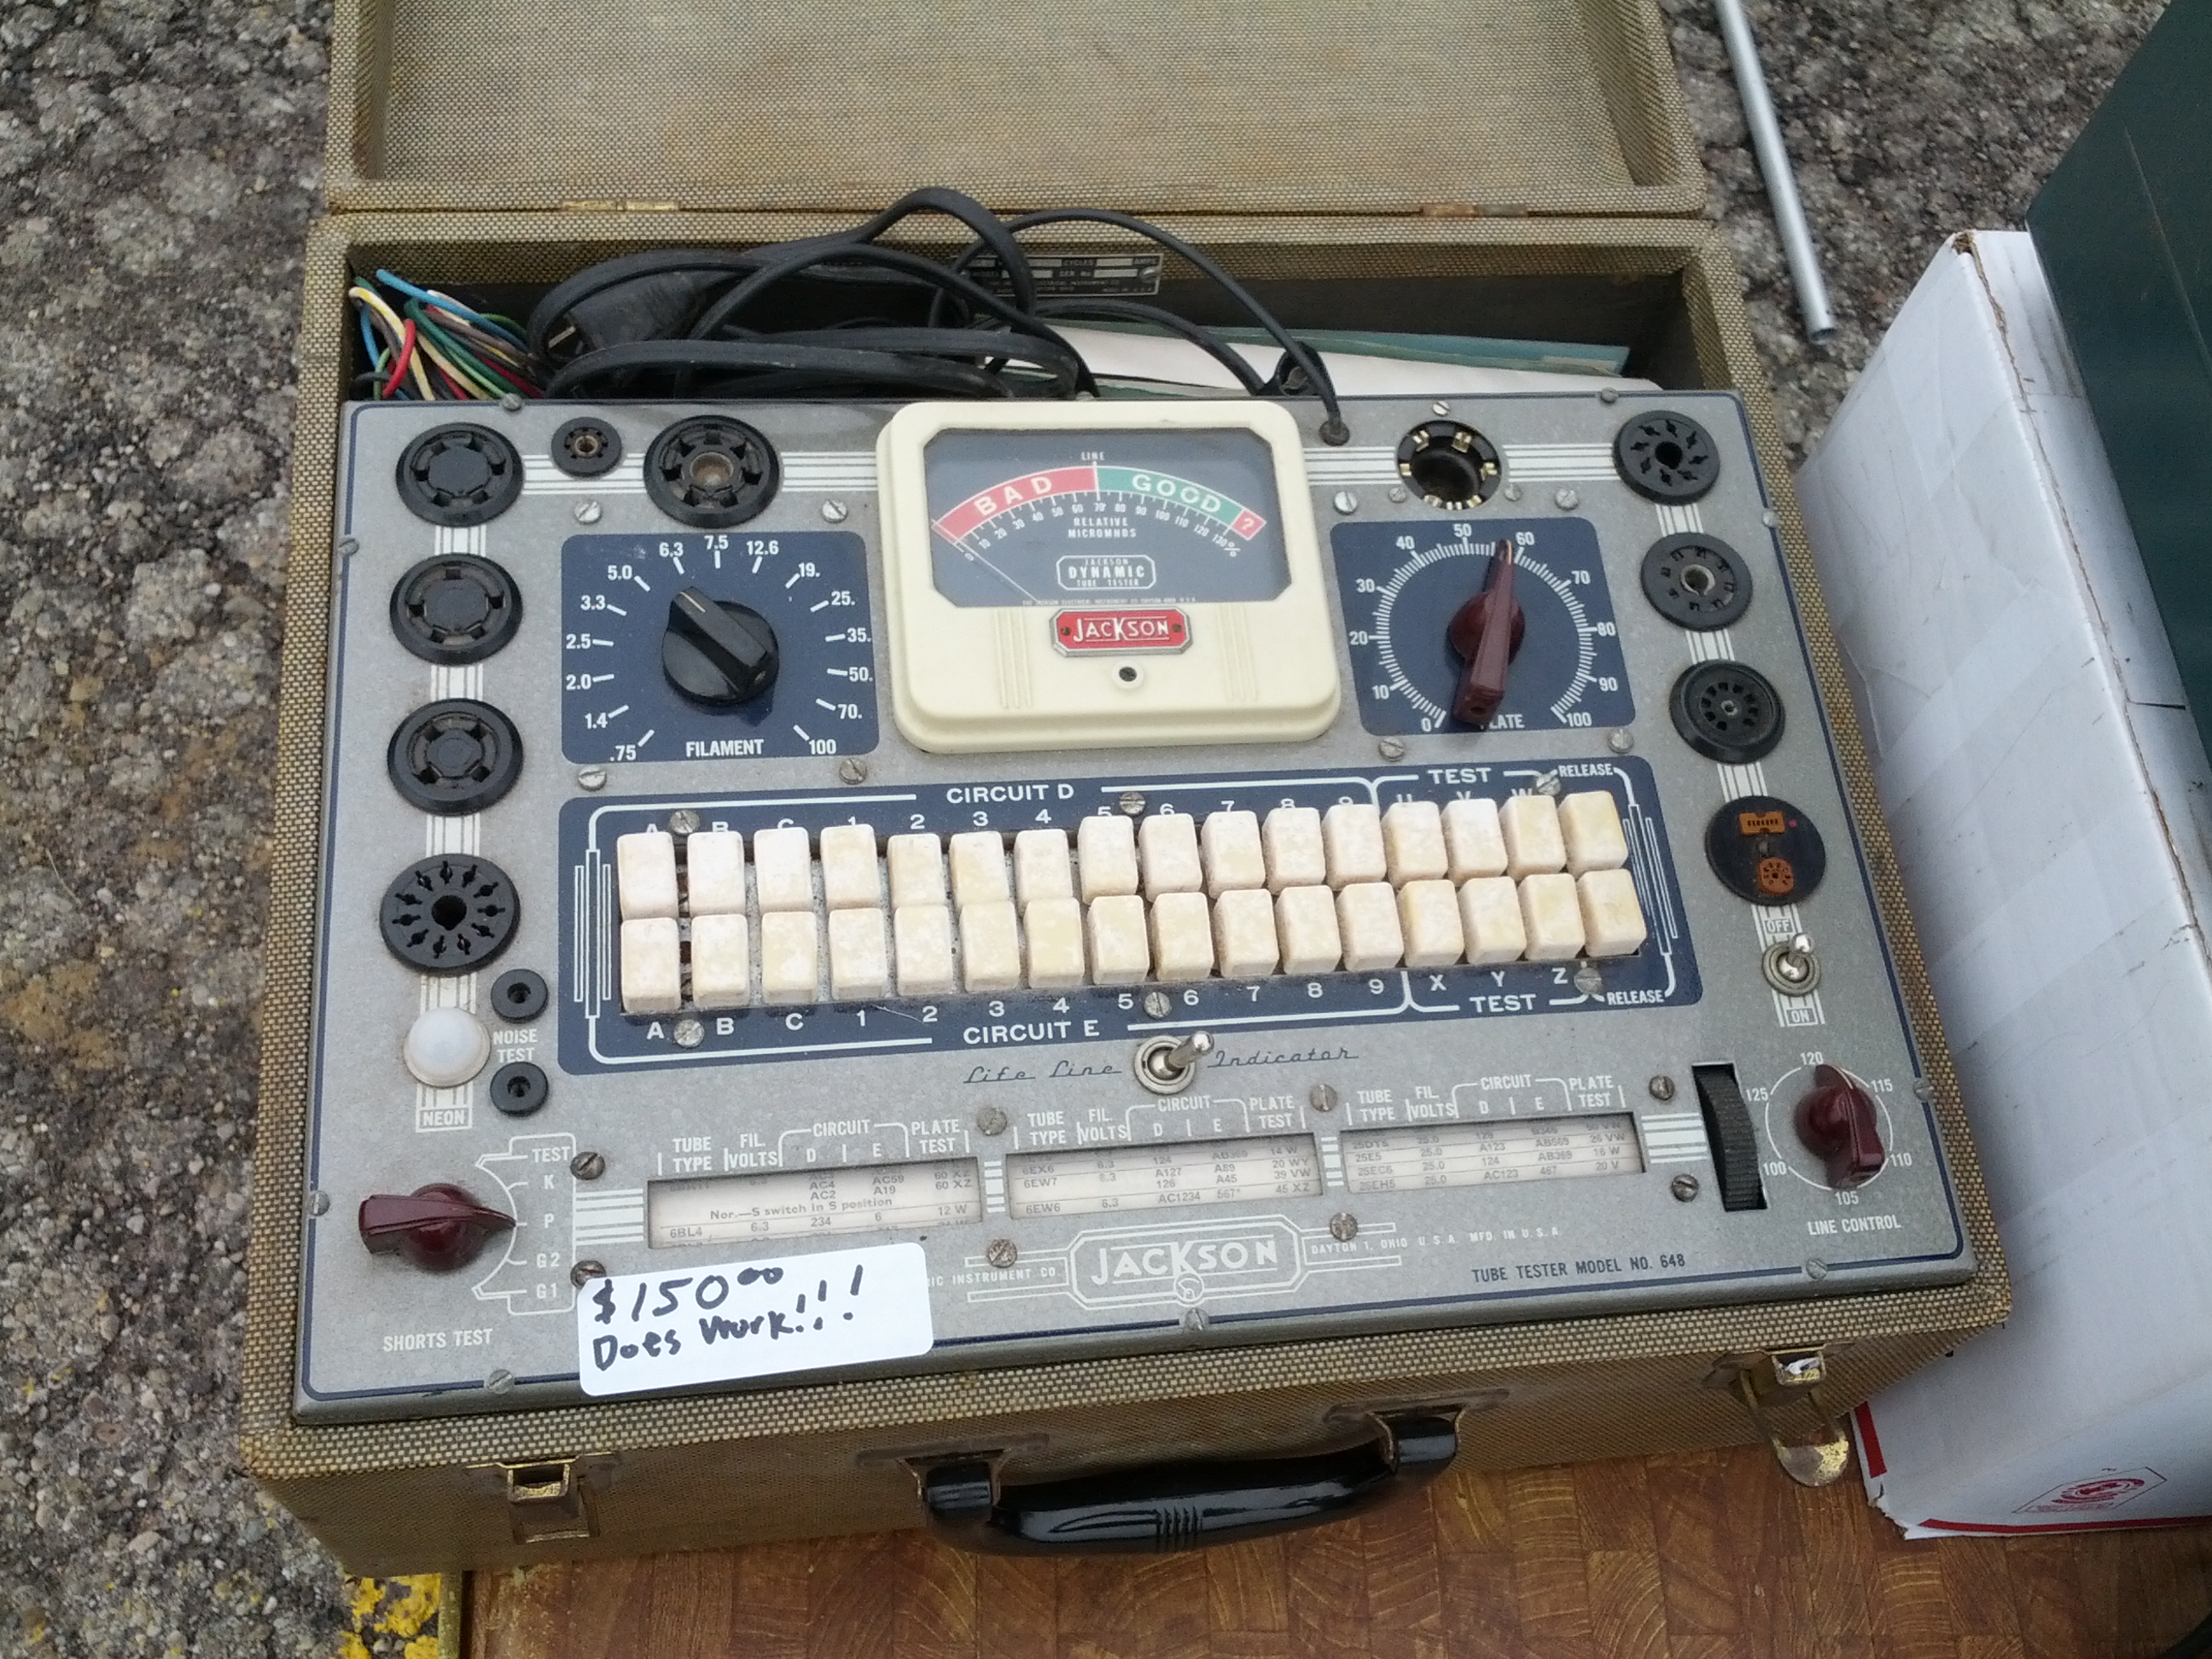
A tube tester.
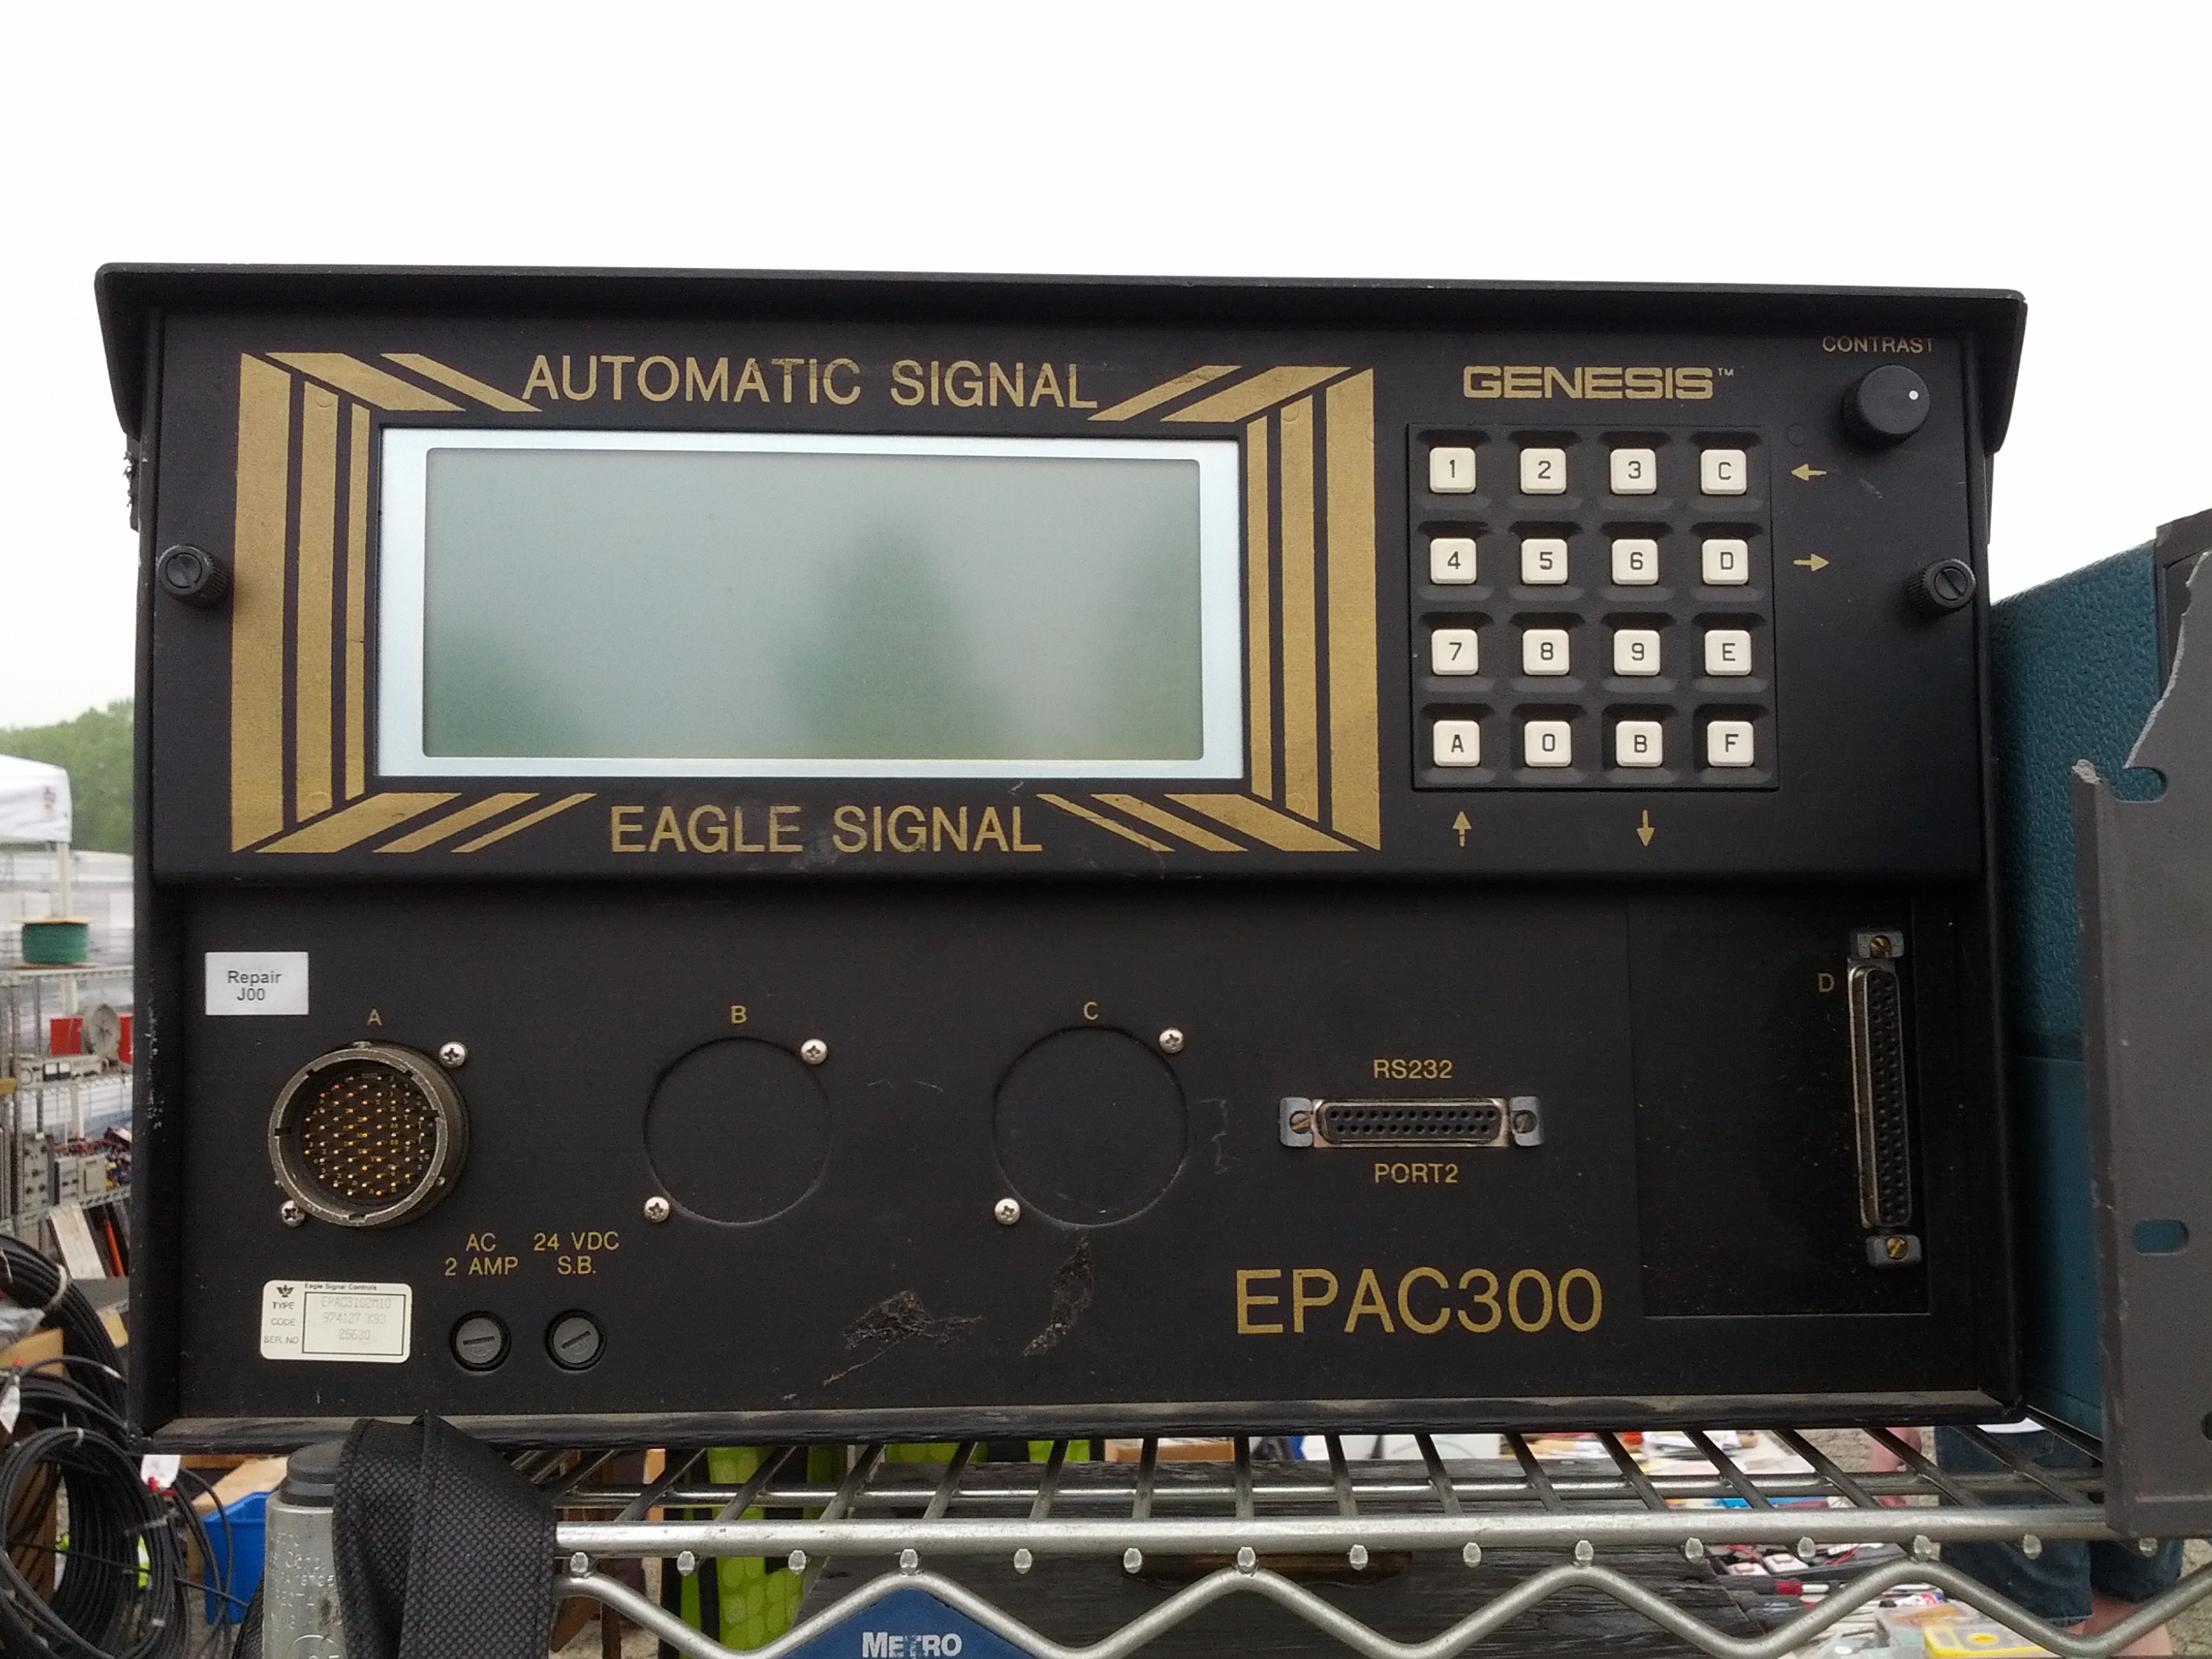
This is an odd find at a hamfest. This is a traffic signal controller.
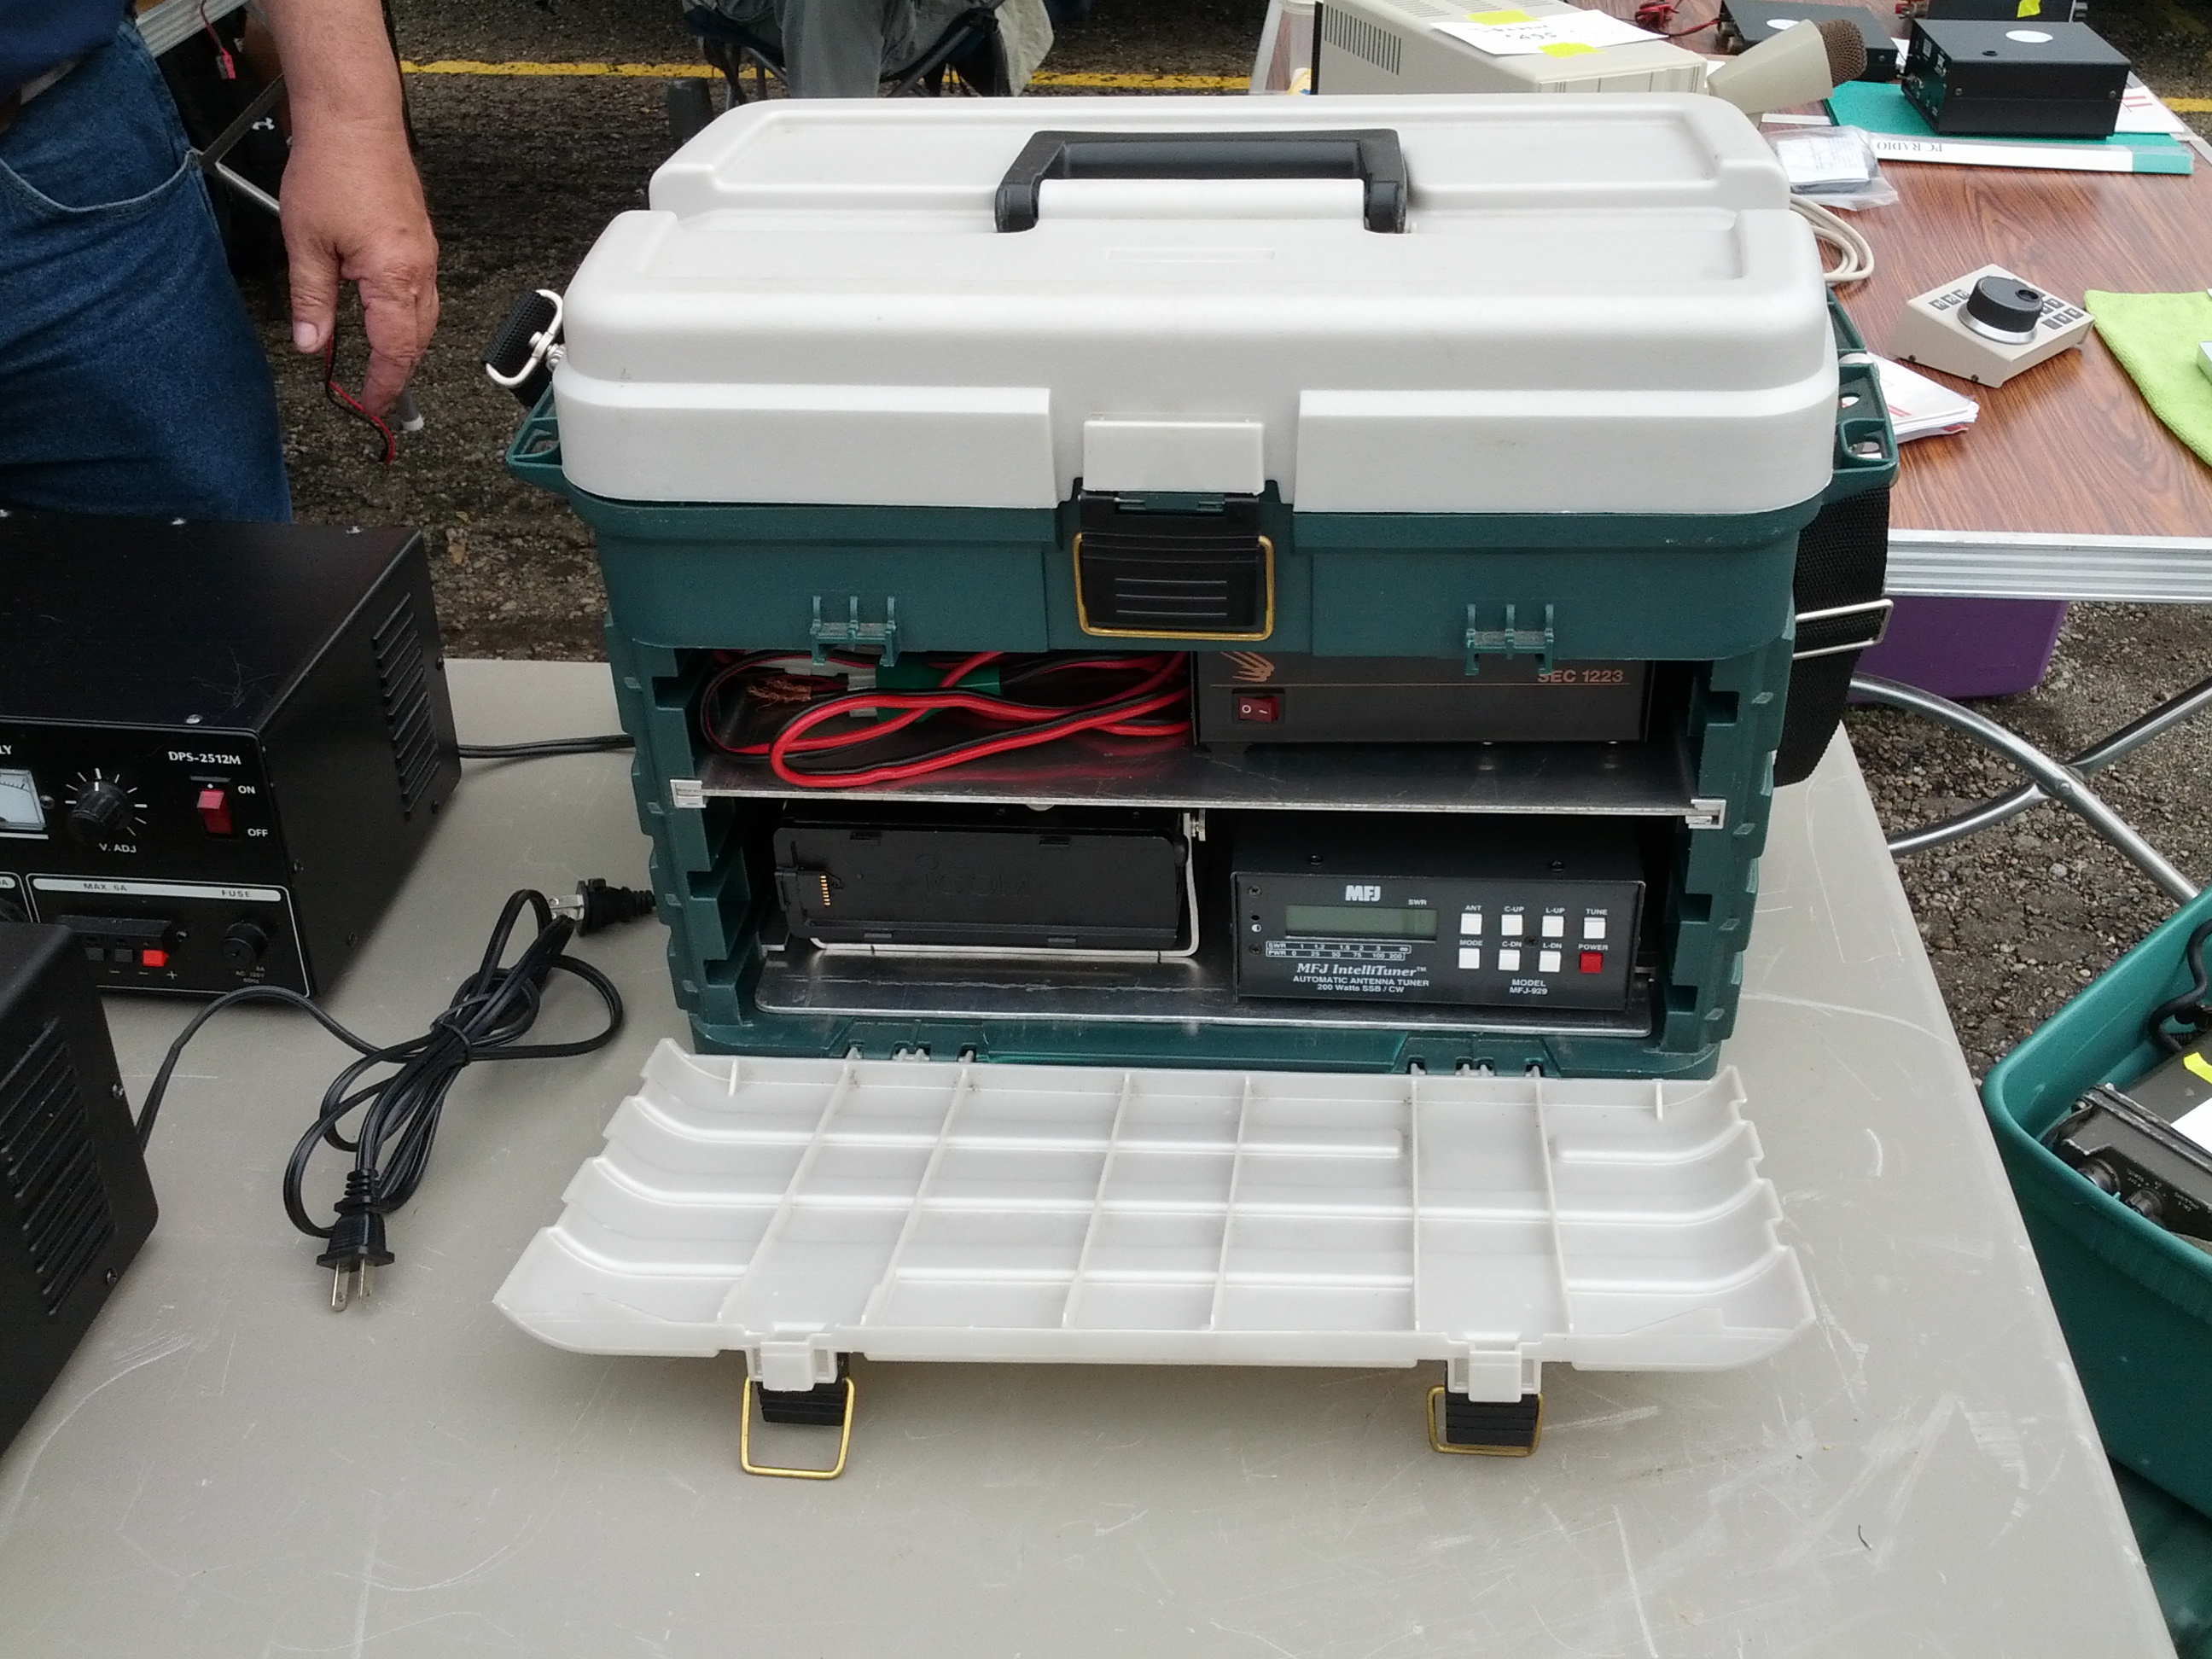
This was one of three similar go boxes made out of the same tackle box, most out of similar radios and tuners as well.

The antenna analyzer I bought.
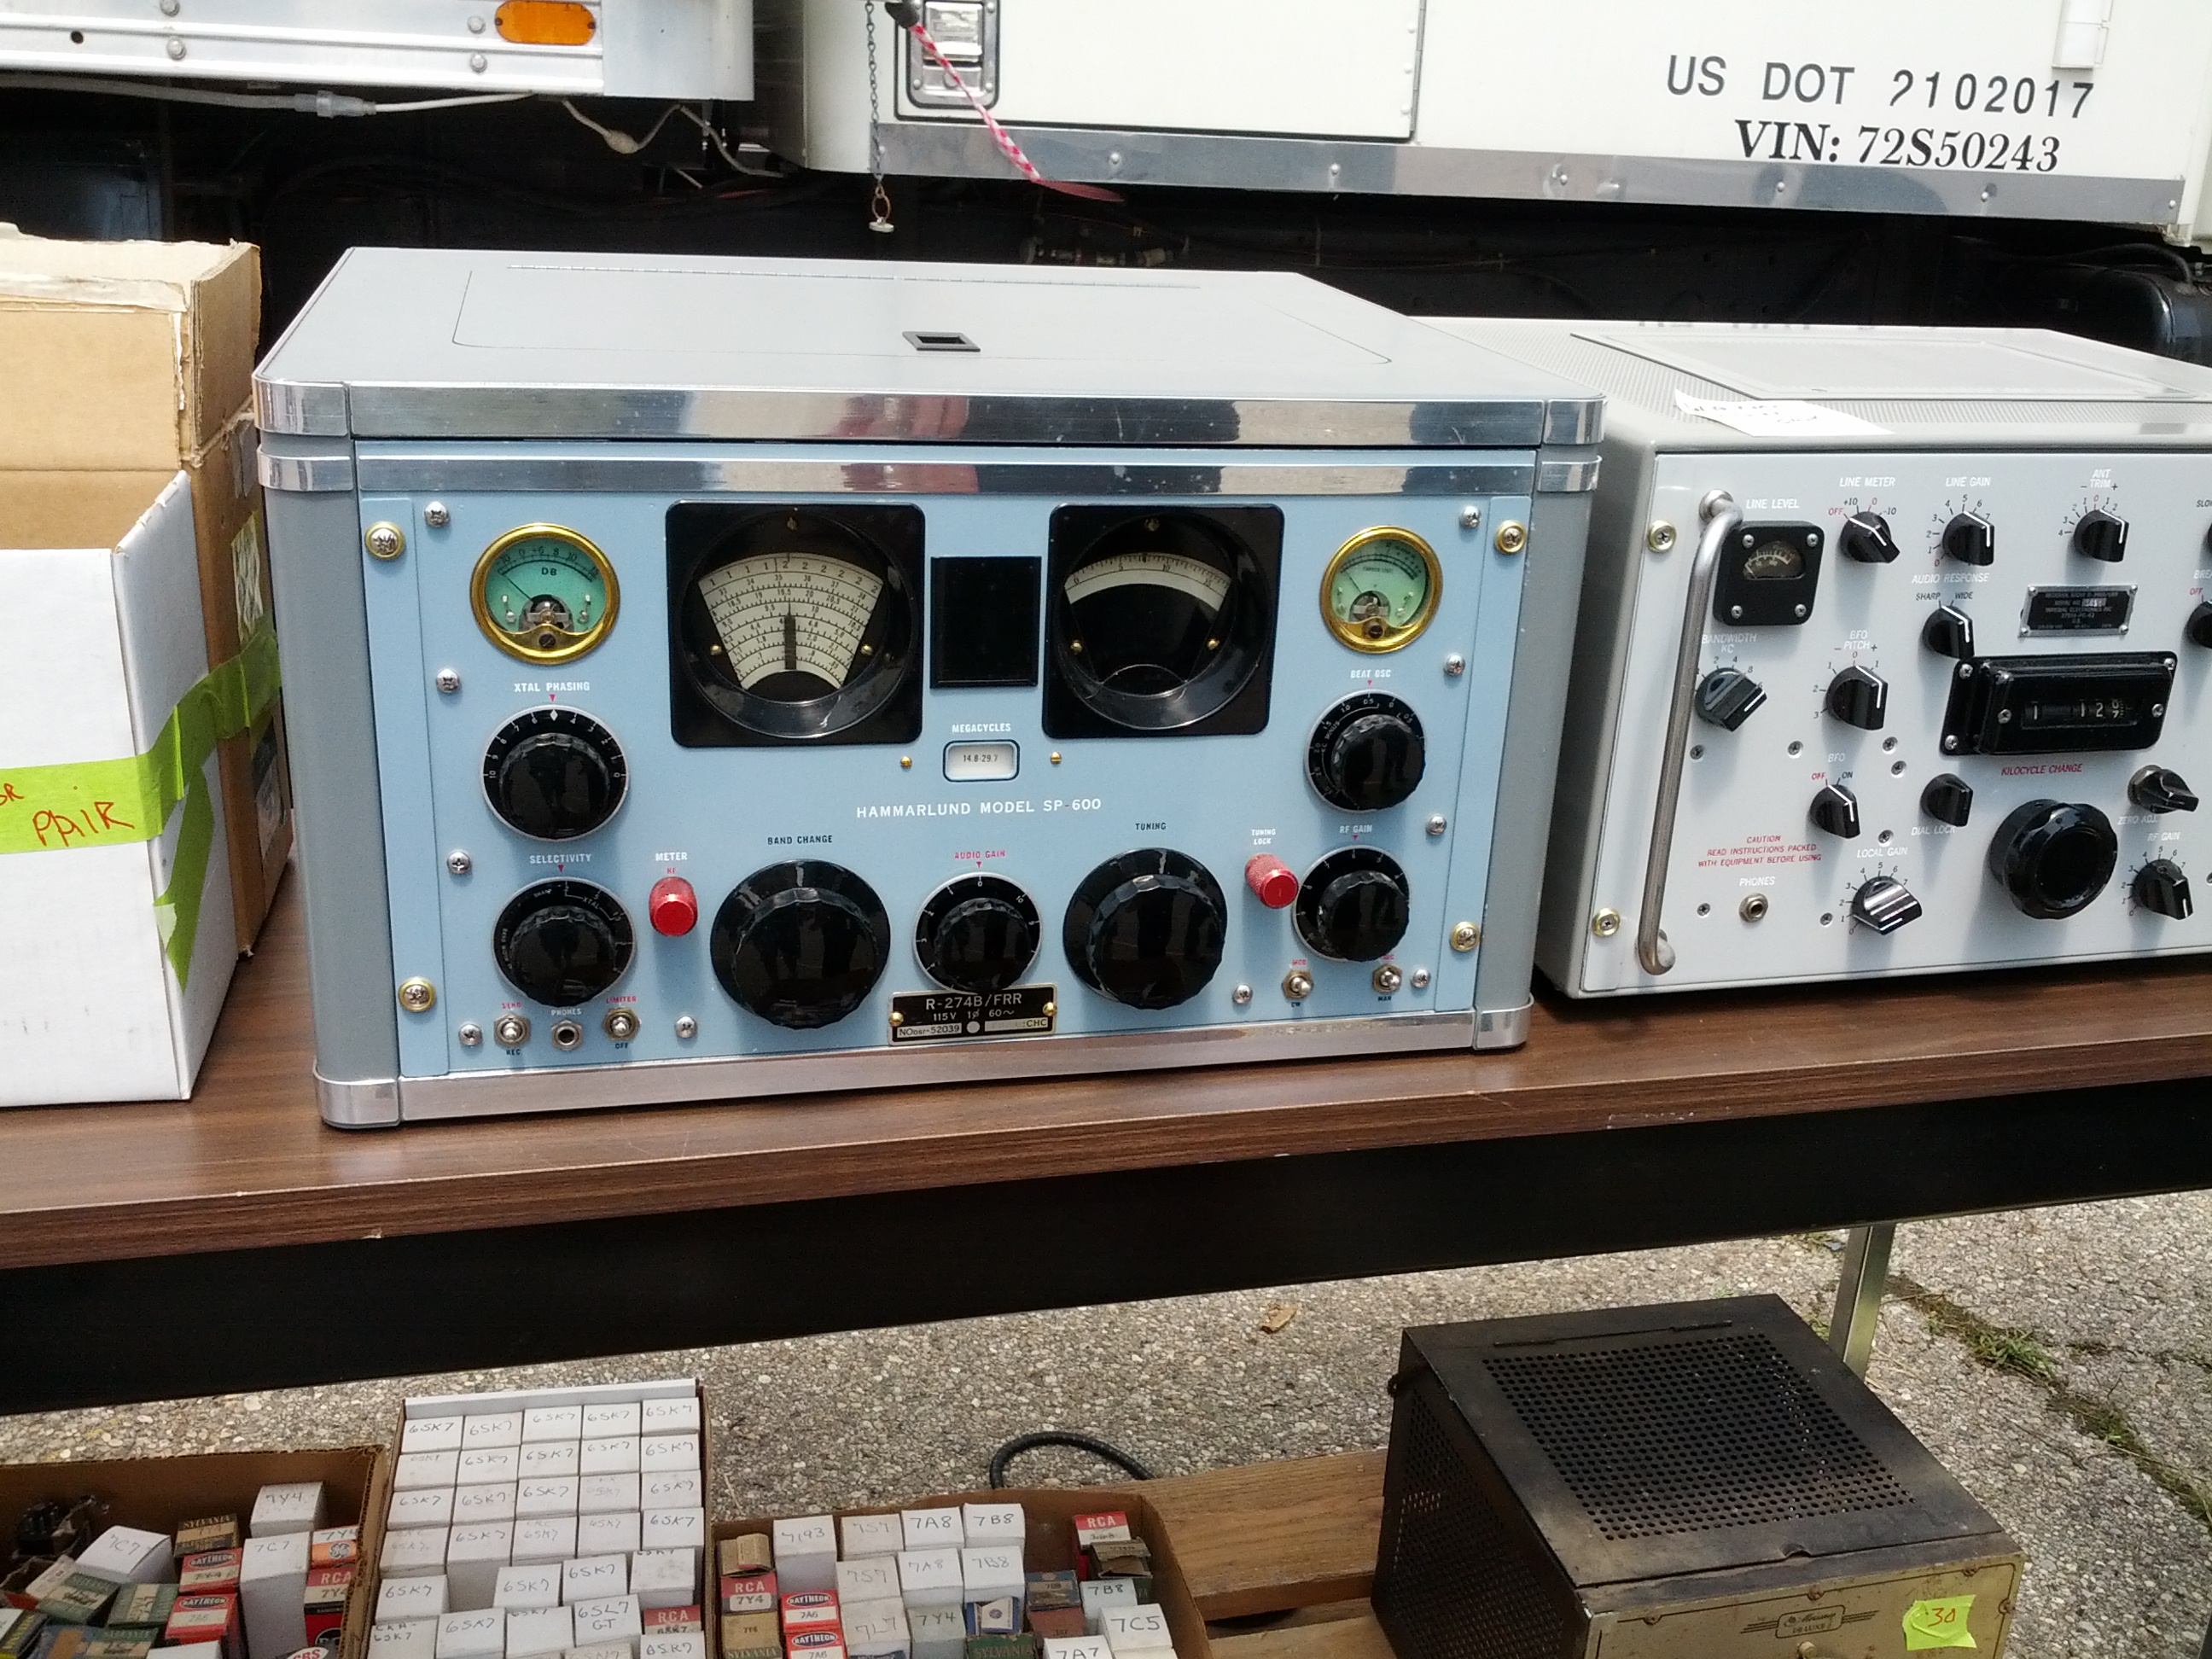
VERY clean Hammarlund
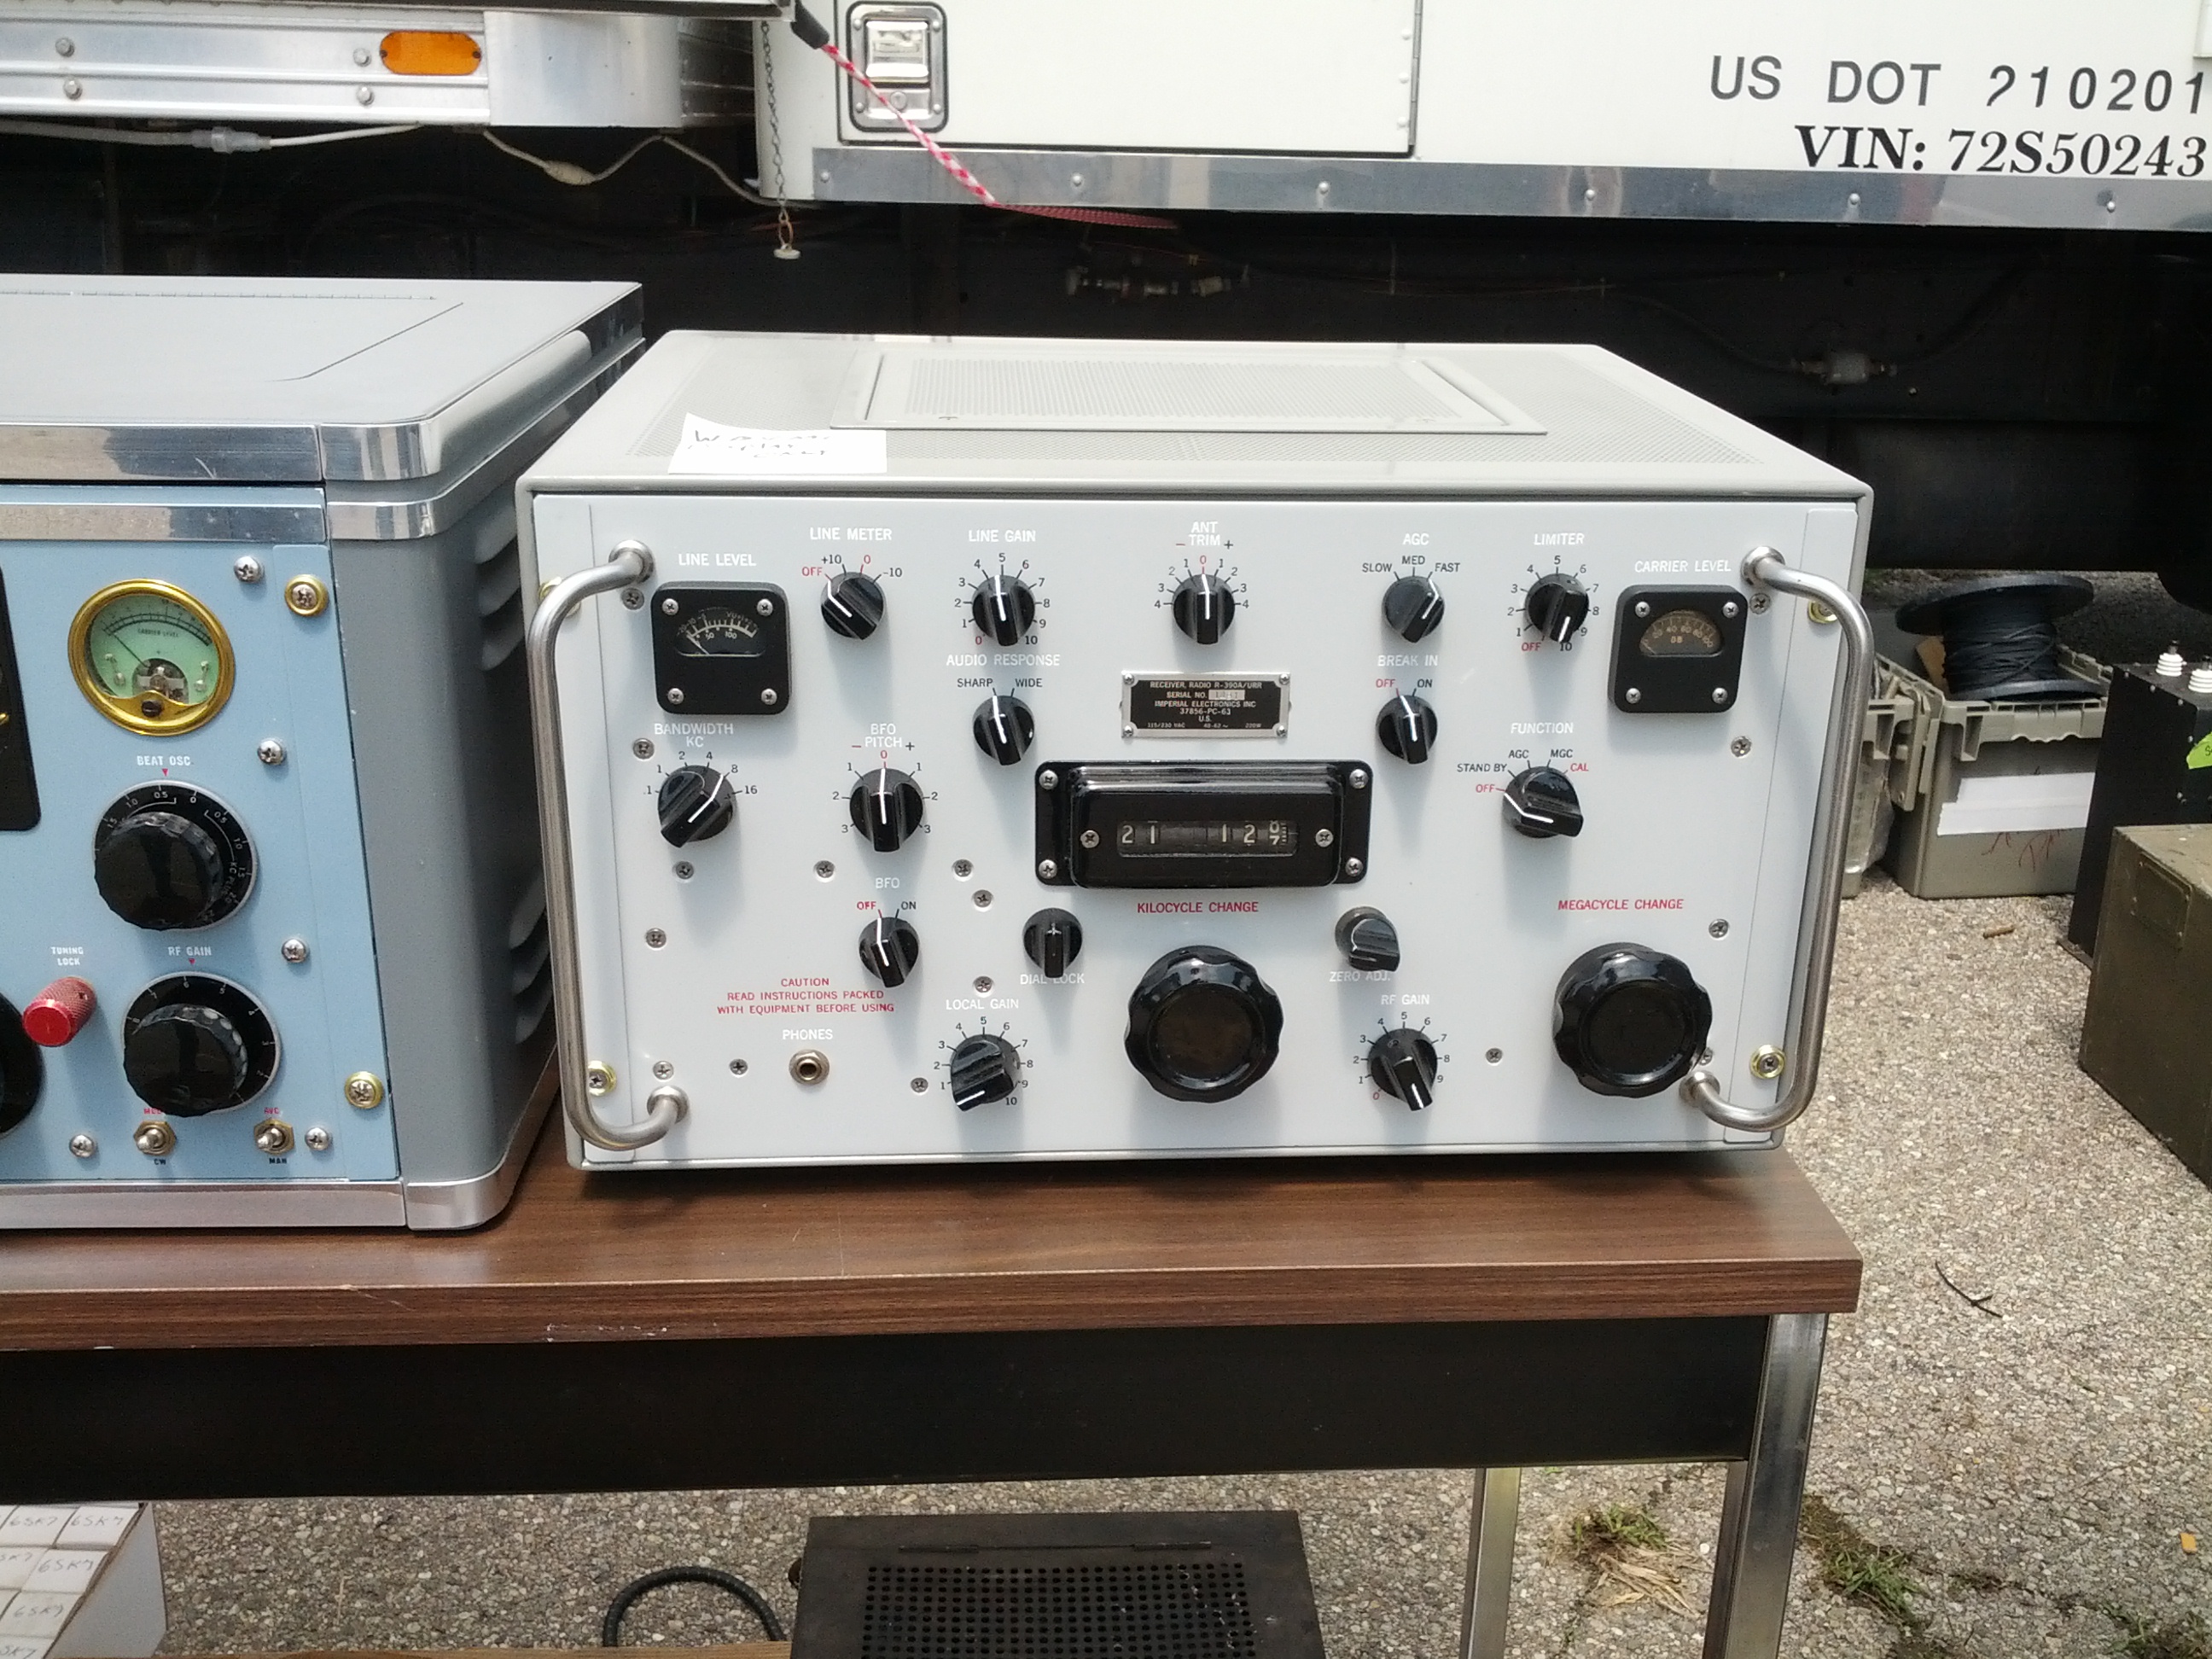
Very clean Imperial
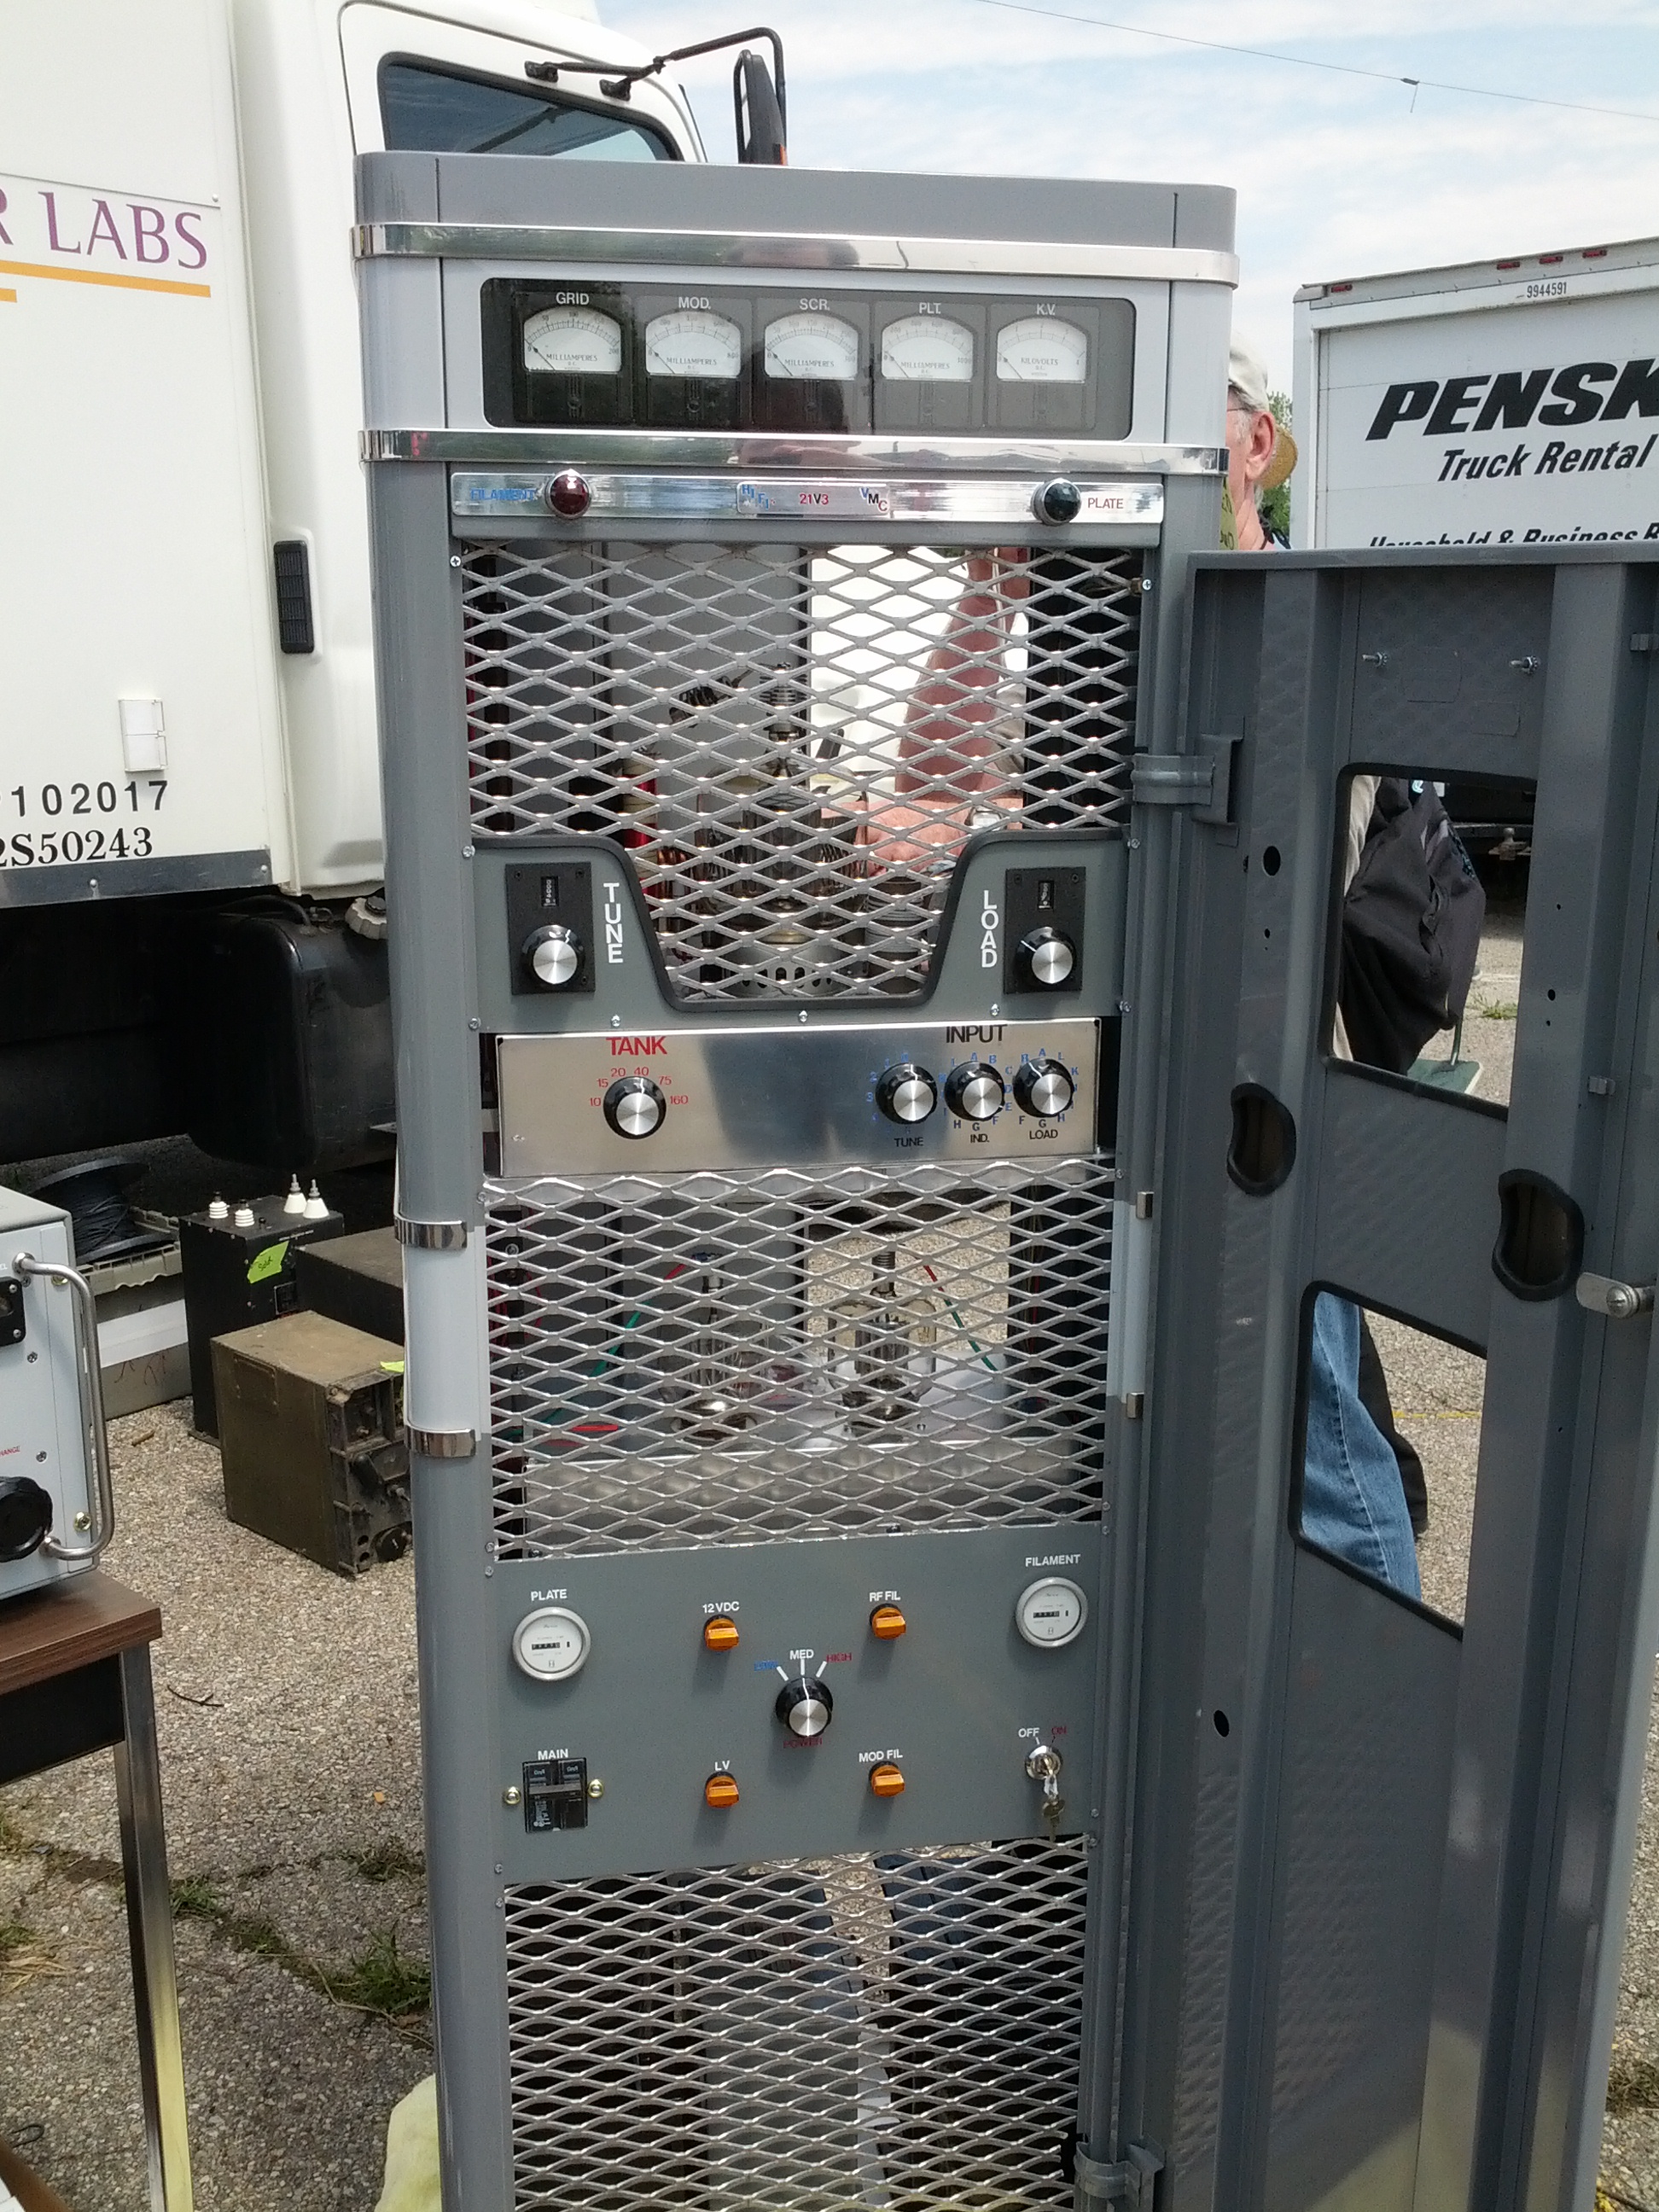
AM transmitter in restoration (front)
AM transmitter in restoration (rear upper)
AM transmitter in restoration (rear lower)
This year is different from any of the past two years I’ve gone to Dayton. The first year I went to Dayton, I wanted a simple HF rig and knew my budget only supported something like a Radio Shack HTX-100. I bought two for $45. I also bought a power supply for it (an Astron RS-12).
Last year, I was looking for an LDG tuner for my IC-706. Found one for $85. I’m not even sure I bought anything else.
This year, my tastes are hopefully smaller.
- A nice straight key… for a damn good price
- The ARRL CW book that just came out… if it is a damn good price
- Some air variable caps… I could use some smaller ones as well as some matching pairs for matching antennas
- Maybe some tubes (for both a linear and potentially for a guitar amp for my brother-in-law)
- Probably some other parts
Dayton’s Friday through Sunday, and this blog post wouldn’t be complete without a list of what will be in my bag.
- An umbrella (maybe my raincoat)
- A small notepad and pen
- A small bag of snacks (last year, it was goldfish crackers)
- My HT and headset
- A backup battery for my phone
- A bottle of water (disposable)
- A towel (small)
Things I know I will buy:
- A beer 🙂
Things I know I will get:
- Another Dayton Pin
- A Yaesu hat (if they have them)
Things to keep in the Truck
- A bath towel… rain is expected!
- A small cooler with ice and a few bottles of water
Other Stuff
Last year, there was a guy from Linux in the Hamshack. If he’s there again, I may give them a donation since they did direct some traffic to my website (and that was totally unsolicited). I listen to their show far too seldom, and it is an interesting show.
Last year, I tried to make it a point to make it to some of the forums. This year I might, but probably not as much – I tried to attend the microcontrollers forum last year, there were no seats available in the oven… er, room… when I got there.
I have been accumulating projects on my workbench, and it is getting near time to jump into them. I thought I’d do a quick blog post discussing my immediate plans.
Antenna Analyzer
I bought a pair of direct-digital synthesizers a month or two ago, and the first thing I want to do is build an antenna analyzer, which is something I desparately need. In fact, it would be good for some of my next projects.
Balanced Line Antenna Tuner
I ran a new antenna in my attic, and wanted to be different, so I ran ladder line to it. My tuner with my IC-706 is an LDG IT-100. It is a great tuner, but it is really meant for unbalanced coax. I want a real balanced line tuner. In the meantime (and as I write this), I’m going to build a balun for it.
QRP Transmitter
Since I have two direct-digital synthesizers, I figured the other can be a part of a QRP transmitter. CW only.
APRS I-gate/Digipeater
My area is pretty bad with regards to APRS. I’m going to fix that.
Frequency Counter
The last thing I want to build is a frequency counter. This will likely be my first project with a PIC microcontroller. It won’t make it up past 150MHz, but I am going to try to hit 150 MHz.
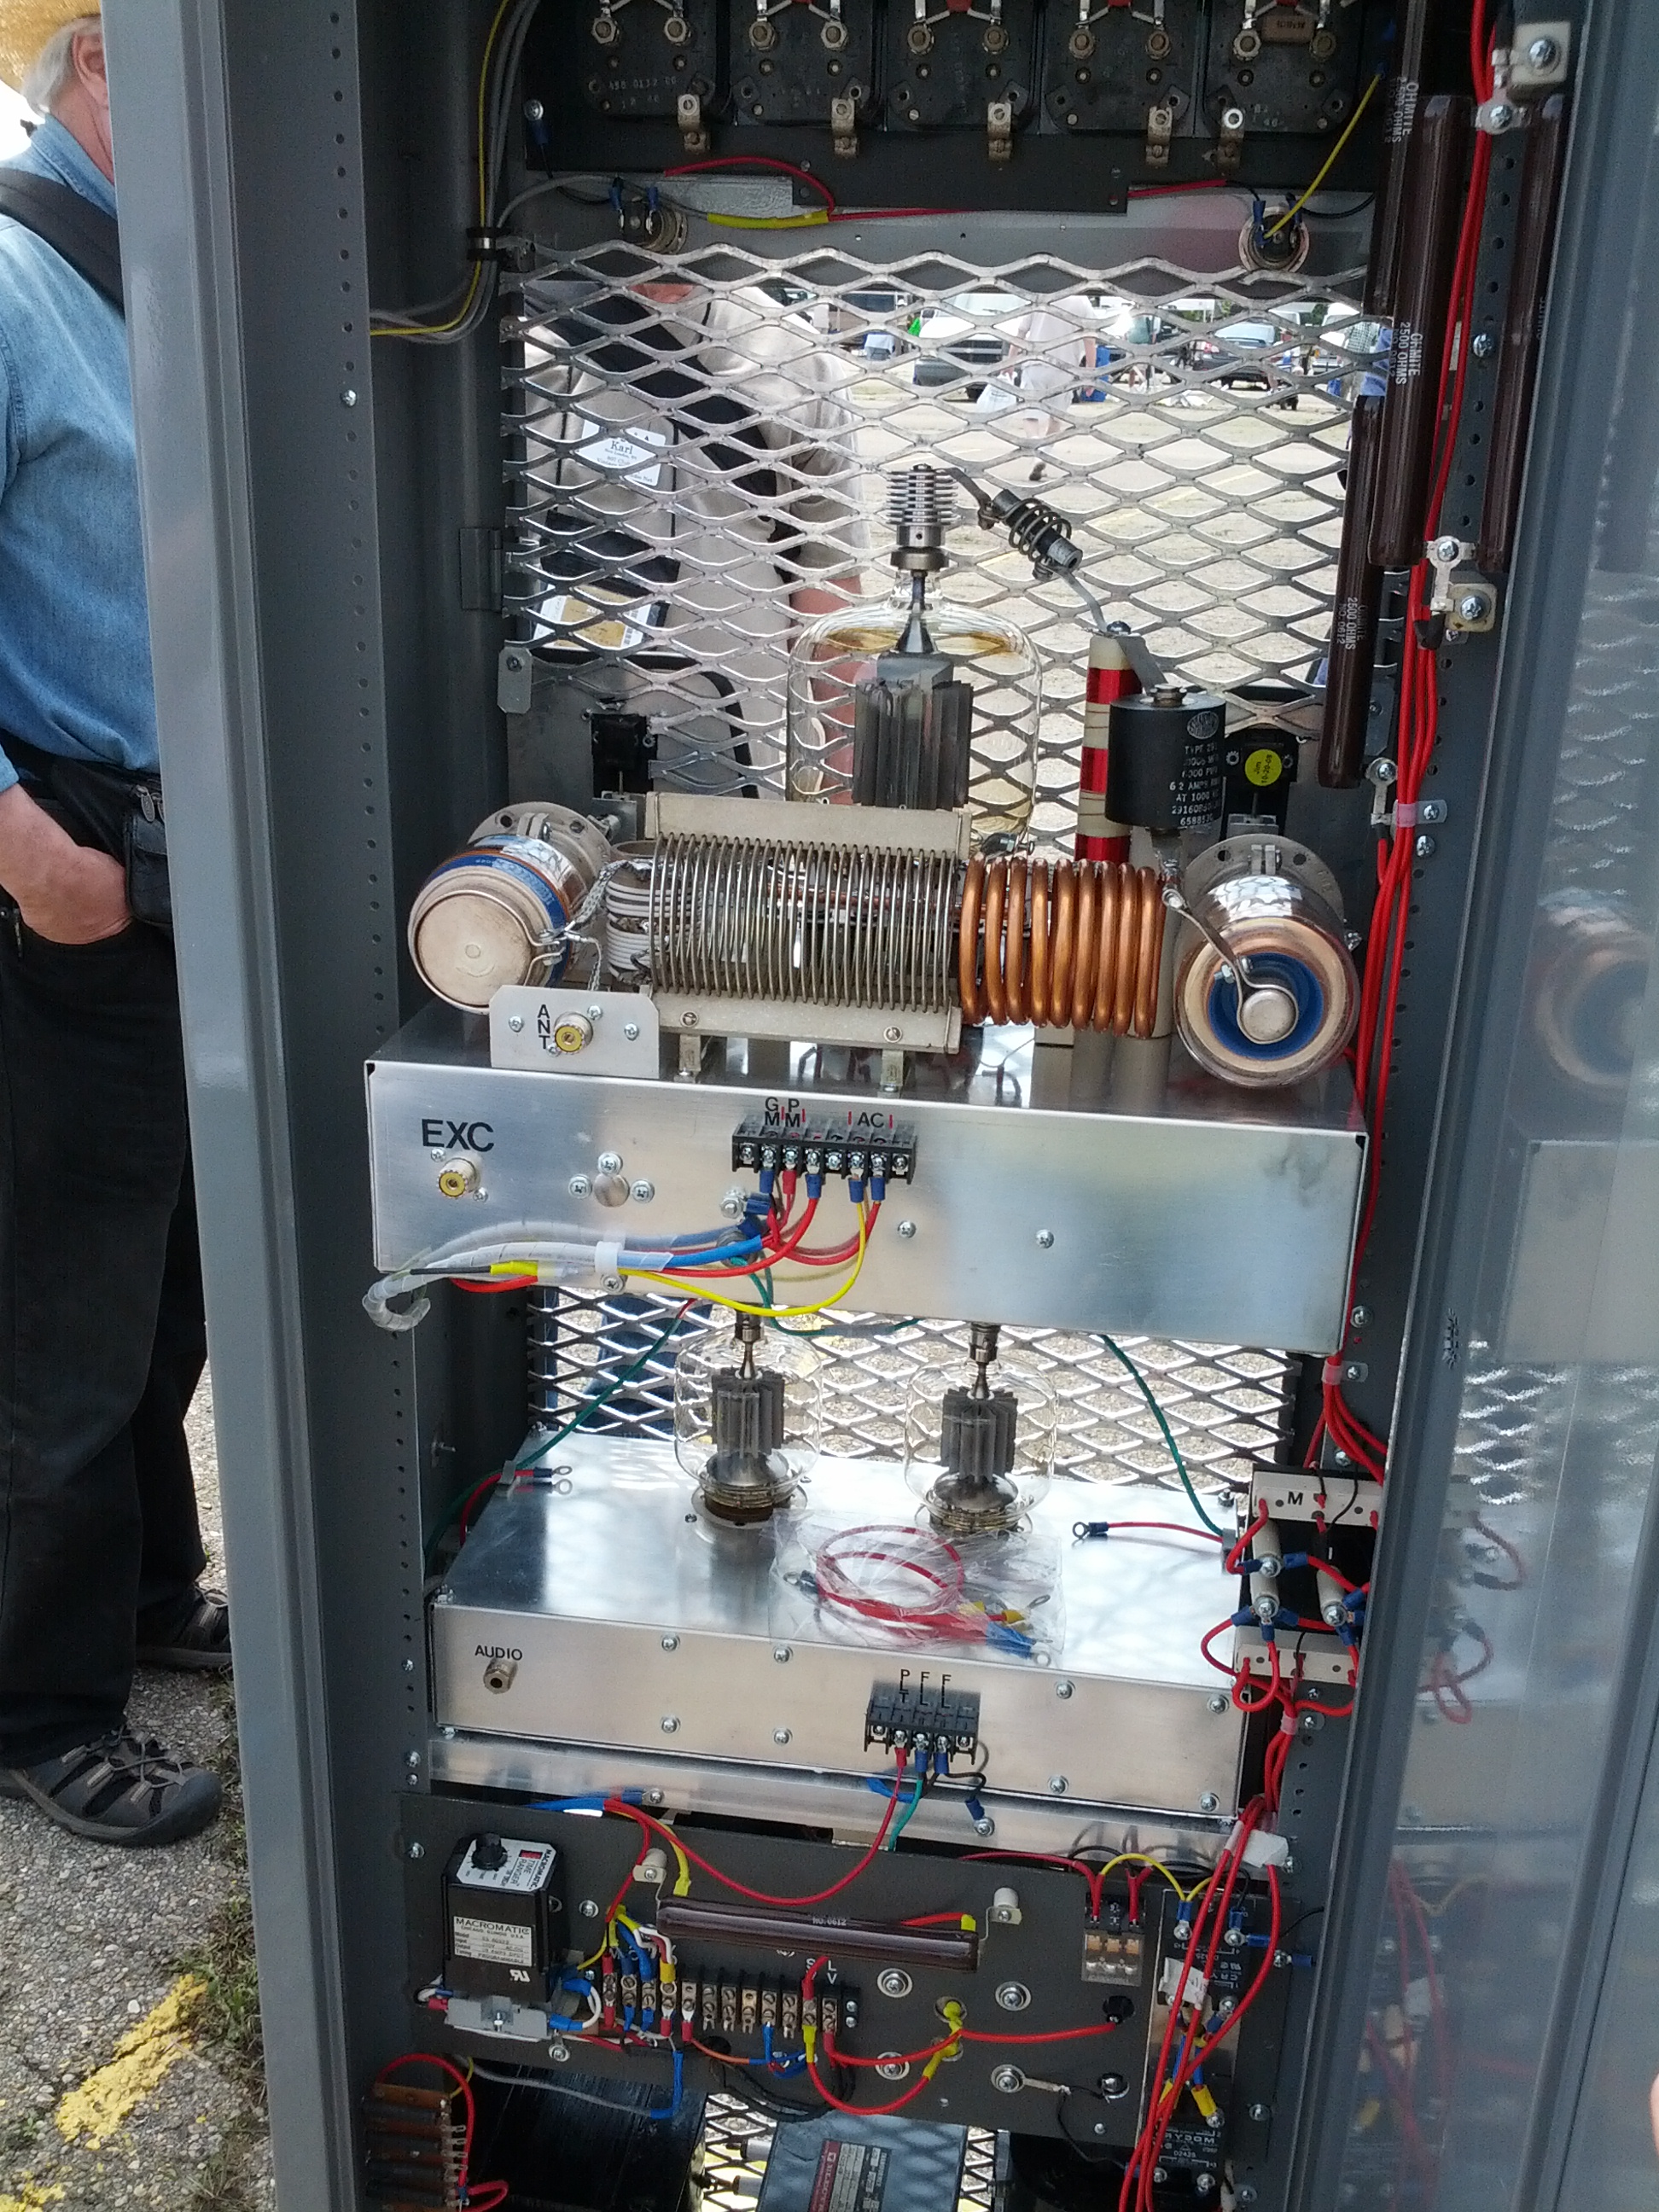
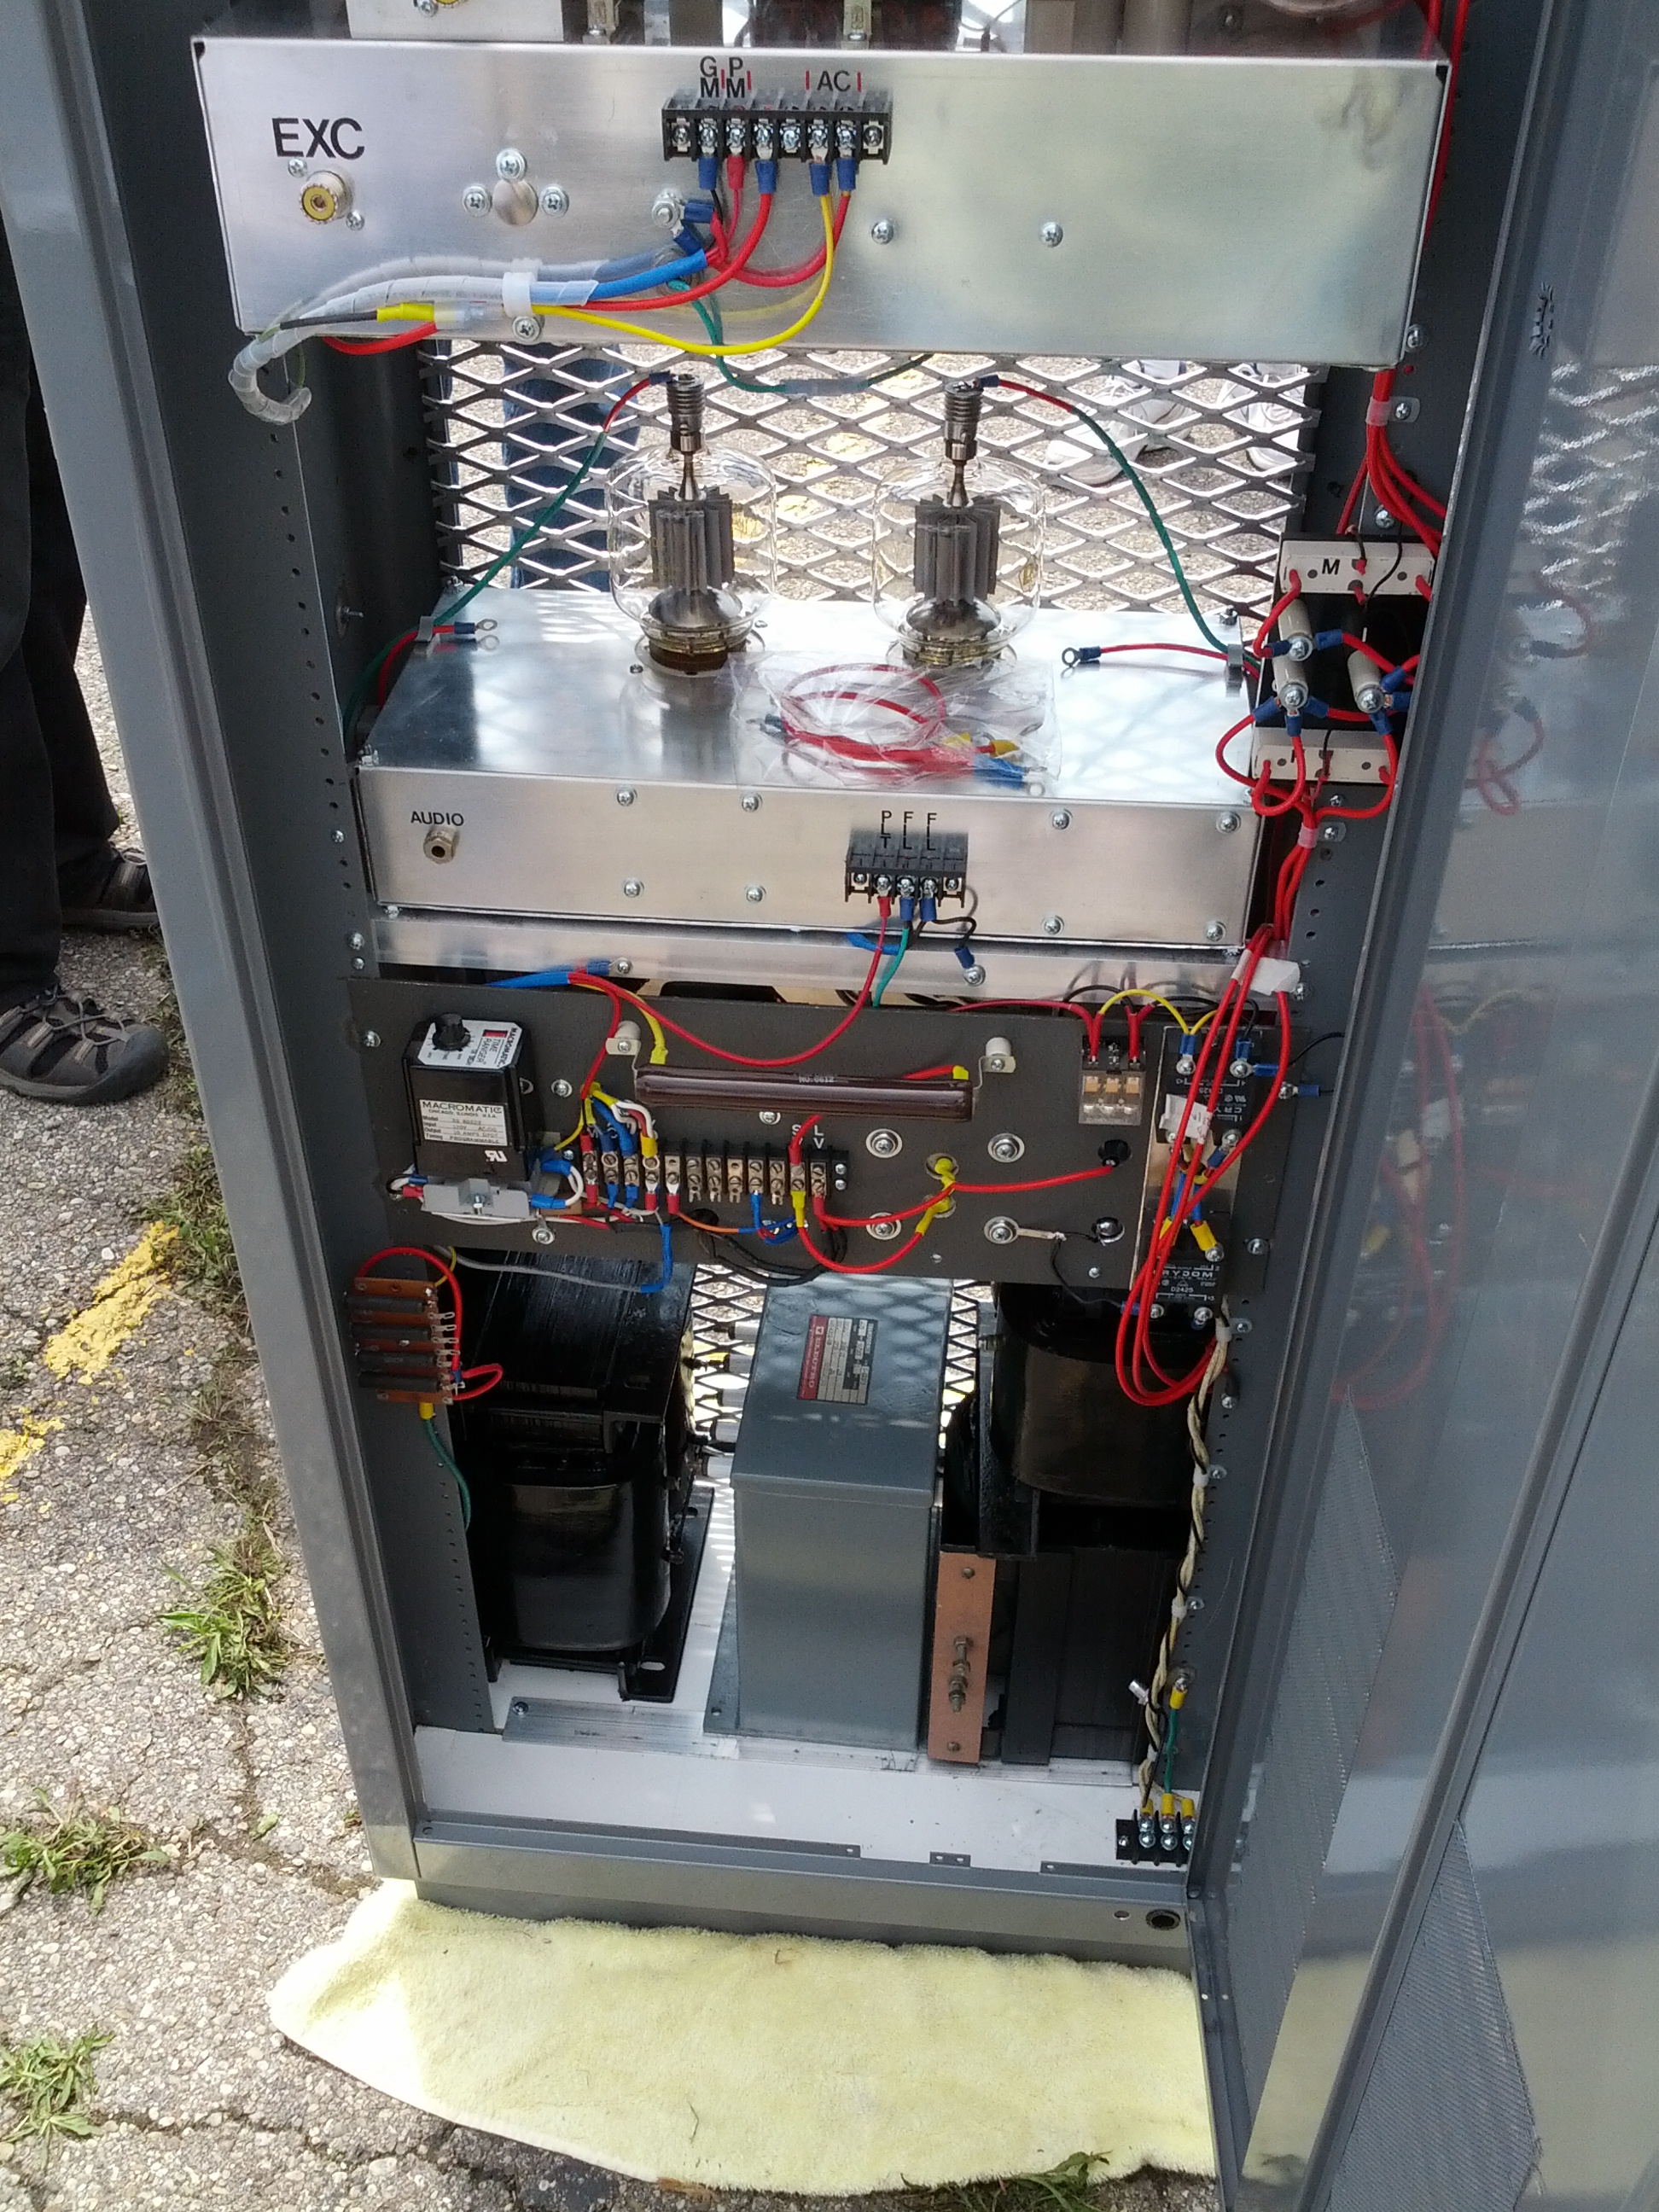
I bought a new-to-me radio. It is a used FT-7800R dual-band (2m/70cm) mobile. The price was right: $195 before taxes. Once I got it, I high-tailed it home and opened the box and….
POW.
It hit me. The stink of cigarette smoke. Not enough to knock me over, but enough to potentially stink me out.
So I asked Twitter, Facebook, and a few locals how to get the smell out. Their answers (all good ones) are in the Storify story below.
So I did with what I could with what I had. The images below tell the story.
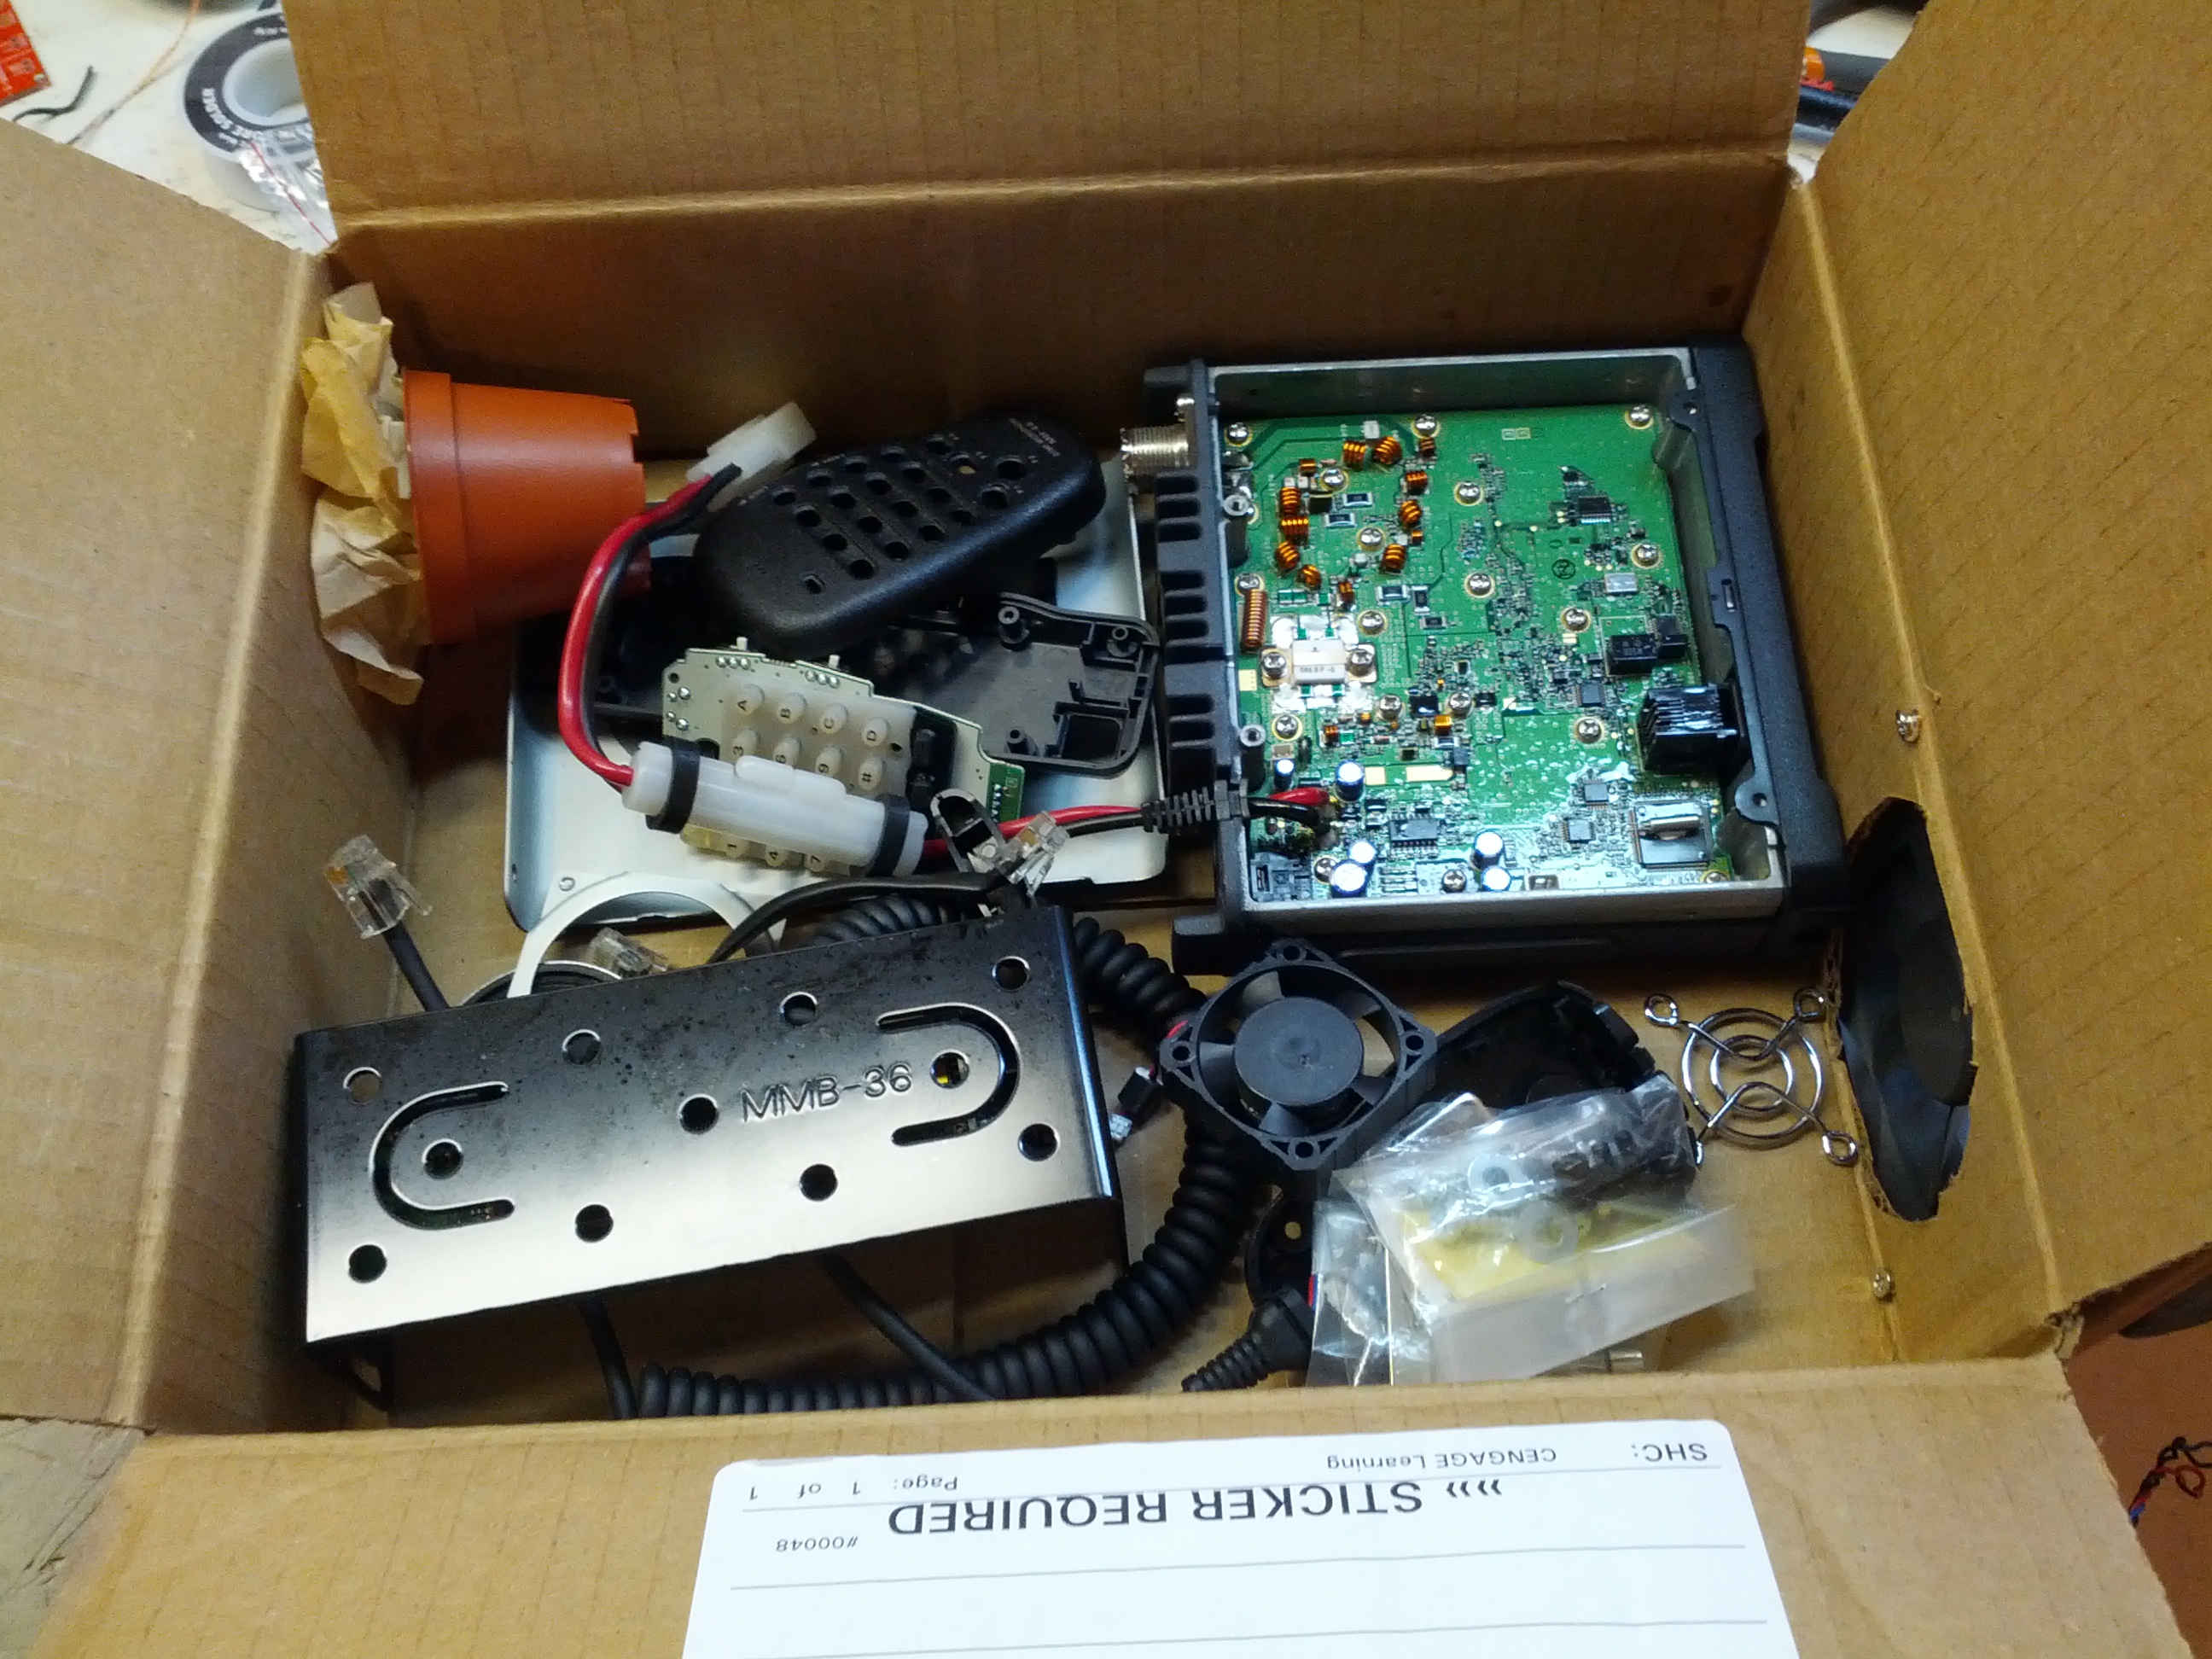
I took the rig apart and put it in a box.

I sprinkled lots of baking soda all over the parts. I left it like this overnight.
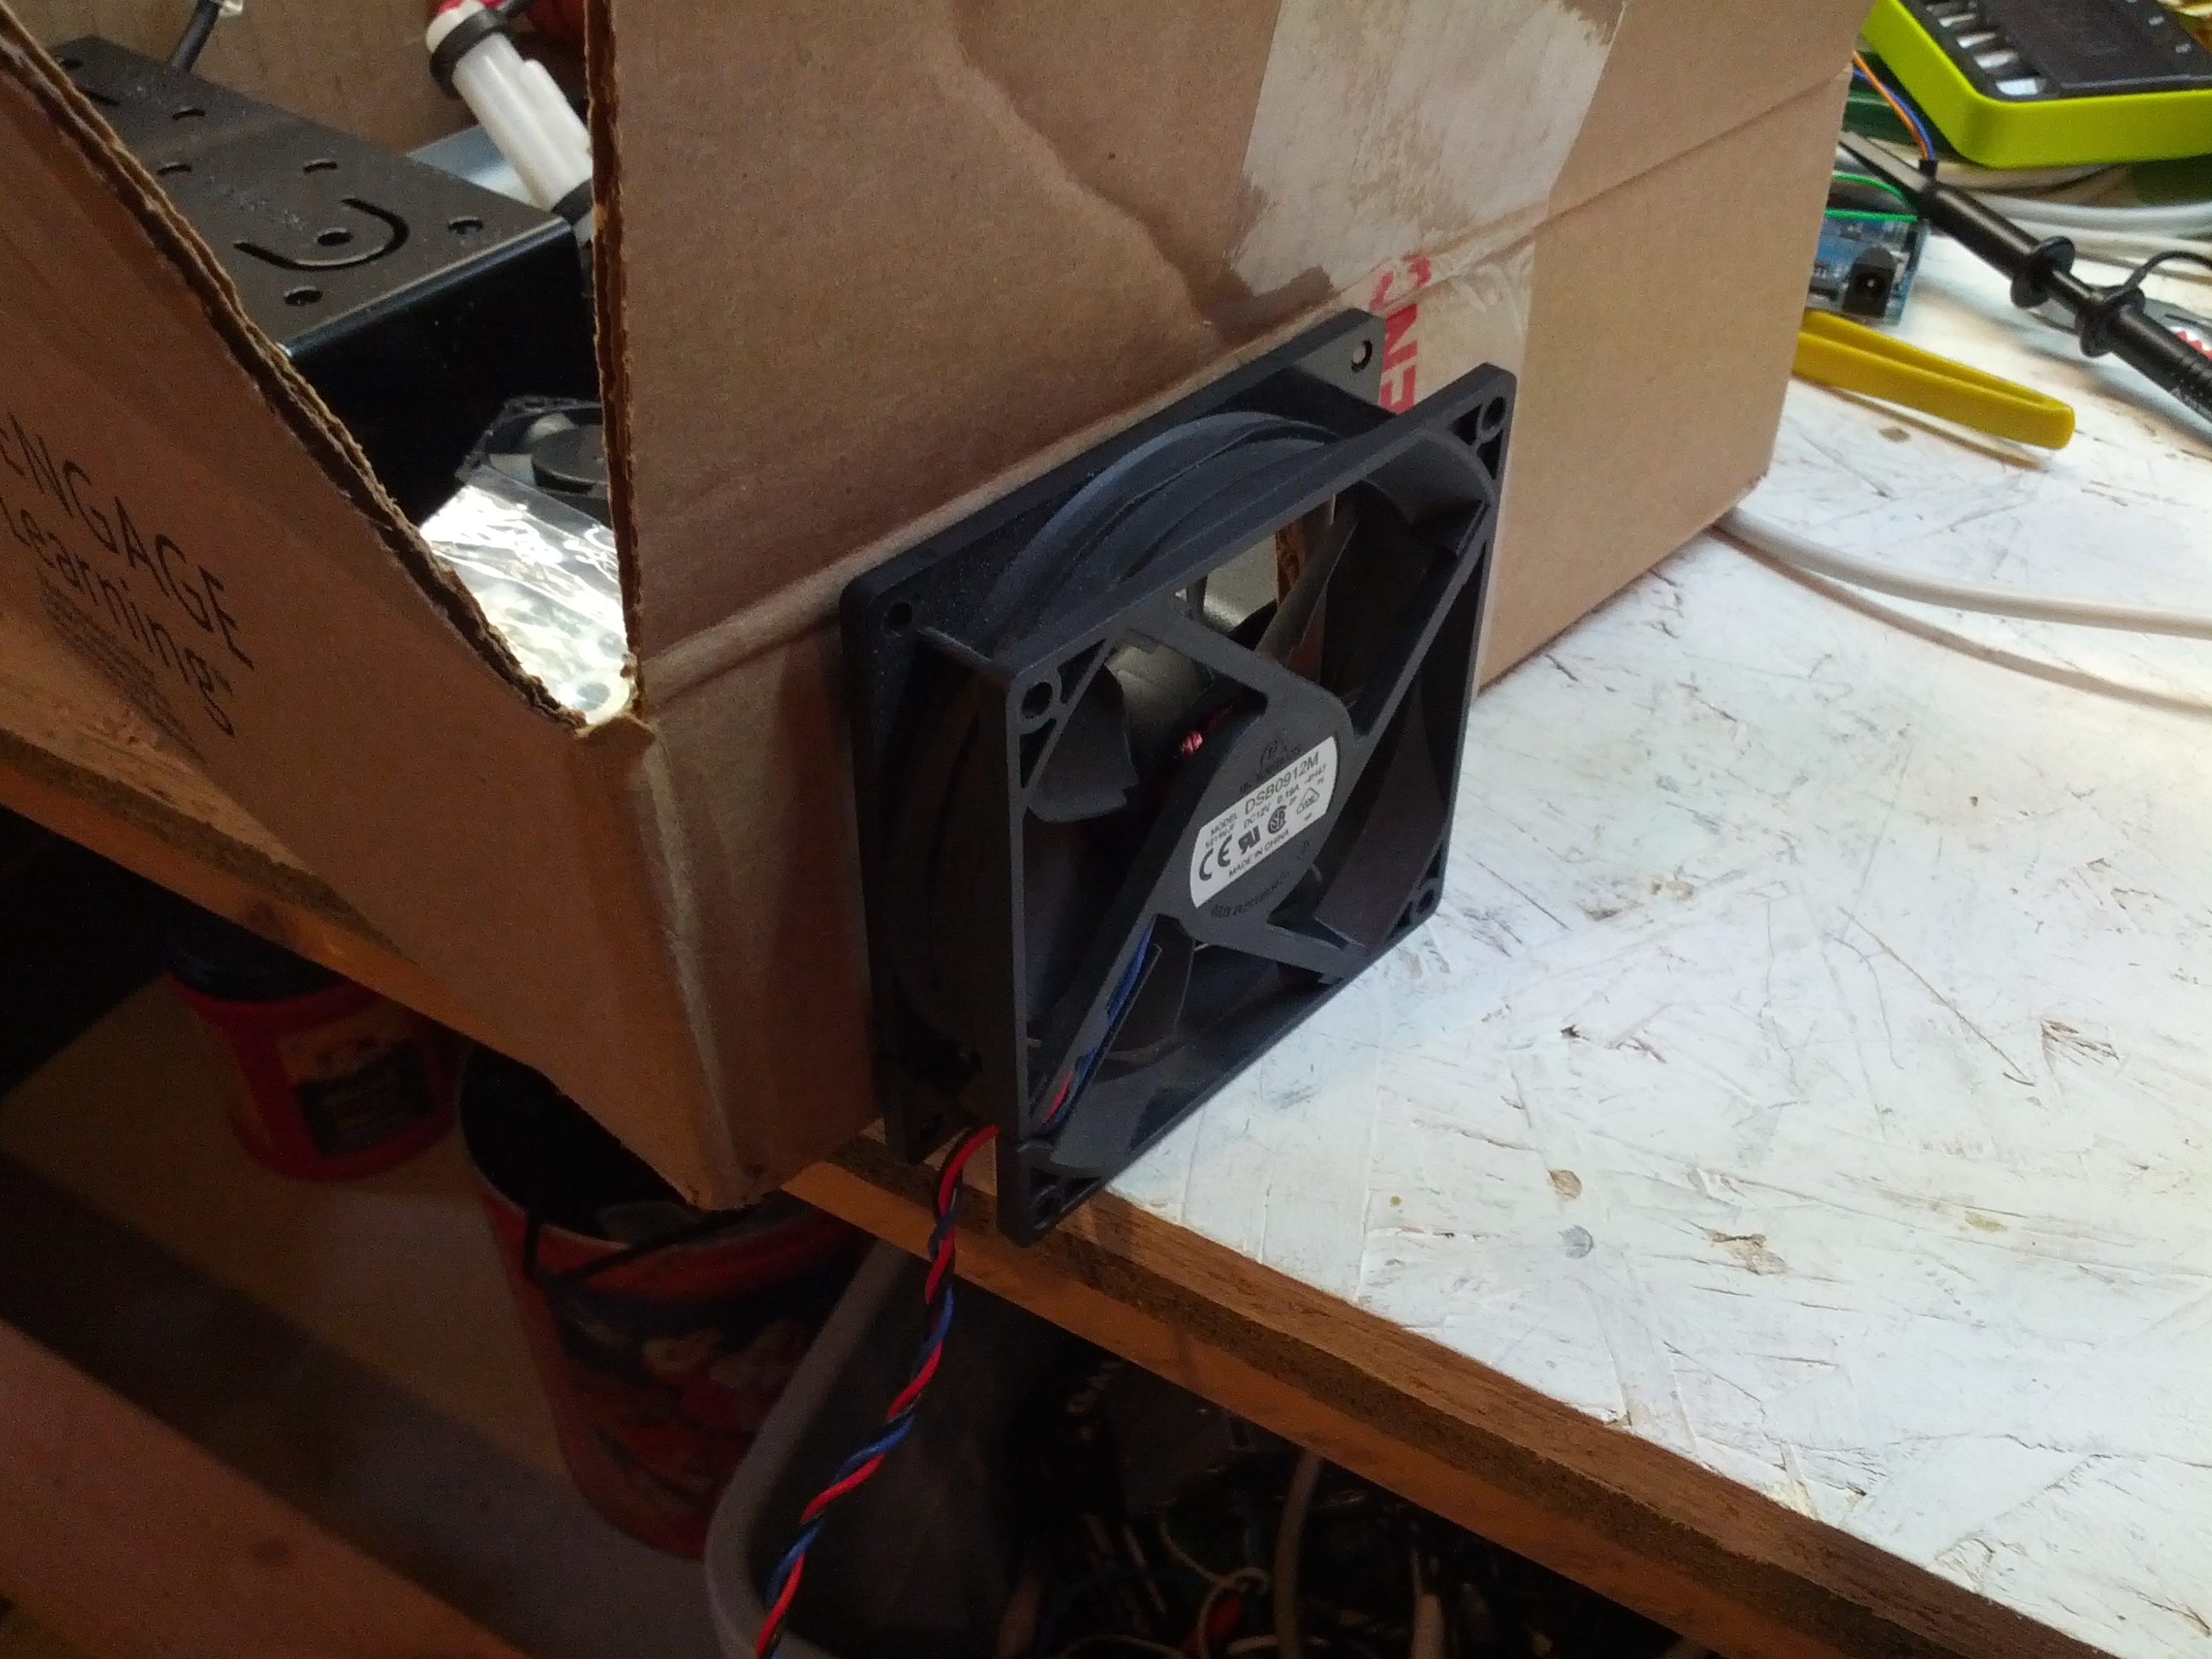
I attached a fan to the side of the box.
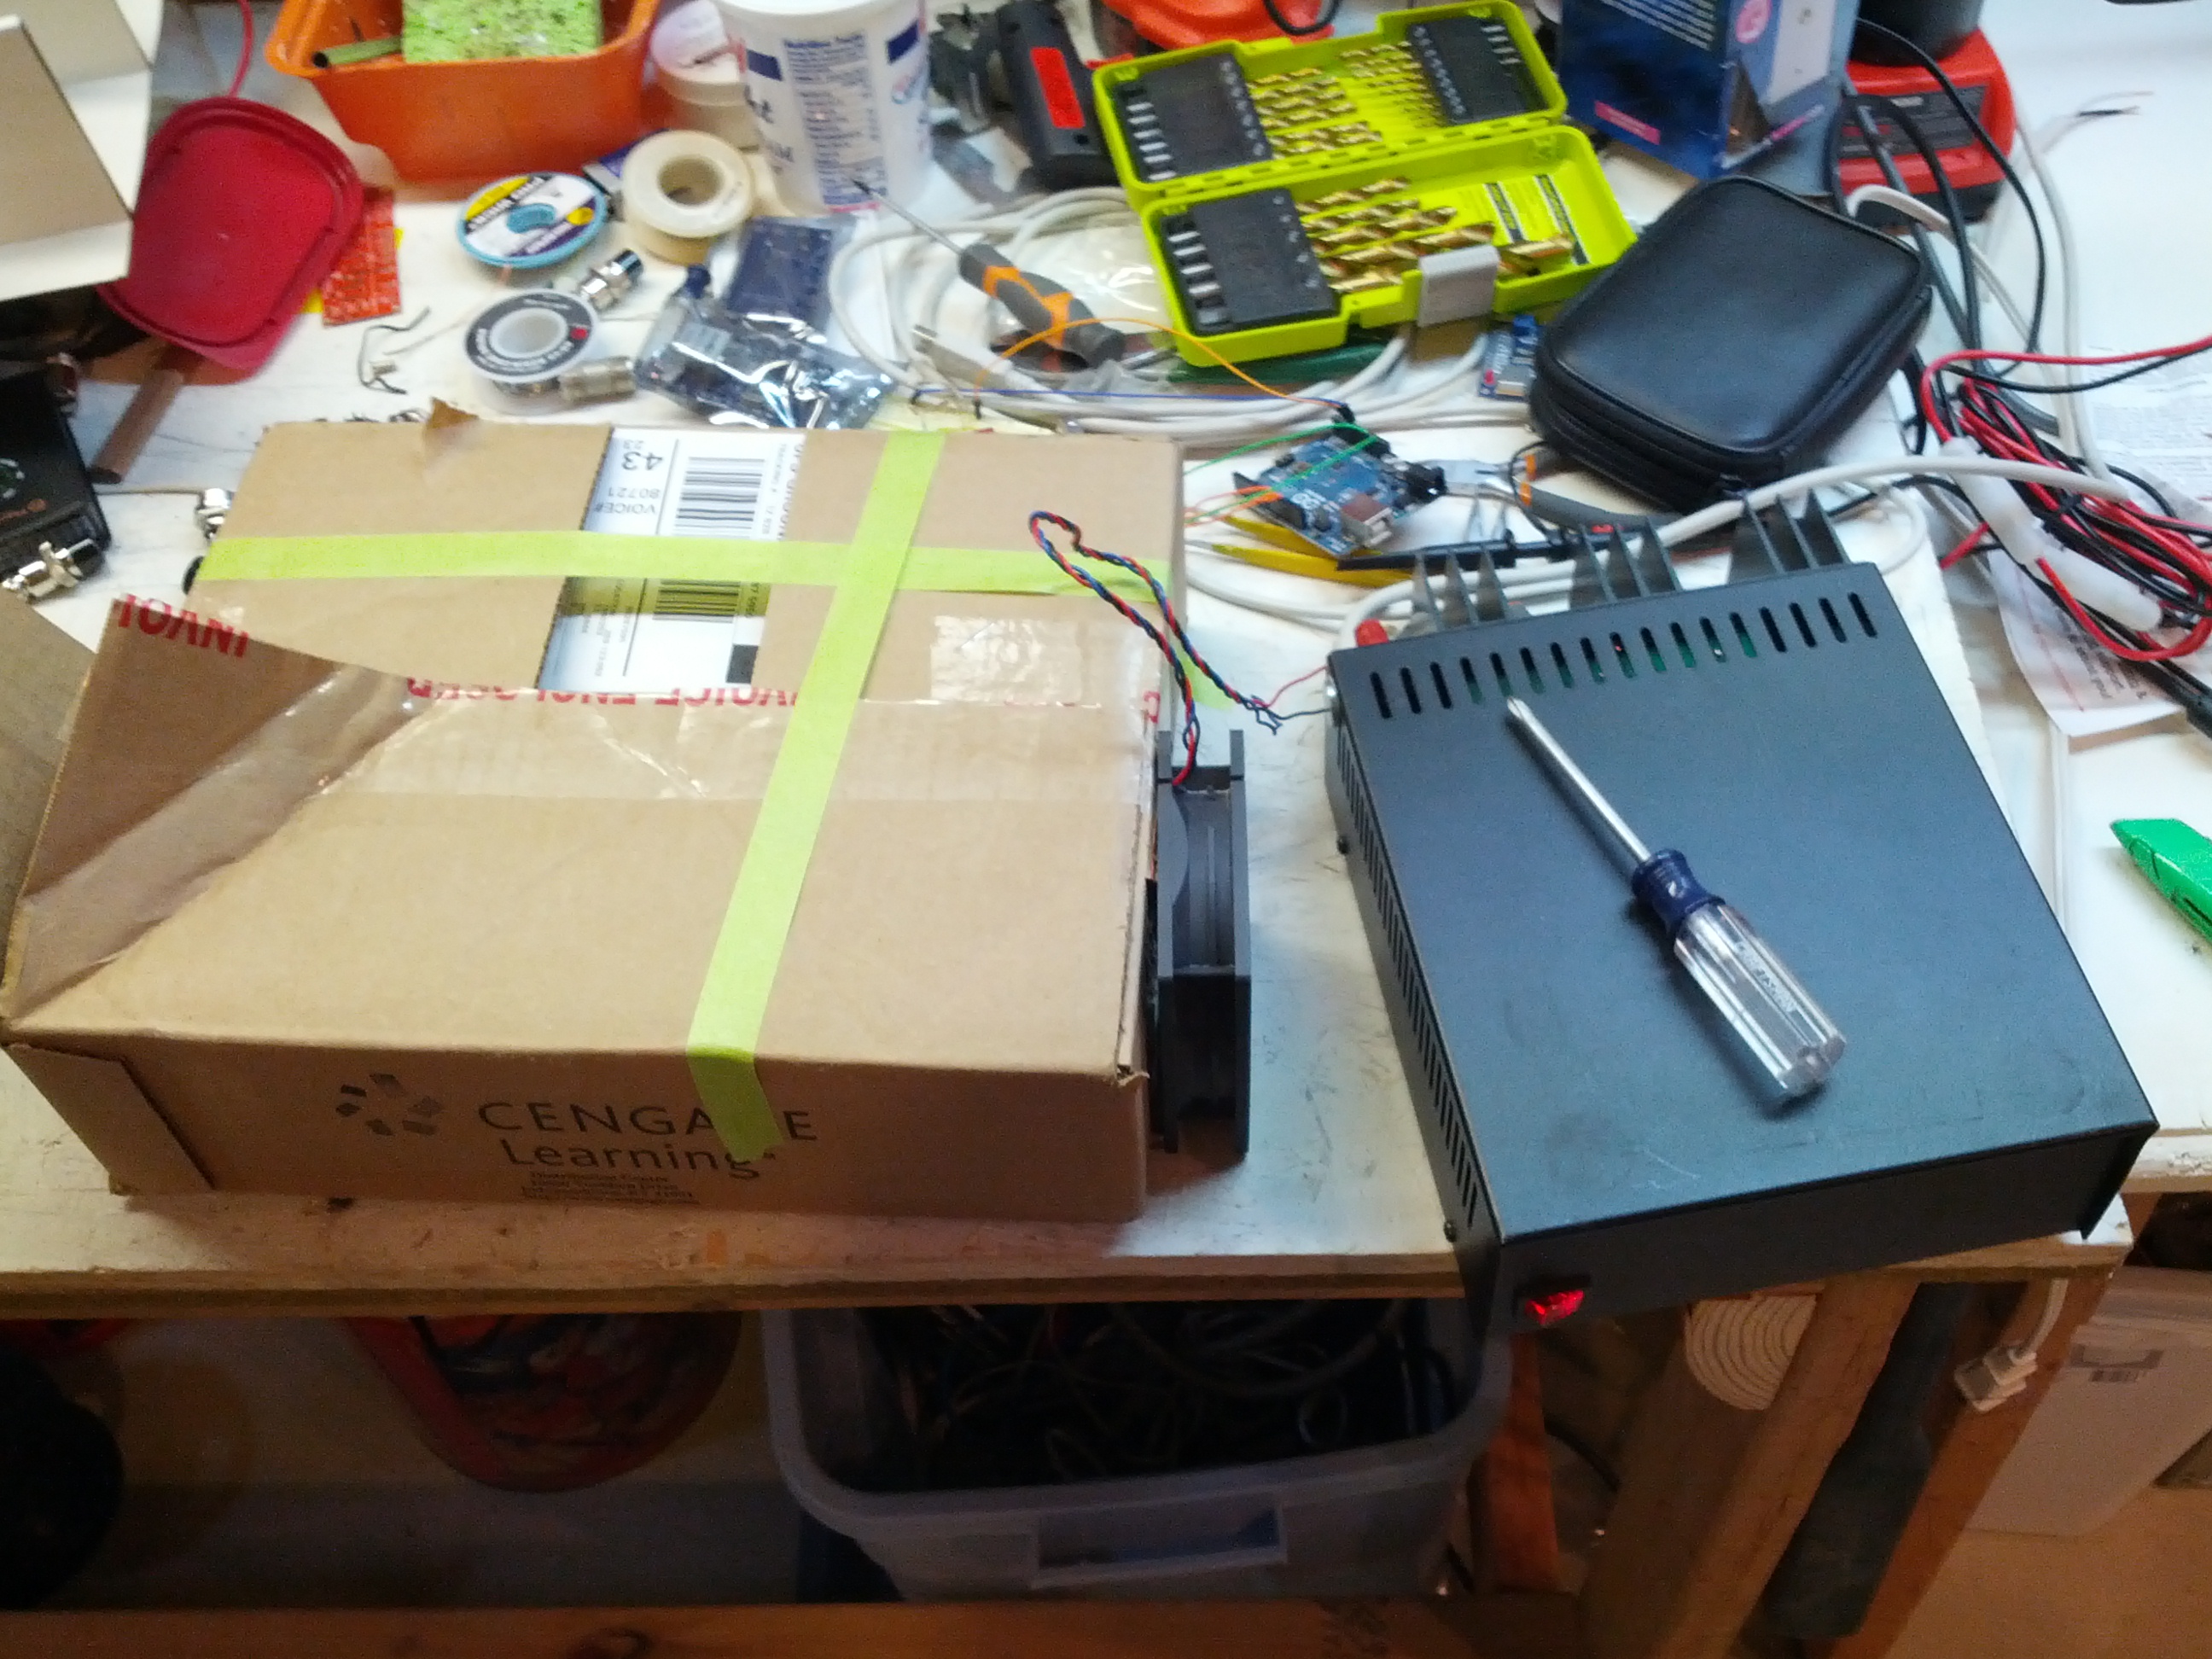
I let the fan run for a while, maybe 12 hours. Yes, I ran it with an expensive linear power supply!
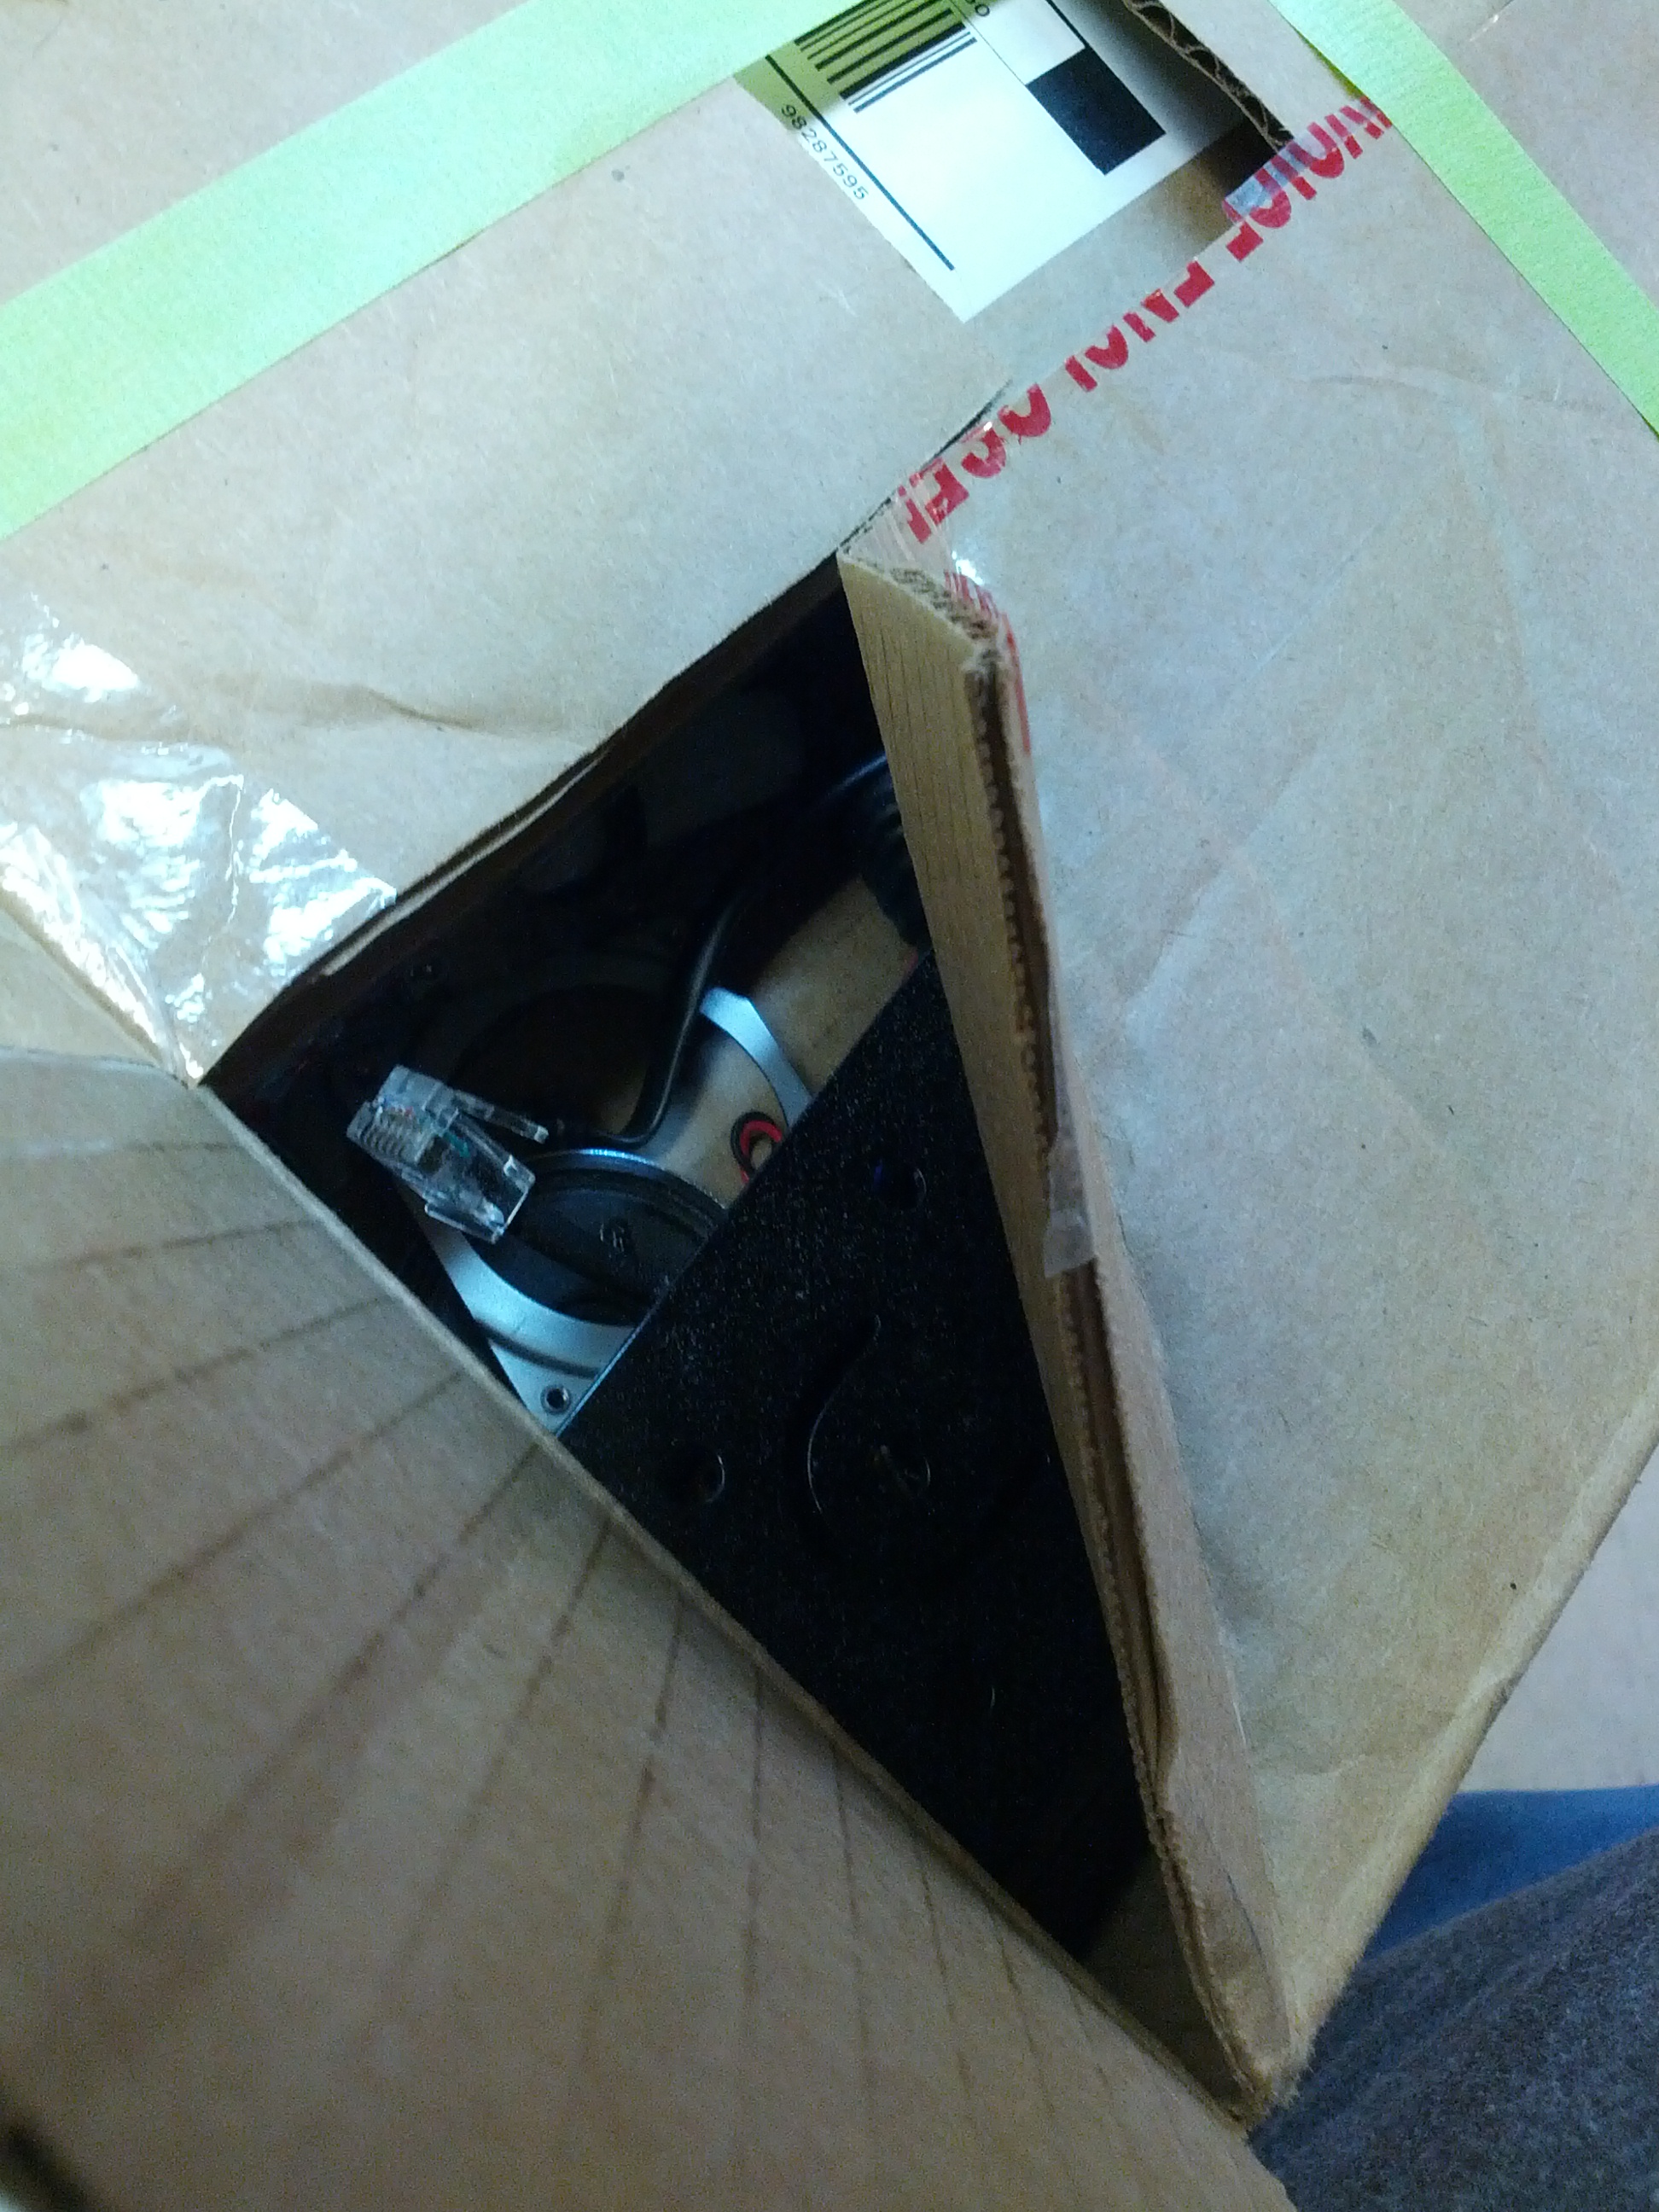
After running it (with this as a small exhaust), I did a smell test over this, and viola! No noticeable smell.
So the exciting conclusion is that this was mounted in my truck on Saturday night, and I got into the truck on Sunday night to actually test the radio (after having it mounted for nearly 24 hours in an enclosed truck in my garage). I detected no smell of smoke in my truck. While nobody was on the local repeater to assist in my test, I had handed one of my HTs to my wife and she gave me a thumbs-up indicating that indeed, the sound was good. Also, I’ve had good sound reports on the morning drive, too.
At any rate, this is one of those “your mileage may vary” situations. I may be right, or I may be lucky. But I’m not smelling smoke!
-73-